
Hi. I’m Emma, one of the Graphic Designers at Kitronik. As my title implies, I’m not specialised in coding at all, especially Python. I have, however, spent quite a bit of time in MakeCode. Given my unfamiliarity, I wanted to document my exploration of the micro:bit Python Editor and the new resources, to show how easy it is for a non-coder to learn how to use it.
I’ll go through all six lessons, commenting on what I found hard and what I found easy. Onwards!
My Overall Experience with the micro:bit Python Editor
- These lessons are great at explaining only what learners need to know, without overwhelming them. This is why I found them particularly helpful while I was learning, since too much detail can stop me from grasping the foundations of a topic, especially something I perceive as intimidating, like Python.
- The lesson download includes example code, which is amazing in a time pinch or if you’re not confident reproducing it yourself.
- The download also includes handouts and a certificate, so teaching these lessons will be the right kind of low-effort endeavour. No headaches in planning or creating assets yourself!
- The editor is fantastic at catching mistakes. Spelling mistakes are easily avoided with the auto-complete feature. If there is an error a red dot appears beside the line with the error on it, as well as a squiggly red line under the error itself, and hovering over the dot or squiggly line reveals what the error is. If you download code with errors in it, the line and error scroll across the micro:bit LEDs.
- Every lesson presentation includes reminders about proper indentation and letter case, which is super helpful, especially when there’s a good amount of time between lessons and this may not be remembered by all learners.
Lesson 1 – Python Name Badge
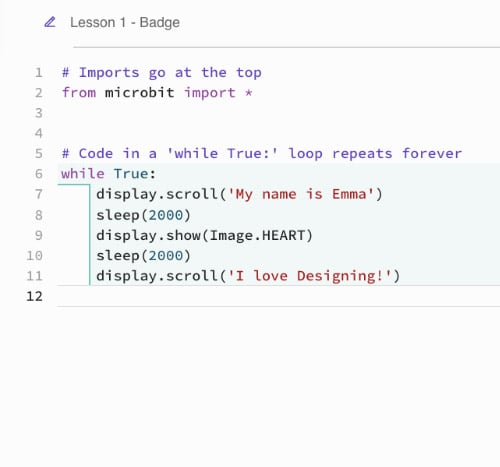

This lesson is an all-round introduction. It explains what Python is, takes you through the features of the micro:bit Python editor, and the ultimate goal is learning to use Python to make a name badge using the LED matrix on the front of the microbit.
This one was nice and easy, drawing on the similarities between MakeCode and the micro:bit Python Editor quite a bit. It was a simple edit to the code already present when opening a fresh project. All in all, I didn’t feel the sense of intimidation I usually do when faced with text-based coding, and this is a great first step in demystifying it if you’re a non-specialist teacher.
Lesson 2 – Python Beating Heart
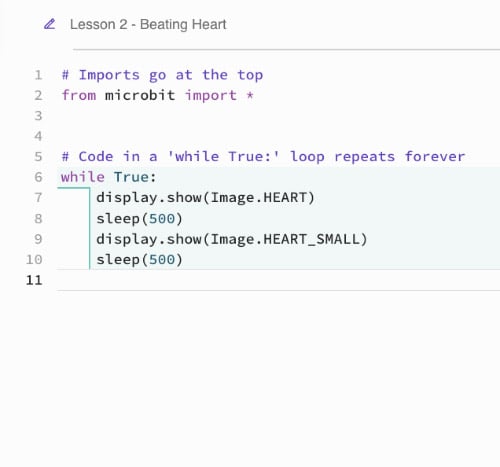
This lesson is about animating an image on the LED matrix, beginning with another comparison to MakeCode for familiarity, before going into loops and sequences. You then complete a simple beating-heart animation using the Heart and Small Heart built-in images.
The lesson shows you outright how to create the beating heart, but then goes into how to use different images and different lengths of sleep instructions, encouraging creativity in making longer and more complex animations. I can see this being wonderfully engaging in a classroom! It was nice and simple, introducing a new concept using knowledge from the last lesson and building from the example code already provided.
Lesson 3 – Python Emotion Badge
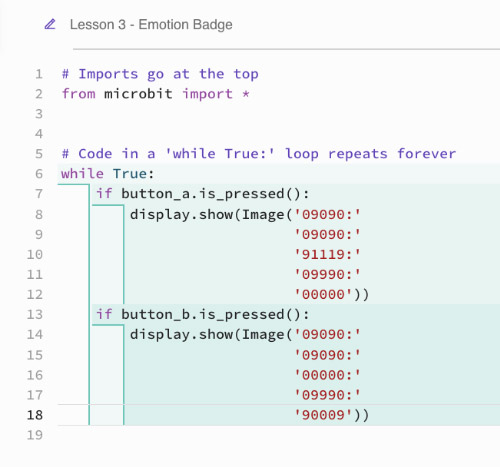
This lesson introduces the concept of using if statements to check for inputs and trigger an output, in place of the event blocks in MakeCode. It teaches you to display a different emotion image on the LED matrix based on whether you press button A or B.
There is a little more complexity than the last two lessons, but it builds on what came before and still avoids that feeling of intimidation. There’s no sense of biting off more than you can chew.
Again, there’s more creative complexity offered later in the lesson, with challenges such as drawing your own images on the matrix, showing text, adding audio, and shaking the micro:bit as an additional input. It’s sure to make your classroom lively and excitable!
Lesson 4 – Python Step Counter
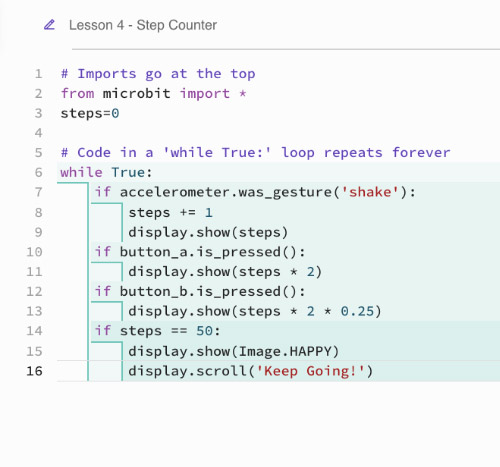
This lesson introduces the accelerometer as an input and gently touches on the concept of variables. As you progress, you move from a simple counter to changing how steps are displayed, to calculating distance moved, and then further to showing a happy face and encouraging message on the screen.
This seems more difficult than it really is, and is just as simple as the previous lessons. The extension does touch on slightly more complex uses of if statements, and there are adjustments to the step counter depending on how well the accelerometer is reading your steps, but it’s all clearly laid out.
Lesson 5 – Python Nightlight
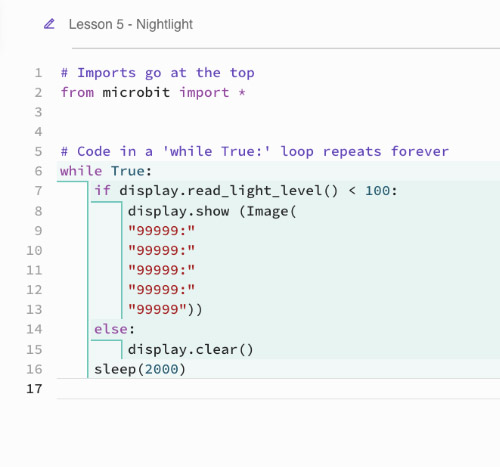
In this lesson, the input of choice is the light-level sensor, and the goal is to vary the brightness of the LEDs depending on the reading. This lesson also introduces if-else statements, and an extension suggests changing which sensor you’re using to turn on the lights, such as temperature or sound.
This is great fun, and not only introduces if-else statements in a small way but also really shows off the functionality of the micro:bit’s sensors. This is not difficult at all, thanks to the step-by-step nature of each lesson and the structure of the series as a whole.
Lesson 6 – Python Rock, Paper, Scissors
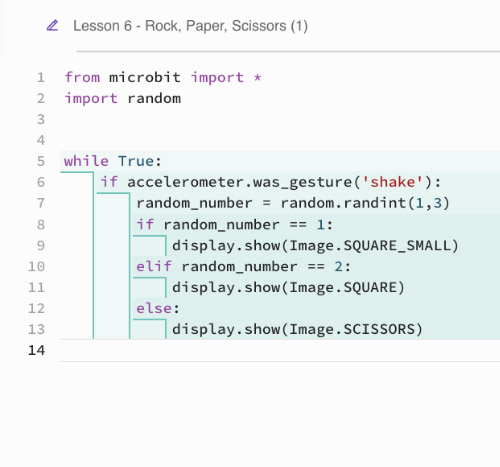
This lesson is the grand finale and is the most complex, combining inputs, variables, random numbers, and selection. This all comes together in a game of rock, paper, scissors, where shaking the micro:bit prompts the selection of a random number from 1 to 3, and then shows an icon for one of the three options.
This lesson is the most in-depth, detailing all the concepts mentioned above. I absorbed them well, thanks to the nicely digestible presentation of the definitions. I had my only hang-up here: not paying attention to how many indents each line had. Luckily, this was quickly spotted when comparing my code to the example on the slide.