

Buy locally from a partner
Bundled options
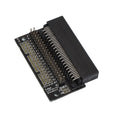
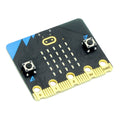
Buy the Kitronik Edge Connector with a BBC micro:bit
 +
+
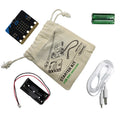
Buy the Kitronik Edge Connector with a micro:bit Starter Kit
 +
+
Description
Same Day Dispatch
- Orders placed online before 3:00pm Monday - Friday (excluding public holidays and our Christmas shutdown period) are always dispatched the same day provided the goods are in stock. If the goods are not in stock we will endeavour to contact you as soon as possible to discuss a dispatch date.
UK Deliveries
- If you live on the UK mainland and don't have any large materials or lithium batteries in your order it will cost £4.50 (£5.40 including VAT) if you spend less than £50 (£60 including VAT).
- If you spend between £50 and £200 (£60 - £240.00 including VAT, excluding large materials or lithium batteries) delivery is free to most locations, and £15 (£18.00 including VAT, excluding large materials or lithium batteries) to UK remote locations. For a list of postcodes that will be charged the remote location rate: remote area list.
- If you spend over £200 (£240.00 including VAT, excluding large materials or lithium batteries) delivery is free within the UK.
Rest of the world
- These orders are sent via FedEx, and the cost is dependant on the service you choose at checkout. Alternatively you can choose the free collection option and have your own courier collect it from us. International orders can only be shipped to the registered card address. Please note: International orders may be charged import duty dependant on local import laws and duty rates. These charges are usually billed to you directly from FedEx.
- Delivery times vary for international orders depending on the service selected and the destination. You can see the delivery time and cost at the shipping stage, or by using the shipping estimator from within the shipping basket.
Collection
- If you would like to collect your order, or use your own courier then there is an option you can select during checkout. We do not charge a packaging or handling fee for this service, and you will receive an email when your order has been processed, you can collect half an hour after receipt of this email.
Further Information
- For information about all of the delivery options we offer see full delivery details.
A wide range of BBC micro:bit resources, what it is, the editors and using the micro:bit
A wide range of BBC micro:bit resources, what it is, the editors and using the micro:bit
Break free from the shackles of your workspace with our range of microbit Case & Accessories Options. If you need to cut the cord from your laptop and go mobile...
Break free from the shackles of your workspace with our range of microbit Case & Accessories Options. If you need to cut the cord from...
Setting up distance sensing with the BBC microbit and a HC-SR04 sensor is a fun and easy project. We have two great sensors for our fabulous customers, one works at a...
Setting up distance sensing with the BBC microbit and a HC-SR04 sensor is a fun and easy project. We have two great sensors for our fabulous...
In this tutorial we are going to look at how to control a servo using the microbit via an Edge Connector Breakout Board for the BBC micro:bit. It’s super simple to set...
In this tutorial we are going to look at how to control a servo using the microbit via an Edge Connector Breakout Board for the BBC...
We've recently added a continuous rotation servos to our range of stocked products. We thought it would be useful to do a quick tutorial on how to control one using...
We've recently added a continuous rotation servos to our range of stocked products. We thought it would be useful to do a quick tutorial on...
Thank you for your email, your best bet for an H bridge is our board on the link below. It uses two H bridges controlled by a chip on the board. It is not made of transistors but this definitely works for the motors you want to use.
5620-motor-driver-board-for-the-bbc-microbit-v2
Best Regards
Cullen
Thank you for your question, you should be able to connect them up with jumper cables. I would recommend connecting from Pin 0 as that is the default for the neo pixels.
Best Regards
Cullen
Thank you for your question, the pin labelled 0V is the Ground Pin.
or All in one Robotics Board
to drive motors.
Thanks
Thank you for your question I am afraid we do not have .stl files for this product that we can supply out to the public.
Best Regards
Cullen
Hello Romilly, The rationale behind the design is this: The micro:bit has 21 connections, however it is not possible to buy a 2 x 21 section of pin header. The 2 x 20 way is however readily available, so the board was designed with the most common connections going to the 20 way break out. As for the two I2C pins, we wanted to include these for more advanced users of the board, but placed them to one side. Anyone that wants to connect to these pins can either permanently solder in to them or add their own pin header.
Hi Stuart, I believe you are wanting a pin out of the edge connector board, you can use the datasheet page 1 and 2 which shows the pins on the micro:bit and a digital copy of the edge connector board.
Many thanks
I am currently looking to obtain the datasheet for this and get it placed on the website. In the meantime what information are you looking for and I will try to find this out?
Ask a question about this product
Payment & Security
Your payment information is processed securely. We do not store credit card details nor have access to your credit card information.


 This product is designed and manufactured in the UK by Kitronik.