
We’re now well into October, and preparing for an evening of trick or treating in our best costumes. But as the year draws on, the nights get darker, and it becomes harder to see and to stay safe.
Emma’s solution? Augment a trick-or-treating bucket with one of our Round LED Matrix Lamps to make a spooky safety bucket! Read on to discover what we used and how we assembled the project!
What did we use?
- Files: Use our DXF or this PDF.
- Kitronik Round 5V LED Matrix Lamp Kit x 1.
- 3xAA Covered Battery Holder with Switch and Leads x 1.
- AA batteries x 3.
- A plastic Halloween trick-or-treat bucket.
- M3 6mm Pan-Head Screws x 8.
- M3 8mm Spacers x 4.
- A Drill with an M3 drill bit.
- Soldering equipment.
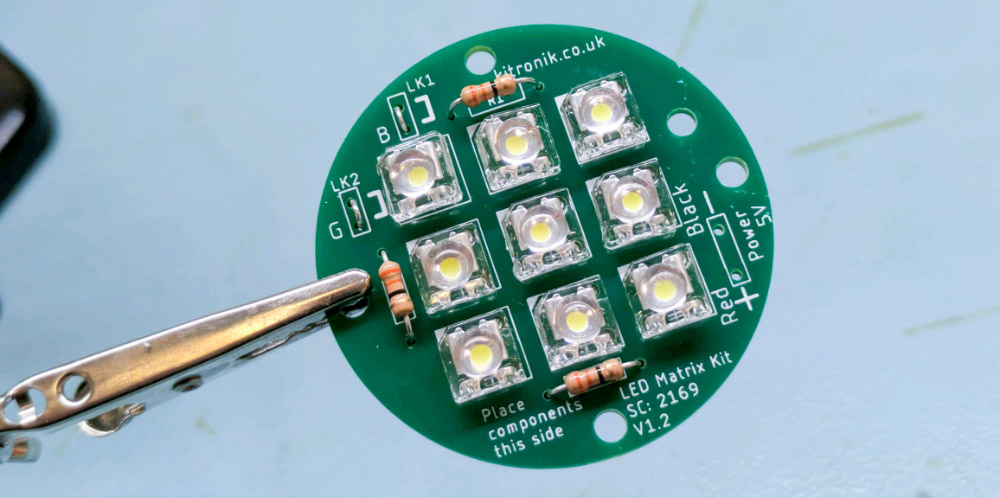
Step 1: Solder Components onto the Matrix Lamp
Following the instructions in the essential information document for the Round Matrix Lamp, solder all the components to the PCB.
You can find the essential information document here.
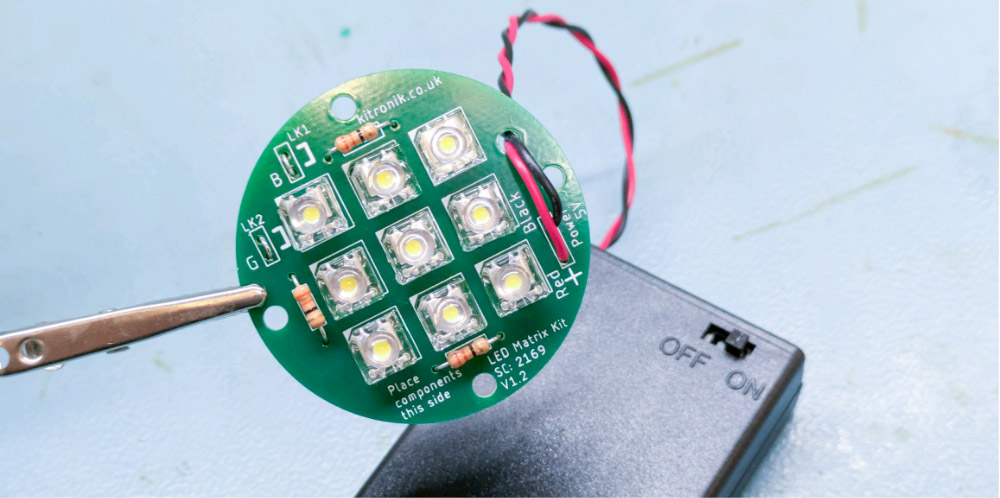
Step 2: Solder Battery Box to the Matrix Lamp
Thread the red and black wires through the strain relief hole, then insert them down through the holes, labelled black and red, then solder them into place.
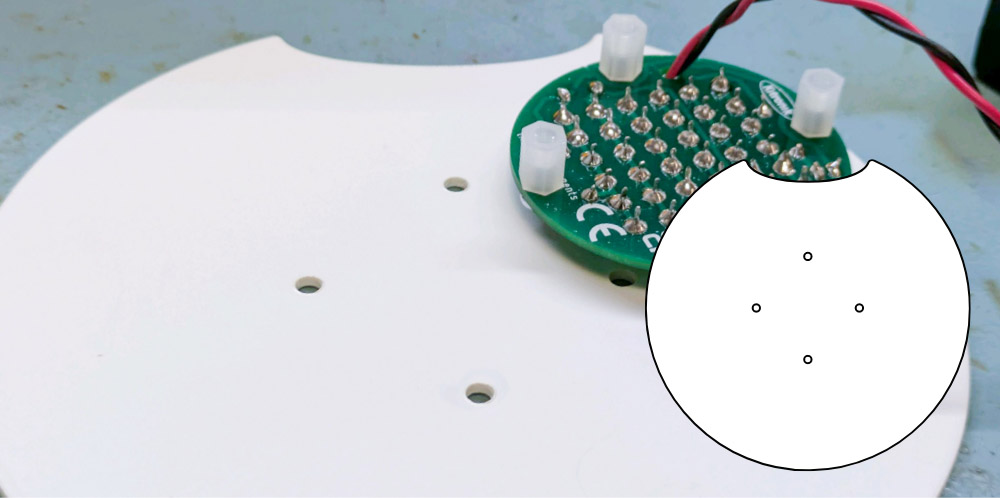
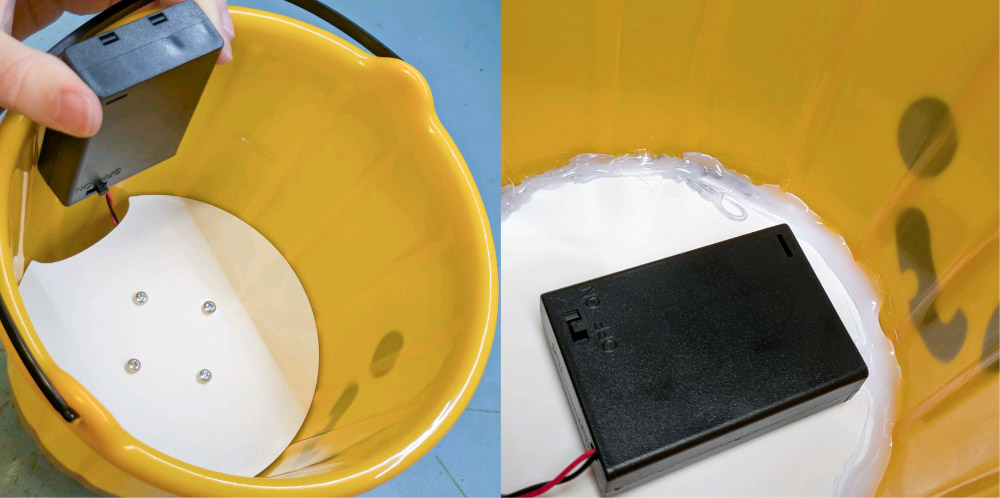
Step 3: Cut out a false bottom for the bucket.
We have used this DXF file, but you can find the outline as a PDF here as well. Make sure You use a material that is rigid enough to hold up the PCB.
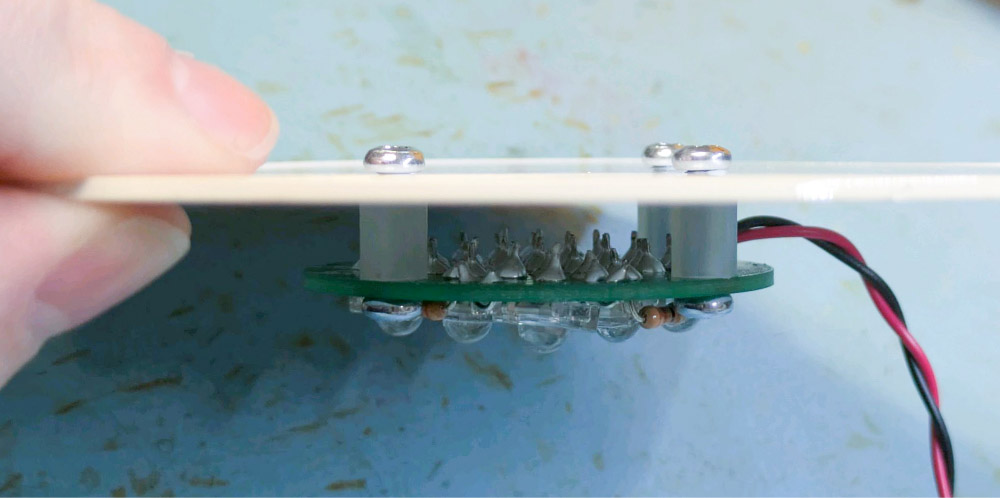
Step 4: Use the M3 Screws and Spacers to mount the lamp
As shown in the image, use one screw on either side of each spacer to attach the PCB to the false bottom panel. This will also hold the LEDs off the bottom of the bucket and allow the light to defuse a little.
Step 5: Secure the false bottom into the bucket.
We have used hot glue for this, just around the edges of the panel, to help it wedge into place. We did not secure the battery box, so that you can still access both the switch and the battery compartment.
Step 6: Add batteries, and get ready to trick or treat!
Add your 3 AA batteries, and you’re good to go! Light your way in the dark Halloween night, and stay spookily safe!

Get in the information fast lane and sign up for our newsletter here!