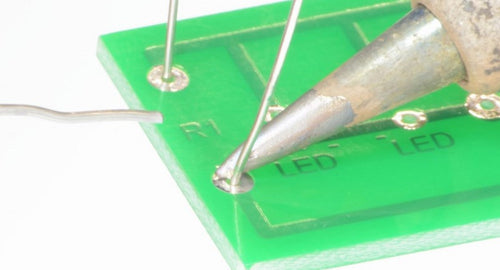
 In this two part Kitronik University resource we’re going to show you how to clean and maintain your soldering iron. Read on for a written guide or skip to the video.
Why do they need maintenance?
Soldering Iron tips are hot. As a result they are subject to the same sort of oxidisation that can affect the solder. They also suffer from being repeatedly heated and cooled. Although the tip is robust it does require a small amount of maintenance. Before starting to solder examine the tip. It should be clean and shiny. Wipe off any accumulation of carbon, old solder and similar debris on the sponge or brass shavings. This tip below shows a build up of deposits.
Still not clean?
If after cleaning on the sponge / brass shavings the tip is still not shiny then melt a small amount of solder onto it and clean again. The flux in the solder will help to clean the tip.Really oxidised?
If the tip is still not clean and shiny then use a tip cleaner. This is a mixture of a more aggressive flux than usually found in solder, and powdered solder. The flux in tip cleaner removes the oxidisation and build up from the soldering iron tip, and then the solder re-tins the tip ready for use. To use the Tip tinner/cleaner heat the soldering iron. Then dip into the tin of tinner/ cleaner with a slight twisting action:
  This step will coat the iron in a mixture of flux and solder. Wipe the iron on a damp sponge to remove the excess.
  This should lead to a clean shiny tip, ready for use.
If all else fails
Soldering Iron tips do not last forever. Eventually they wear out. Common signs that the tip needs replacing are: a hollow forming in the end of the tip, cleaning and re-tinning has no effect, or needs frequent repeating.Video:
Join Kevin as he shows you how to clean and maintain your soldering iron in the video below, or see lower down for a text version of the resource. Before we start soldering we want to make sure that the tip is nice and clean and shiny so that it will accept solder. We call this 'tinning'. We start off by wiping my soldering iron tip through this damp sponge to remove any excess solder and dirt or carbonated material. Then we run some solder onto the tip and wipe away the excess. Now if we had a tip that was very black and we were finding it hard to get the black material away we can use this which is called tip tinner and cleaner. This helps remove this dark black material. We run the soldering iron through this and then wipe it through the damp sponge, it helps remove any of this black material. Again we can run a bit more solder on, wipe away the excess and we have a nice clean, tinned soldering iron ready for our soldering job.| Lesson No#. | Lesson Name. | Description. |
|---|---|---|
| Introduction. | If you're new to soldering our Soldering School will have you up and running in no time. | |
| 1 | Soldering Equipment Explained. | A quick guide to the basic tools you'll need before you start. Includes a video explanation of some tools. |
| 2 | How to Clean your Soldering Iron (Tinning). | An explanation of why we need to clean the tips and a step by step guide. Includes a video guide to tinning. |
| 3 | How to Solder in Ten Easy Steps. | A practical guide to getting started soldering. Includes a troubleshooting guide and examples of good and bad solder joints. |
| 4 | De-Soldering Demystified. | A guide to removing solder. Includes a video demonstration. |
| 5 | Simple circuit board repair. | Sometimes a pad might get damaged on your board. We show you how to fix it in this simple to follow guide. |
©Kitronik Ltd – You may print this page & link to it, but must not copy the page or part thereof without Kitronik's prior written consent.


5 comments
Cullen Lewis
You’re very welcome!
Maria
Thank you so much for the great tips to clean the tip of the soldering iron.
Betty Hunt
Video is so helpful in learning the cleaning process of solder. Thanks!
JoAnne Kosse
I appreciate the breakdown. I'm learning to solder on stained glass. Thank you…
Michael
Thanks for the info