Emma shows you how to get more from your laser engraving with Scan Gap Engraving is a medium that relies heavily on contrast between the base material and the engraved surface. I have been looking to find ways to use the settings artistically and so far, I have found the most artistic possibility with the “scan gap” function.
This is purely a very manual artistic endeavor, since programs like Lightburn can process photos for engraving and capture tone and shade.
What is ‘Scan Gap’?
This is truly a setting that does what it says on the tin. When a laser cutter engraves a surface, moves back and forth to “shade in” the area. This is the “scanning” referred to. The “scan gap” is the gap between the horizontal lines the laser draws.
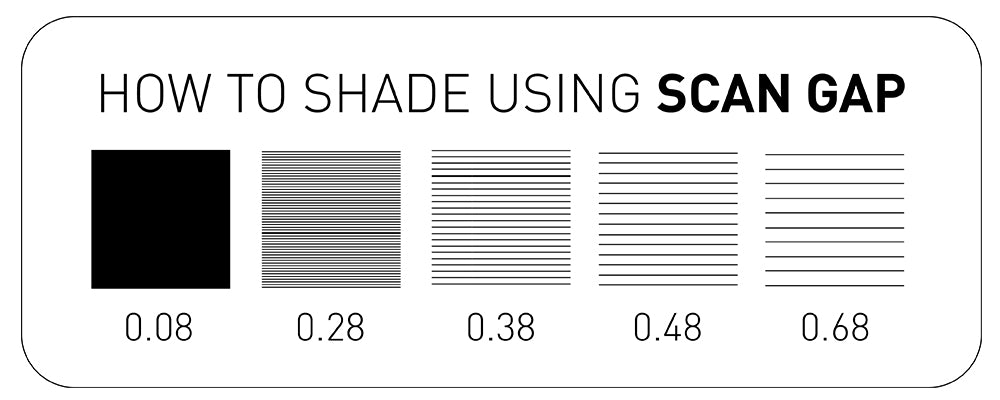
The above image demonstrates how the setting works, and how it can be used to create different shades by varying how tightly packed the scan lines are. These are the settings I used. Notice that the higher the number on your scan gap setting, the wider the gap between the scan lines.
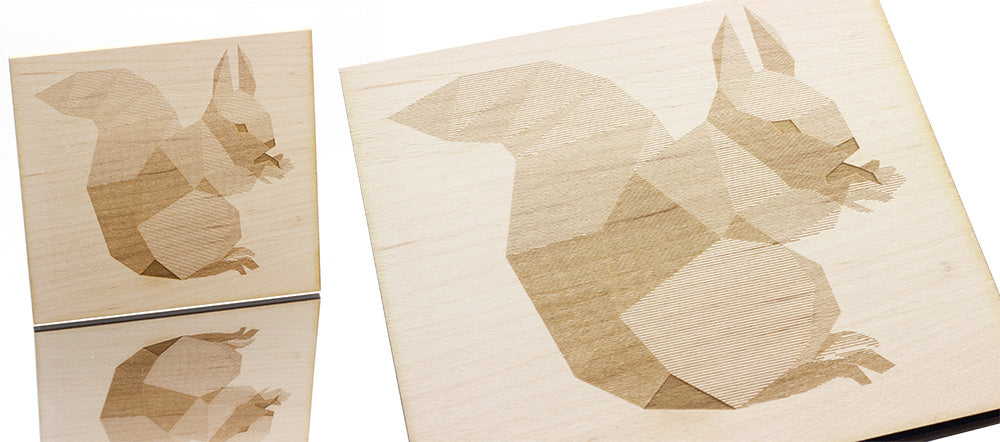
NOTE: Depending on material, this can either be lighter shades or darker shades. In the case of engraving slate for instance, the more densely packed the lines, the lighter the shade. On a wood, the denser areas will be darker.
Examples of Shading Using ‘Scan Gap’
First of all – download the DXF demonstrated HERE
I have demonstrated this effect simply, using a low-poly squirrel drawing. The low number of polygons with different engraving settings means this will be easy to open in your laser cutting software.
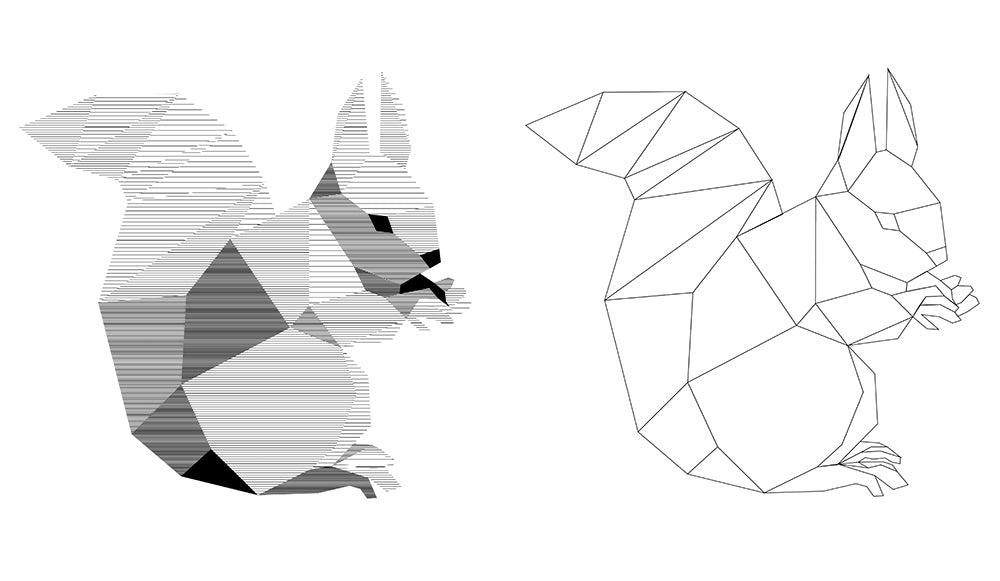
On the left is my plan – this tells me which polygons will be what shades when I get the dxf into the laser cutting software. On the right is how the dxf will look once I export with just the line art.
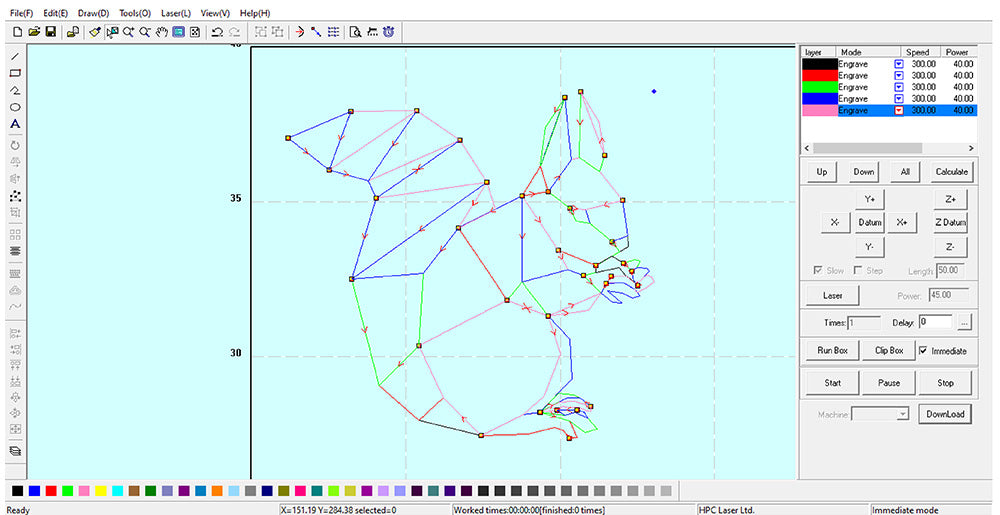
This is how the art looked once I had it set up in the laser cutter software.
How Does It Look?
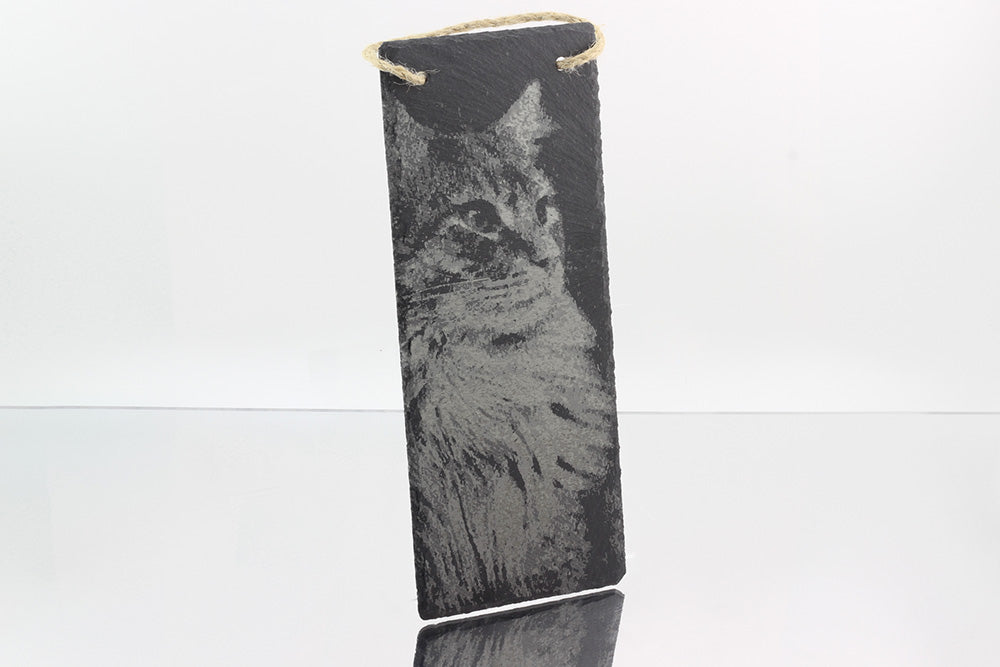
If you want to try something more advanced than the steamed beech squirell, you can do this with higher-poly images, such as this vectorised photo of a cat etched on one of our Slate Signs!

Keep yourself in the loop and sign up for our newsletter here!