CreateAI for BBC micro:bit brings AI to life through movement and play, perfect for curious young minds. Pupils can collect data by jumping, clapping, or waving, then train their own mini AI models right in the browser. With just a micro:bit and a bit of classroom magic, students can see their code respond in real time, no jargon, just joyful learning. It’s ideal for sparking discussion and hands-on discovery.
This collection of resources helps educators quickly master AI basics, get set up with CreateAI, and dive straight into a turnkey classroom activity, saving you prep time and keeping students engaged from the first jump to the final certificate.
📂🌟 Intro: What is CreateAI for BBC micro:bit?

✨🤖 What is CreateAI?
CreateAI for the BBC micro:bit brings artificial intelligence into the classroom through movement and hands-on discovery. Pupils can train their own AI models using actions like clapping, jumping, or spinning, then see their micro:bit respond in real time in the online editor. It’s a playful, accessible way to demystify AI. No experience required, just imagination, some movement, and a browser.
🧑🏫 Who is CreateAI for?
CreateAI is designed with busy educators in mind. Whether you’re actually teaching pupils or dipping your toes into digital making for the first time, this tool is ready to go. It’s perfect for teachers looking to enrich computing, STEM, or cross-curricular lessons with a future-facing twist.
🏫 Why use CreateAI in the Classroom?
CreateAI unlocks meaningful learning by:
- Encouraging curiosity, creativity, and experimentation.
- Making complex concepts like machine learning feel tangible.
- Supporting teamwork, physical movement, and problem solving.
- Providing a low barrier intro to AI without extra hardware or downloads.
It’s not just about code, it’s about confidence, collaboration, and lightbulb moments.
📂🧭 Getting Started: Teacher’s Quick Start Guide
🧭 Quick Start Guide for Teachers: Learn what you’ll need, how to connect the micro:bit to CreateAI, how to collect data, and how to create simple programs on the micro:bit to see the AI in action!
What You’ll Need:
- 🖥 A computer or tablet with internet access
- 🔌 A BBC micro:bit (v2 recommended) + USB cable
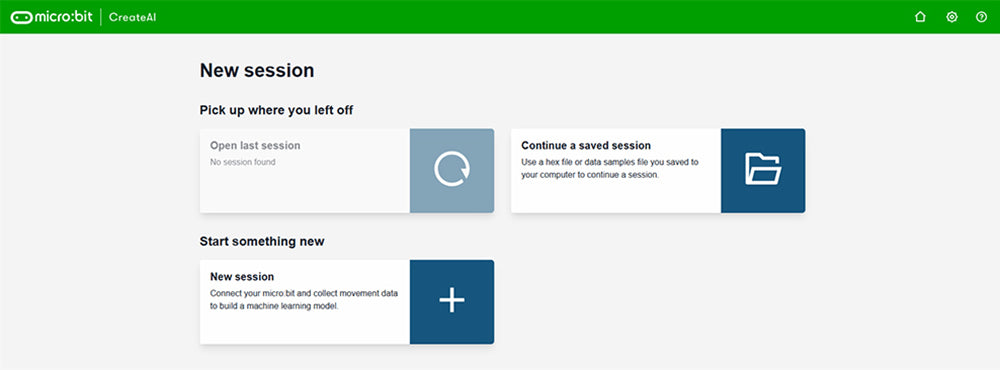
- 🌐 Head to microbit.org/createai.
- ✅ No installations needed, it works in your browser!
From plugged in to AI-powered in just a few simple steps!
👣 Step 1 – Connect Your micro:bit
- 📌 Plug your micro:bit into your computer using the USB cable.
- ✅ It should appear like a USB drive on your computer.
👣 Step 2 – Open the CreateAI Editor
- 🌐 Visit createai.microbit.org.
- 🧰 Click “New Project” and give it a name.
Tip: In the classroom, let pupils help name the project, it gives them ownership from the start.
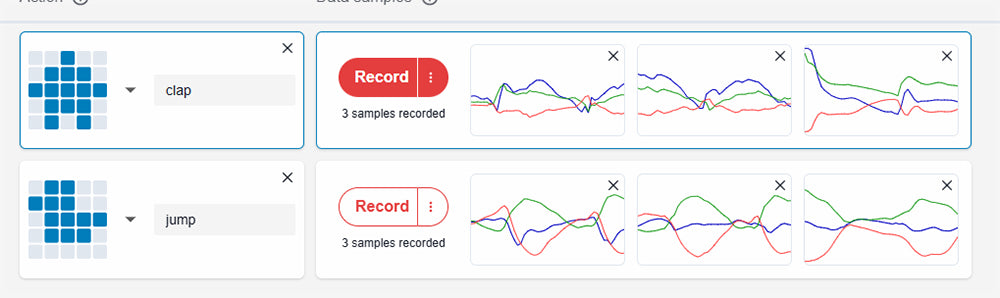
👣 Step 3 – Choose Movement Labels
🏷️ Name two categories, like “Jump” and “Clap”. This tells the AI what movements it should learn.
👣 Step 4 – Record Examples
- 🎥 Perform one movement and click “Record”—repeat this 20–30 times.
- 🧍 Then switch to the second movement and record again.
Encourage pupils to move clearly and consistently, they’re training the computer!
👣 Step 5 – Train Your Model
- 🧠 Click “Train Model”.
- 📈 The AI will process the examples and begin learning how to tell them apart.
A simple confidence chart will show you how well the model is doing.
👣 Step 6 – Test It Out
🤖 Try one of the movements in front of the device. The model will make a prediction—its best guess based on the data.
If it’s wrong, that’s OK! Ask students how they could improve the training data.
👣 Step 7 – Export to MakeCode
- 🛠 Click “Export to MakeCode”.
- 🧩 Drag and drop blocks to code your micro:bit—maybe show an icon, flash LEDs, or play a sound!
🧩🧱 First CreateAI Program (using MakeCode blocks).
When you click “Export to MakeCode” in CreateAI, it opens a new MakeCode project. The project will have blocks for each of your exported movements, in this case, claps and jumps.
Objective: React to the AI’s prediction when the microbit is shaken.
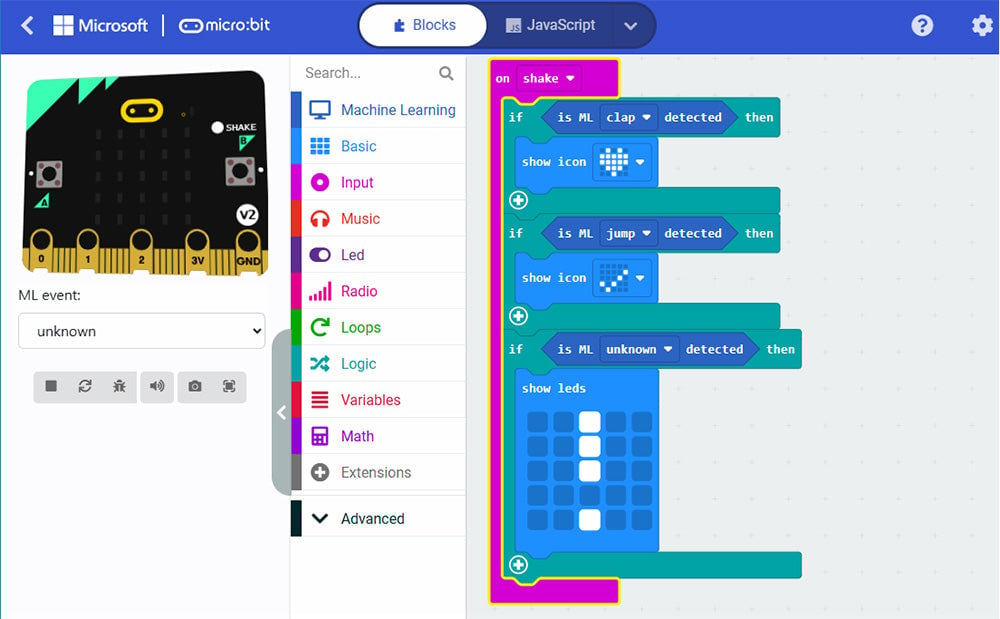
Note: The blocks are colour coded to the menu name they come from, e.g. the On Shake block and can be found in the Input menu.
🧠 What It Does.
- On Shake Block: Triggers a check when the micro:bit is shaken, easy and playful.
- If Machine Learning (ML) Event Detected: Checks the AI’s prediction against trained events like “Clap” or “Jump”. ML event blocks are added automatically when you export your model—no need to search for them!
- Icon responses: Visual feedback appears on the LED grid, a heart for clap, a checkmark for jump, or a custom pattern if nothing is confidently recognised.
🛠️ Tips/Troubleshooting
- It’s okay if nothing appears, this reinforces the idea of “confidence” and “uncertain predictions.”
- This can be extended by adding sound or animations in place of icons displayed on the micro:bit LEDs.
- Once your code is complete, hit the “Download” button in the editor and follow the pop-up instructions.
Then test the outcomes with the micro:bit.
📂🧑 Lesson 1: “Train the Teacher” Activity (15 Mins)
Objective: Help pupils understand how AI learns from examples and makes predictions.
Time: 10–15 minutes
Materials: Just your pupils, a bit of space, and your best acting chops!
🧩 Step by Step Breakdown
1. Set the scene
Tell the class:
“Today, you’re going to train me like I’m a computer, learning to recognise movements. I don’t know anything yet, you’ll have to teach me!”
2. Choose the movements
Pick two distinct actions—e.g. clap and jump. Assign half the class to each movement.
3. Collect the training data
Have each group perform their movement 10 times while you (the “AI”) watch carefully. You can even pretend to “record” them by blinking or making beeping sounds for fun.
4. Test the AI (That’s you!)
Now mix it up! Call on individual students to perform one of the two actions. You, the “AI,” must say (prediction) which one it is based on your training.
5. Reflect as a group on the results
Ask:
- “Was I always right? Why or why not?”
- “What made it easier or harder to learn?”
- “What would help me improve?”
🧠 What Pupils Learn
- AI needs lots of clear, consistent examples to learn well.
- Predictions aren’t always perfect, but they improve with better data.
- They’re already thinking like data scientists!
🔄 Optional Extensions
- Add a third movement.
- Let a student be the AI and repeat the process.
- Introduce “noisy data” by having someone do the wrong movement on purpose.
📂🤖 Lesson 2: Train it, Code it, Test it (30 mins)
Objective: Pupils collect their own movement data using CreateAI, train a custom AI model, and export it to MakeCode to build their first interactive micro:bit program.Time: ~30 minutes
What You’ll Need:
- 🖥 A computer or tablet with internet access per 2 or 3 pupils.
- 🔌 A BBC micro:bit (v2 recommended) + USB cable
- 🌐 Head to microbit.org/createai.
- ✅ No installations needed, it works in your browser!
👥 1. Pupils create a new AI project
- Visit createai.microbit.org/new.
- Click “New Project” and name it (e.g. “BounceBot”).
- Pick two movements to detect—e.g. Jump and Clap.
Teacher tip: Let pupils act out a few options and vote on which ones to use, great for engagement!
📸 2. Collect Training Data
- Pupils take turns performing one movement at a time.
- Click “Record” 20–30 times per movement.
- Repeat for the second movement.
Encourage consistent movement and a quiet background, just like “training a robot.”
🧠 3. Train & Test the Model
- Click “Train Model”.
- Once training completes, click “Test Model”.
- Try each movement to see what it predicts!
Discuss: “Was it confident? What happened when the prediction was wrong?”
💻 4. Export to MakeCode & Build a Program
- Click “Export to MakeCode”.
- Wait for the MakeCode project to open with pre-loaded blocks.
- Add an “on shake” block and respond to each ML event (e.g. show a heart or LED pattern).
Example: Show a heart when the AI detects a clap, a checkmark for a jump.
🧪 5. Test & Download
- Connect the micro:bit if it’s not already connected.
- Click Download in the MakeCode editor and follow the pop-up instructions.
- Test it! Shake the device and perform a movement—does it respond?
💬 Wrap-up Prompts
- What helped your AI learn well?
- How did it feel when it guessed wrong?
- What would you change if you had more time to improve the project?
🔄 Optional Extensions
- Add a third movement (like “Spin”).
- Play a sound or flash custom animations.
- Record more examples and retrain, does it get more accurate?
📂🚀 Next Steps for Classroom Learning

Objective: Encourage pupils to reflect, improve, and extend their CreateAI projects while connecting machine learning to wider learning goals.
🔁 Iterate & Improve
- Challenge pupils to add more training examples and retrain their model. Did confidence improve?
- Introduce a new movement (e.g. spin or wave) and see how a three-class model performs.
- Modify the micro:bit program to respond in new ways, custom patterns, animations, or music.
🧠 Reflect & Discuss
- What does the AI need to “understand” a movement well?
- Was your model more accurate when your training data was clear and consistent?
- How do humans learn similarly, and differently from computers?
🔗 Cross-Curricular Links
- English: Write an instruction manual for your AI project, or a sci-fi story about its future.
- Maths: Graph your AI’s prediction confidence scores over time.
- PE: Design a movement sequence for the AI to recognise and respond to.
🏁 Challenge Activities
- Design a “reaction tester” game, and use AI predictions to track player performance.
- Create a mini quiz: Can the class “fool” the AI with unusual inputs?
- Develop a classroom scoreboard, whose model is the most accurate after 3 rounds of retraining?
💡 Tip for Teachers
Don’t worry about getting everything perfect, this is about building understanding and confidence. The best learning often happens when things go a bit wrong!
📂📝 A Printable Record of Achievement
- 🎓 Certificate of Achievement – personalisable and classroom-ready, download a PDF.
Teachers can print these off or share them digitally.
Certificate of Achievement
This certifies that
[ ____________ ]
has successfully trained, tested, and coded their very own AI model
using CreateAI and the BBC micro:bit.
Their curiosity, creativity, and problem-solving skills
have earned them the title of:
✨ AI Apprentice ✨
Teacher: ____________