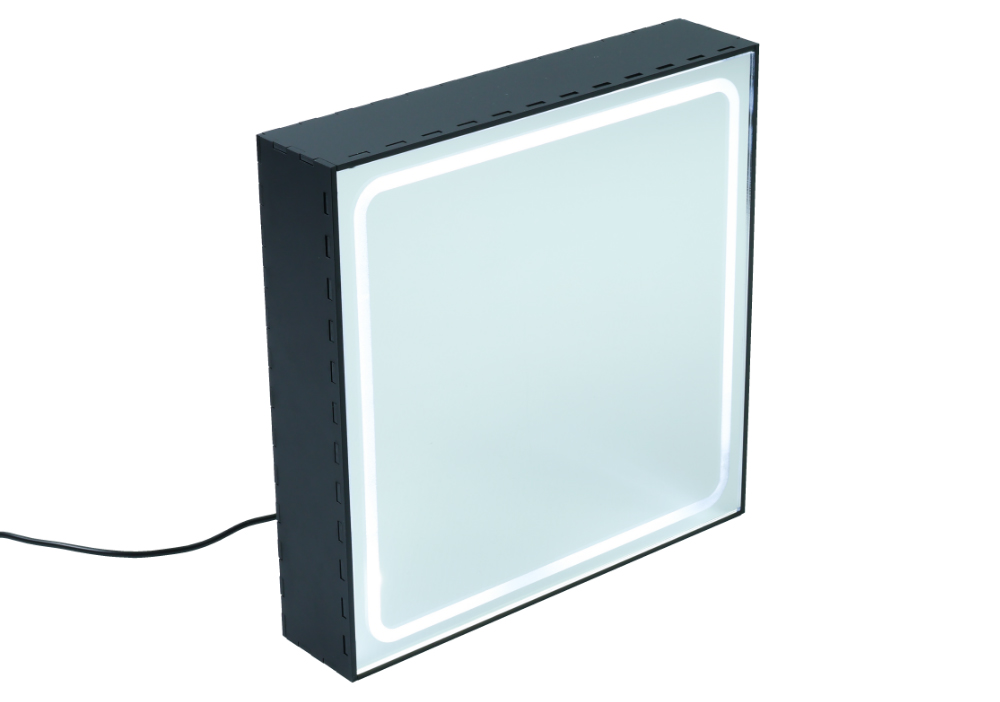
This vanity mirror incorporates some easy soldering and uses some of our special finish Value Acrylics. Once plugged into a USB wall plug, the LEDs inside will light up the viewer for optimal makeup application, beard trimming and silly-face-making. Read on to find out how you can make it!
This blog was was written by Emma and is one of the 6 included projects in the Book of Projects Volume 5. Background Image by Lazarescu Alexandra on Unsplash.
This Make Covers:
What did we use?
- Mirrored Value Acrylic (600mm x 400mm) (43339)
- Matte Black Value Acrylic (600mm x 400mm) (43306)
- USB Cables and LED Strip Light (Kit of 50) (35171)
- White Flexible LED Strip 5m Reel (35165)
- SPST Round Rocker Switch (3407)
- Superglue
- Soldering Equipment
- This DXF design file.
Note:
- *Price per student calculated based on each student using a whole sheet of 600mm x 400mm Matte Black Value Acrylic, half a sheet of 600mm x 400mm Mirrored Value Acrylic, one USB Cable, one SPST Round Rocker Switch, and 46 LEDs.
- The price may fluctuate slightly over time but was correct at the time of printing.
Step 1 – Check out the design files.
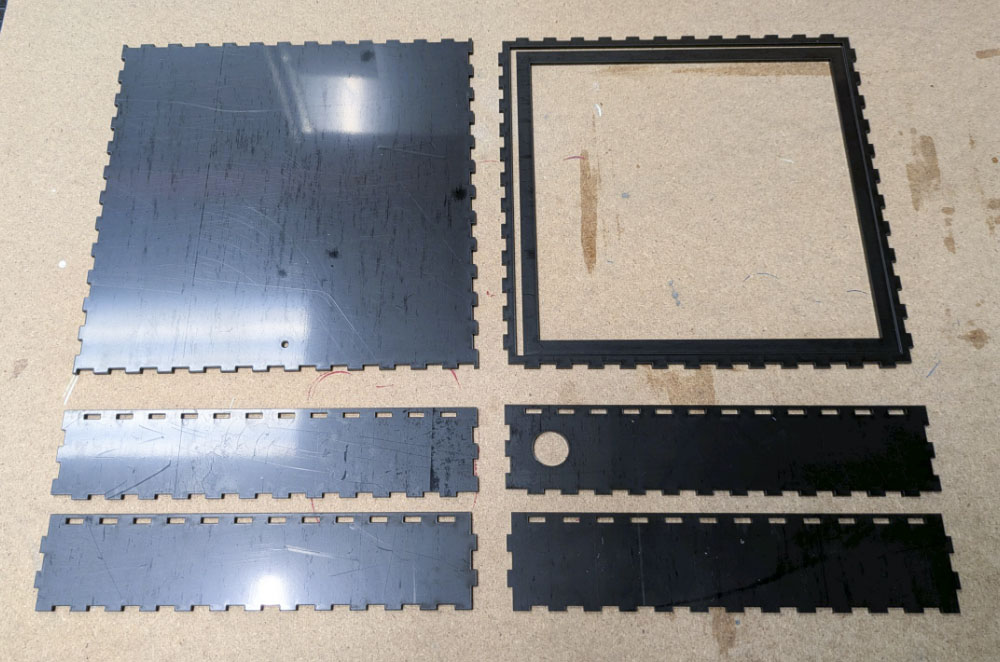
This DXF contains the design for this project. The diagram below shows you how to work with the file.
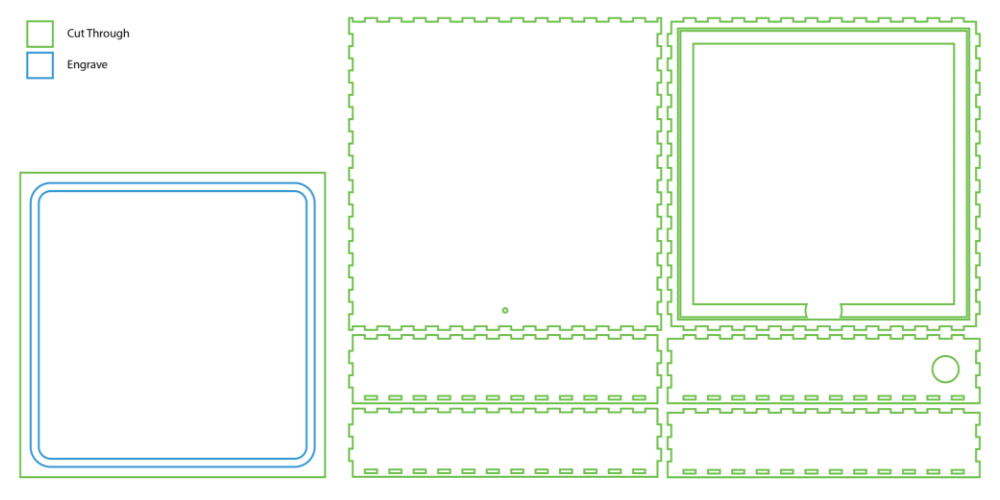
This design is in two parts. The box panels with finger joints above will form the mirror housing box. We cut this from our Matte Black Value Acrylic, which fits one make per 600mm x 400mm sheet. The box with the blue engraving is the mirror panel, which we cut from our Silver Mirrored Value Acrylic. Each 600mm x 400mm sheet will fit two of these panels.
The blue lines should be engraved onto the back of the mirror panel so the reflective coating is removed. Then, the green lines should be cut fully.
Step 2 – Laser cut the back of the mirror.
We’ve cut ours from Matte Black Value Acrylic – you could cut it from anything you liked!
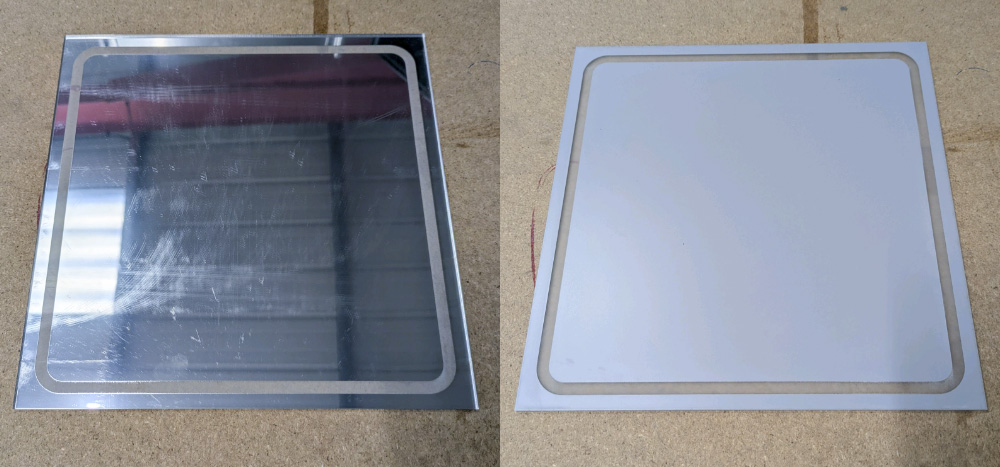
Step 3 – Laser cut mirror surface.
Make sure to cut this with the mirror coating facing up so that the engraving removes the coating. Also, leaving the protective film on until the whole mirror is assembled will make sure it doesn’t get scratched during assembly.
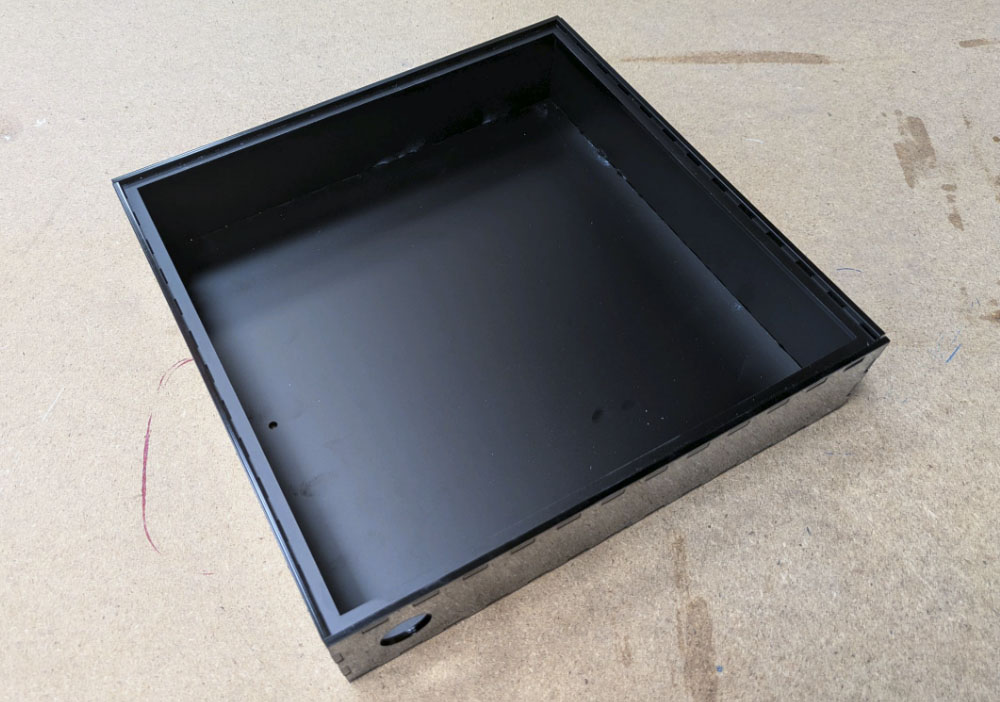
Step 4 – Build the back of the mirror.
As shown in the image, the box is built by assembling the four sides around the larger back panel, with the large hole for the switch at the bottom, to the right of the hole in the back panel for the USB cable. Before all the sides are stuck in place with superglue, insert the lip that sits just below the top of the box. This lip will hold the mirror later.
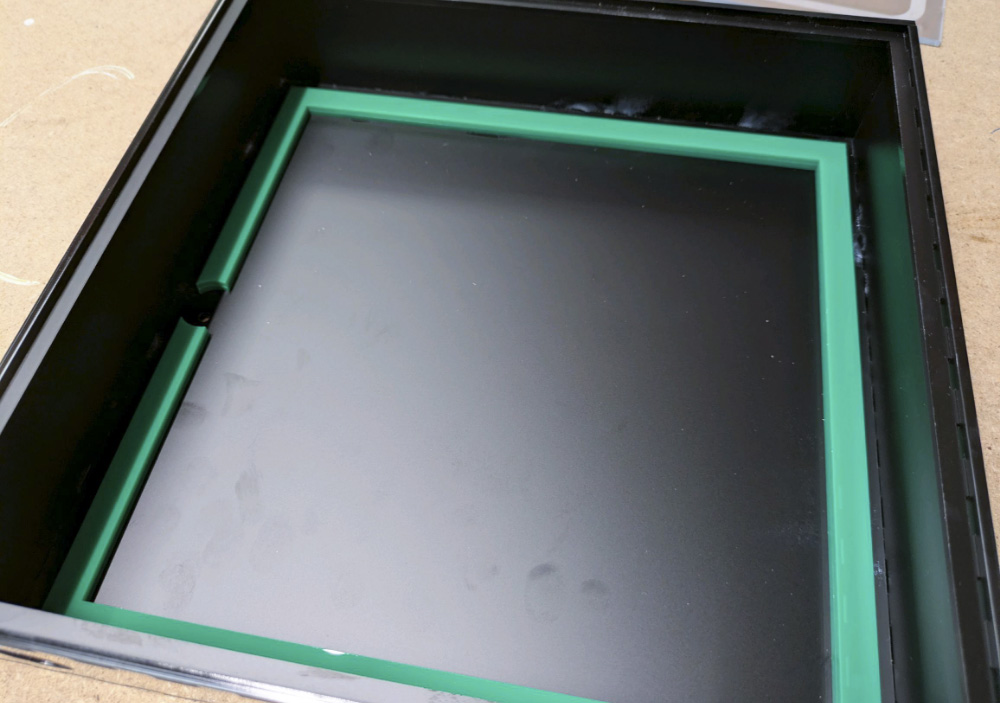
Step 5 – Attach a riser (optional).
This step is to raise the LEDs slightly closer to the mirror, and could be built taller should you choose. The riser is green in our example, but it’s included in the box design for you.
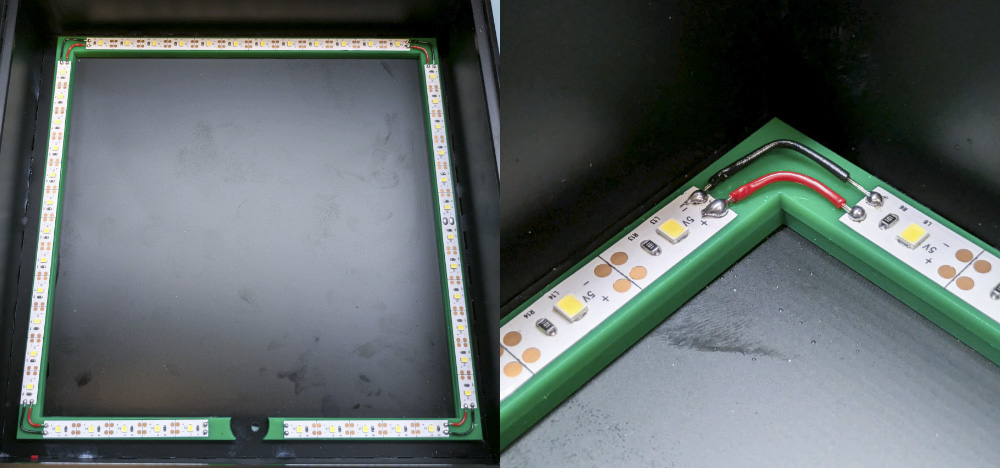
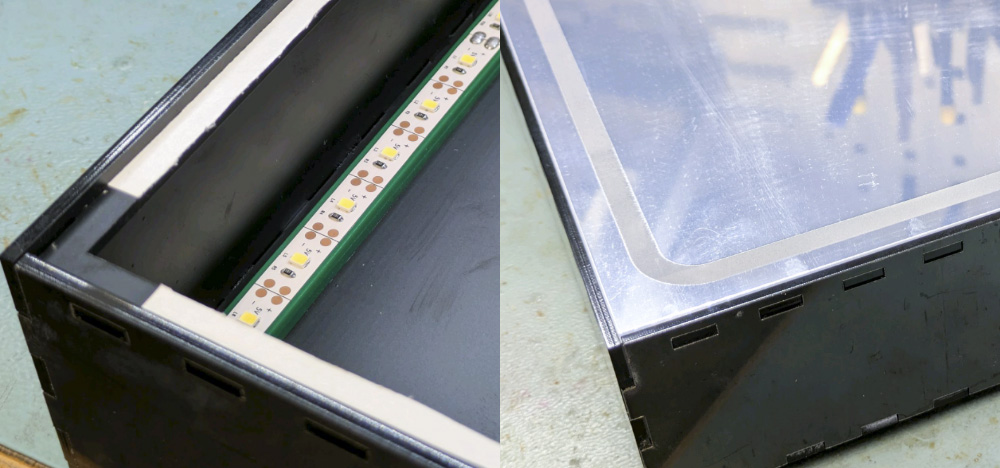
Step 6 – Attach and solder together the LED Strips.
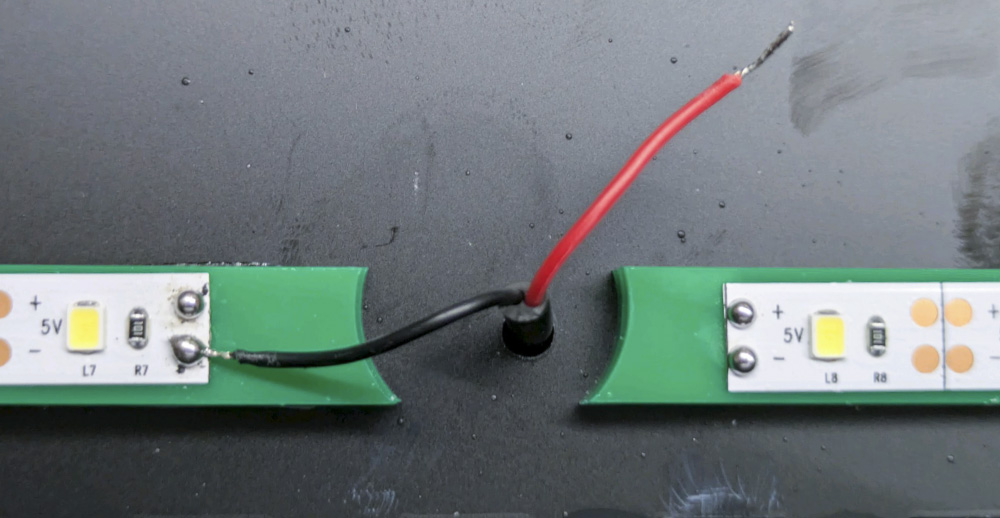
Using the adhesive on the LED strips, attach 12 LEDs down each full side, and then 5 on each side of the split at the bottom. Solder together positive to positive and negative to negative. We’ve used black wire for negative and red wire for positive to make this clear.
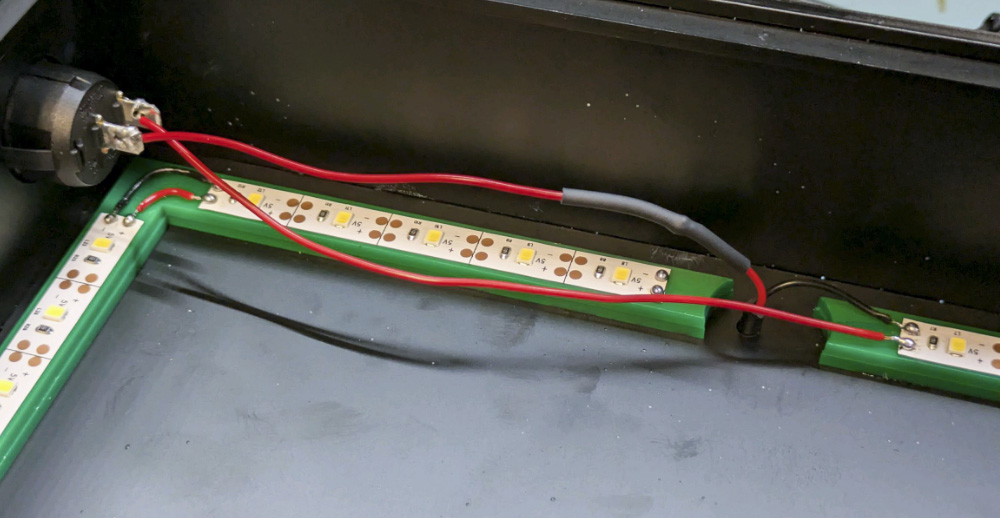
Step 7 – Attach the USB Cable.
Taking the stripped wire ends of the USB cable, push it through the hole in the back of the mirror and solder the negative wire to one of the negative pads.
The negative wire is the black one, and the positive is red.
Step 8 – Connect the switch.
Connect two lengths of wire to the rocker switch as shown, before pushing it through the hole in the side of the mirror. Solder one wire on the switch to the positive wire from the USB Lead, making sure to slip a little heat shrink over the wire.
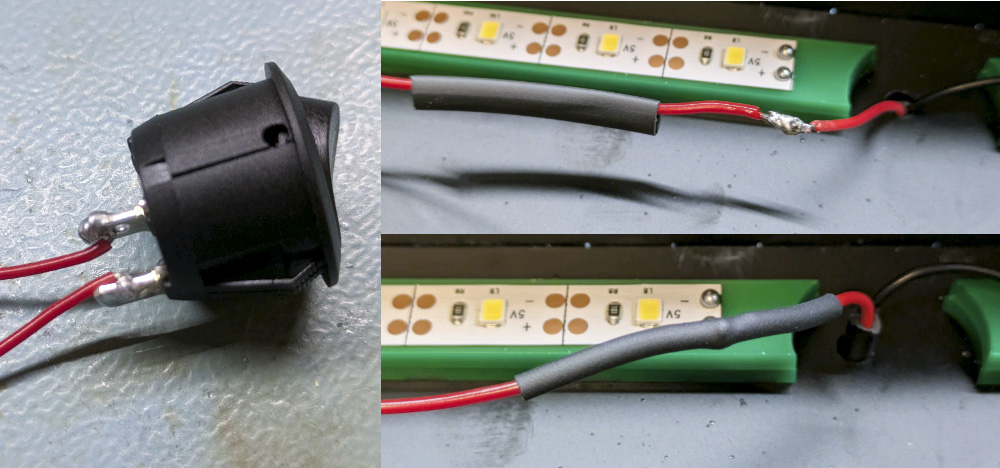
Then solder the other wire to the positive pad beside the negative pad you already soldered the USB cable to.
Step 9 – Attach the mirror surface.
Using a solvent-free adhesive to avoid damaging the mirror coating (we used double-sided tape), attach the mirror onto the lip as shown. Make sure to remove the protective film from the front of the mirror afterwards!
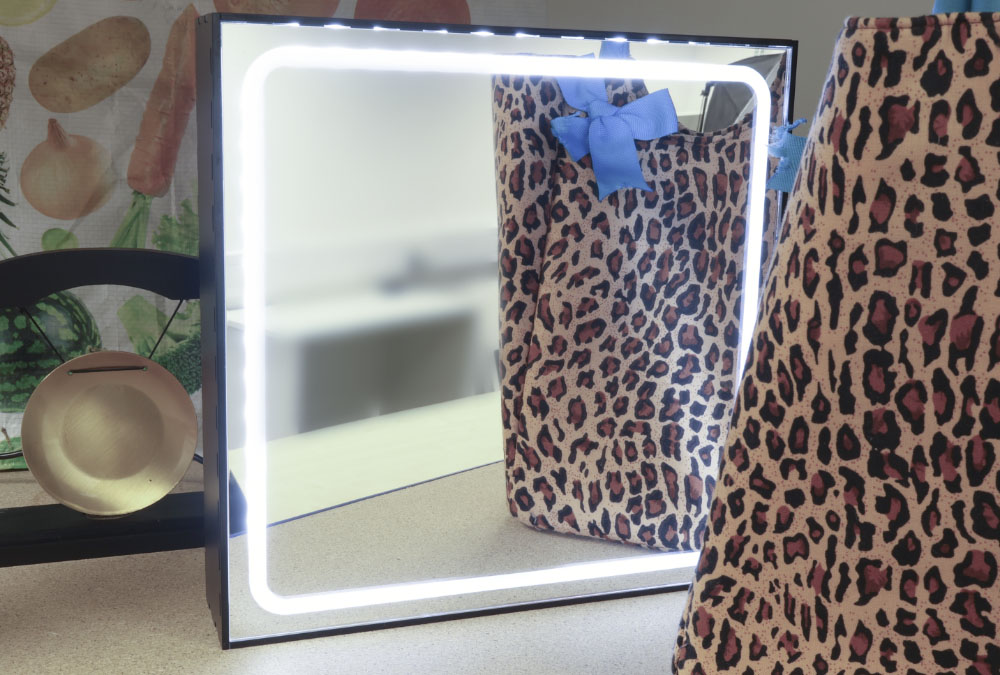
Step 10 – You’re Finished!
You now have a fully functional LED vanity mirror! If you want to give this make a go, why not consider using alternative materials, resizing it, or changing the shape?
–