Spring will soon be sprung and that means that Easter 2021 is just around the corner, which also means… daffodils and nicer weather! It also gives us another excuse to fire up the laser cutter! We’ve rustled up a couple of nice project ideas for Easter that you can make as is or tweak to taste!
As always, materials suggestions and design file downloads are provided so you can get to work straight away! Both builds are quite easy but adult supervision is advised for the heat forming step. Below are the materials that we used, but the outcomes will be just as nice with other colours.
What we used:
- Fluted polypropylene sheets.
- 3mm glass look perspex.
- 3mm transparent red perspex.
- 3mm value acrylic.
- Glue.
- Heat gun.
- Something suitable to form the headband around.
- Our Free DXF files.
- A Laser Cutter.
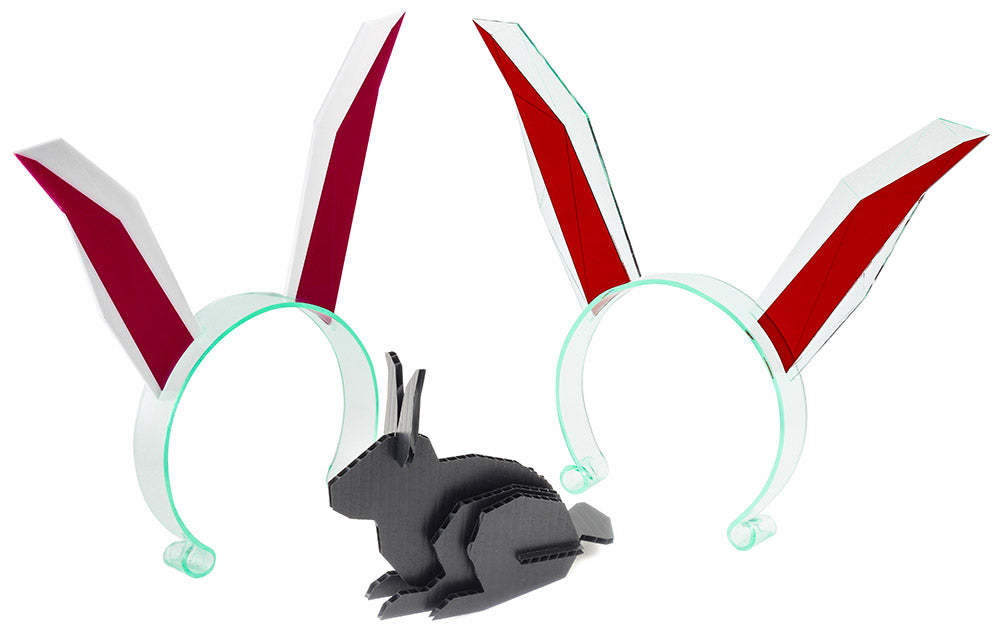
The reason there are so many acrylic/perspex sheet lines is that we made two sets of ears.
Easter 2021 Project Ideas For The Laser Cutter:
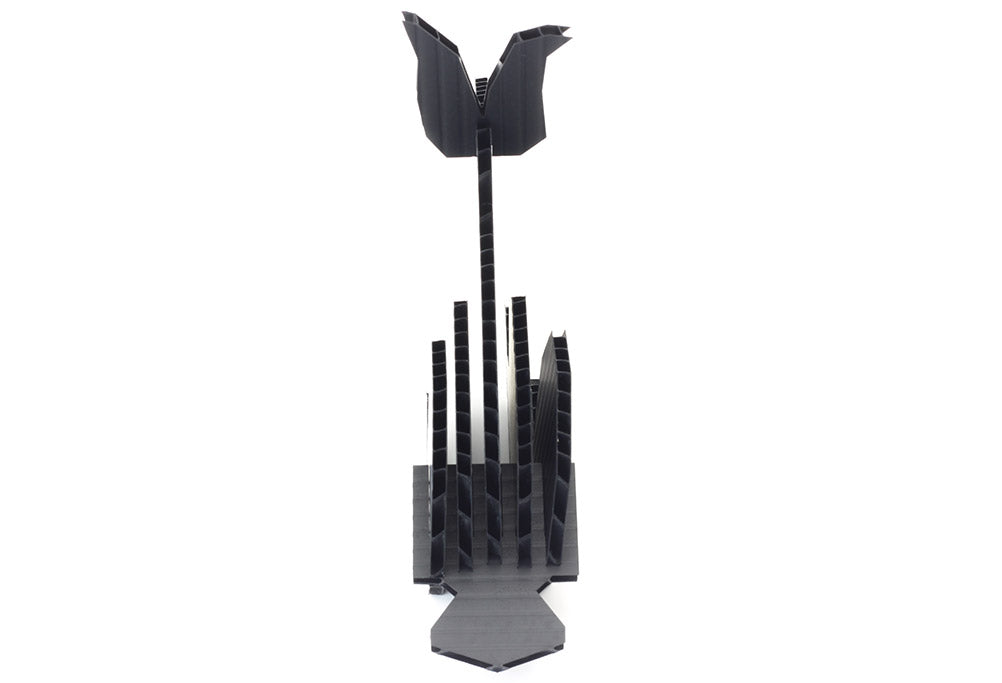
First, we’re going to tackle the bunny ears as there are one or two challenging steps. If you want to tweak the ears and personalise them in anyway, load the file into your CAD software of choice.

Step 1 – Bunny Ears to the laser cutter:
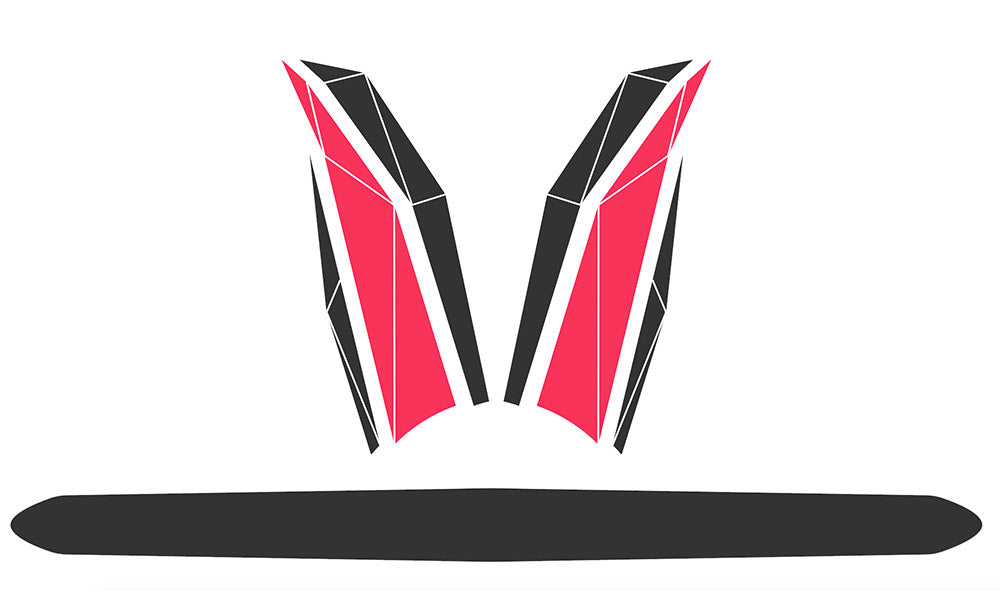
Load the DXF into your Laser Cutting software. As per the diagram below, you will want to set your Laser Cutter to kiss-cut the lines shown in white, and then cut all the way through around the outside of the shapes. Using a different colour for the inner ear panel – shown here in pink – will mimic the appearance of a real rabbit ear.
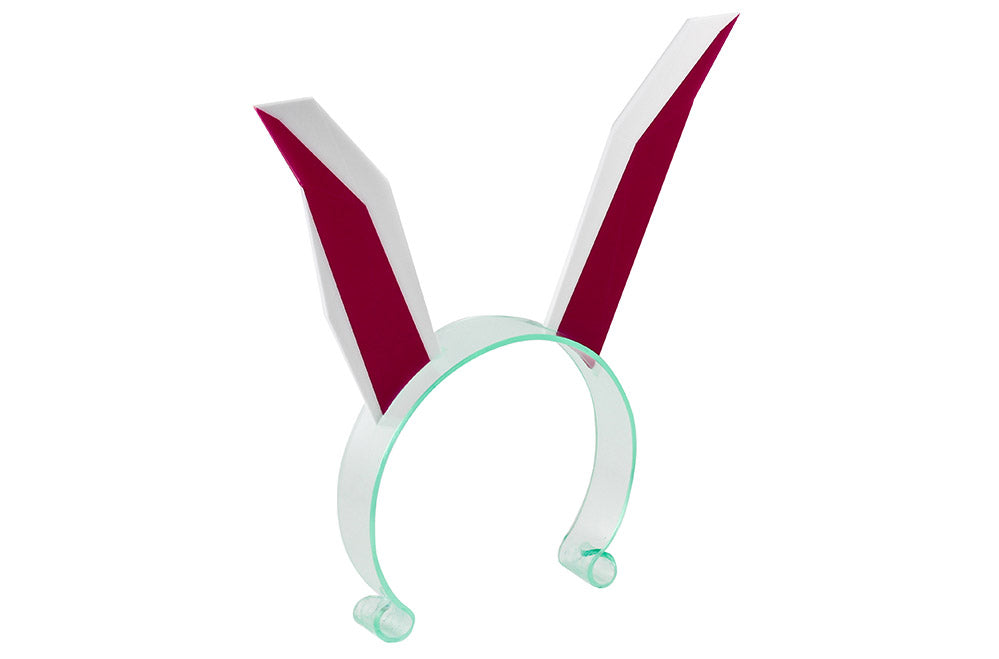
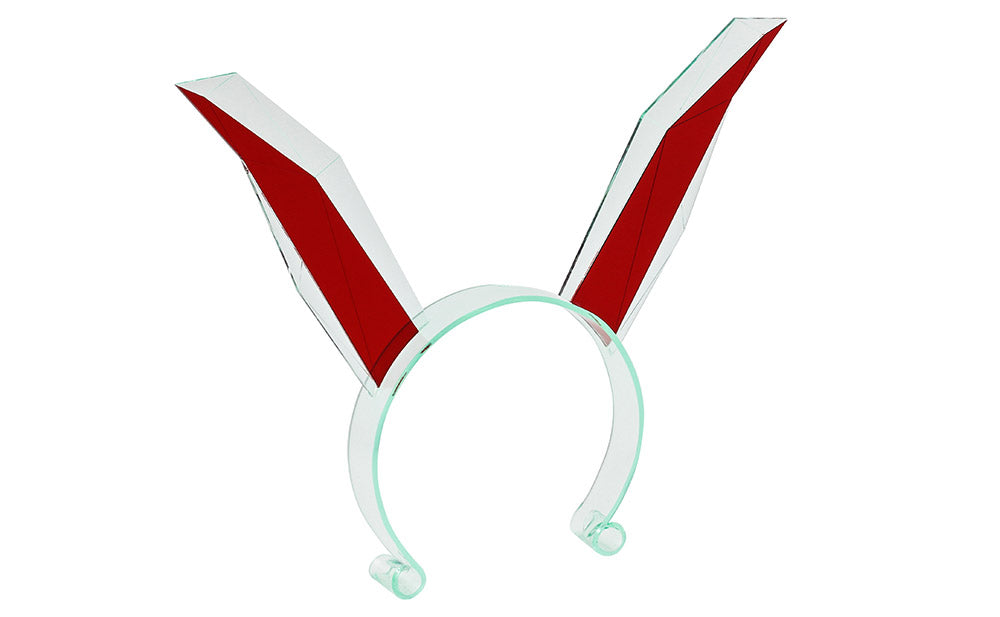
- Step 2 – Gluing the ears together: Once all these parts are cut, glue the ears together with either plastic cement or superglue. Be careful not to get it all over the back or front of the acrylic!
- Step 3 – Heat forming the headband: While the glue dries on the ears, we will heat-form the headband. Ours was formed around a bowl with a 15cm circumference, which is what the curve at the bottom of the ears is made to fit to. Whatever your circumference is, you should ensure the bottom of the ears conform to it.
- Step 4 – Curling the ends: Once the band is formed into a circle, curl the ends up to make sure they’re not sharp when you put it on.
- Step 5 – Joining the ears to the headband: Finally, apply glue to the bottom of the dried ears and place them where you want them on your headband.
And that is all there is to it! Once done you should have something similar to the two versions we made for this resource.
Tips:
- TIP 1: If you really want to make your ears secure, cut a slot for each ear to sit in on the headband. If you make this a friction fit, you might not even have to glue them in!
- TIP 2: You don’t have to make this headband if you have already got a headband you’d like to mount these onto! Why not get creative and try out different colours and transparencies, and maybe accessorise with different decorations like flowers or ribbons?
Instructions for Fluted Polypropylene Rabbit:
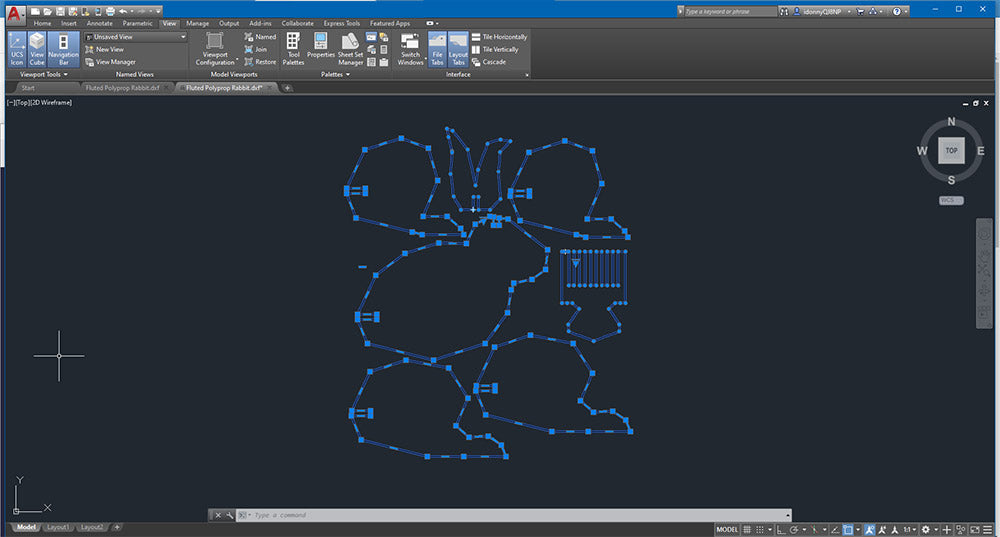
As always, you can either load the DXF file into your CAD software of choice, or head straight to the laser cutter. Load the final DXF into your laser cutter and cut all of the parts from your desired material. Then, assemble the pieces, as shown below.
We chose to make ours out of Fluted Polypropylene because it’s new to us, and, why not! There are some real advantages too, it’s light weight, durable, and it can be easily wiped clean of chocolate finger prints without damaging the material. It’s quite a bit like working with cardboard, except it’s more durable and can be cleaned.
Once assembled you should have something resembling our bunny below;
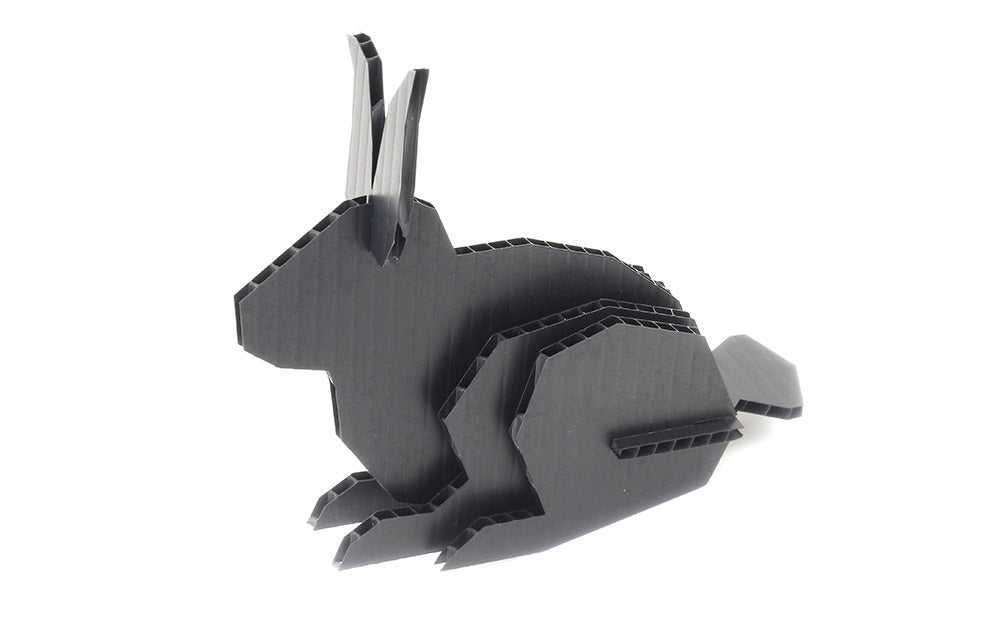
We think that the rabbit would look fetching in any colour but Easter yellow would look especially nice! Make sure you don’t miss out on other news and free resources by signing up for our newsletter here.