There are two basic stitches that are used in E-Textiles circuits: oversewing stitches and running stitches.
Here, you can learn the basics.
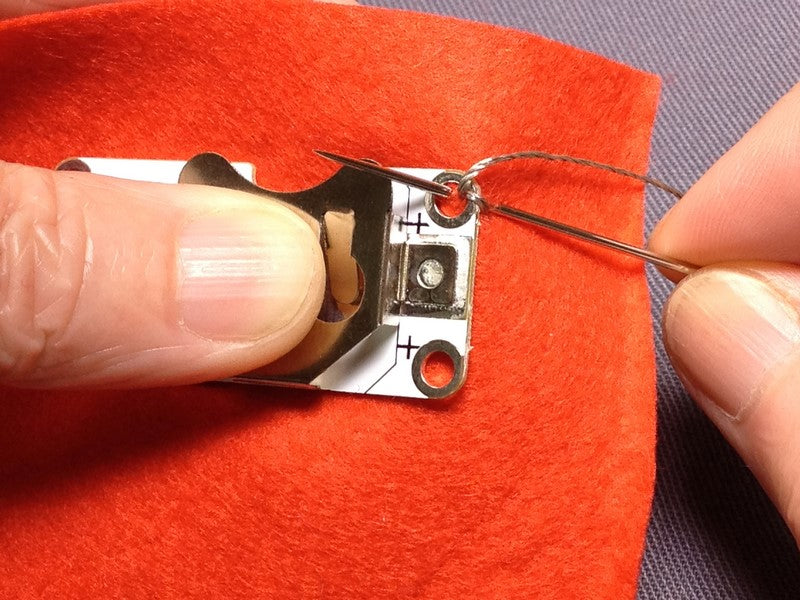
Oversewing Stitch
This stitch is used to hold the rings on LEDs and cell holders onto the fabric. Note: for information on threading the needle and whether to do a knot or not, see the separate tutorials. Bring your needle from the back of the fabric to the front and push it through the hole in the cell holder or LED. 
 Take the needle into the fabric by the side of the cell holder and bring it up through the hole again. This creates one oversewing stitch around the cell holder ring.
 Repeat this process 5 or 6 times or enough times to hold in the ring in place securely. Note that the stitches must be tight and clustered together (not spread out like spiders’ legs).

Running Stitch
This stitch is used to travel between different components in order to link them together. Bring the needle to the right side of the fabric. Insert the needle into the fabric about 0.5cm in front of where the thread is.  Take the needle along the back of the fabric about 0.5cm and then bring it up to the right side of the fabric. Take the needle in and out of the fabric leaving a gap in between.
 Repeat this process to create a line of stitches with gaps in between.
