Description
This project uses a basic e-textiles circuit but a popper has been added into the circuit to create a switch.
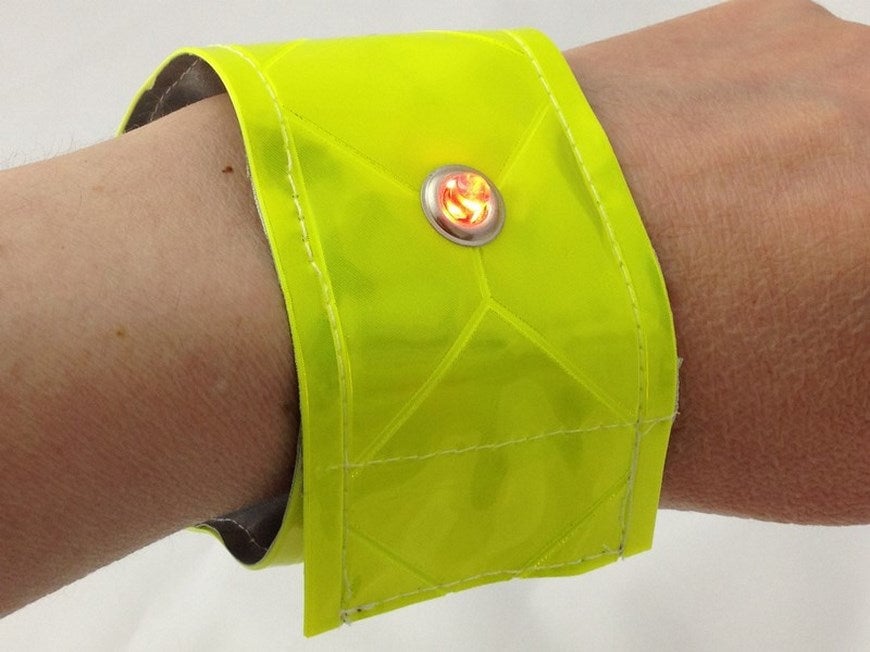
When the popper is open the circuit is broken and the LED will not light up. When the popper is closed the circuit is functional and the LED lights up.
In addition the LED is inserted through to the right side of the fabric through a metal eyelet. This means the light from the LED is very bright and the eyelet adds to the aesthetics of the item as well as strengthening the hole where the LED is pushed through the fabric.
The fabric used in this project doesn’t fray or rip easily but this technique is a good one to use on fabrics where cutting a hole to push the LED through would weaken the fabric or cause it to fray. The battery can be accessed for changing through an opening on the backing layer of the band. The arm band is made of high visibility reflective material with the LED light as an added safety feature. It can be used by cyclists, walkers or anyone wanting a high vis safety product. The design can be adapted into a wristband or full upper armband simply by changing the length.

Learn how to:
- Use a flashing LED.
- Insert an LED into a product through a metal eyelet.
- Create a circuit with a popper as an on / off switch.
Level of difficulty:
- Intermediate.
Parts list

In order to make your be seen be safe armband you will need the following:
- Cell holder.
- Cell battery.
- Red flashing 5mm LED.
- Conductive thread.
- Main fabric – reflective or fluorescent tape long enough to go round the wrist or upper arm plus 4cm for the overlap.
- Inner layer – Silver reflective tape (sew in type with fabric backing) the same length as the main fabric piece.
- Backing fabric – 2 lengths of silver reflective tape 2cm shorter than the main fabric size and half the width plus 0.5cm.
- Metal eyelet big enough for the LED to slot through.
- Metal popper (sew on type).
- Sewing thread.
You will also require the following equipment:
- Sewing machine.
- Large eye e-textile needle.
- Equipment needed to attach metal eyelet.
- Round nose pliers.

Step by Step guide to making a be seen be safe armband
Step 1

Attach the metal eyelet on the right side of the main fabric 6cm from the top edge.
You’ll need to refer to the instructions on the packet for how to do this, as kits differ.

Cut a hole in the inner layer fabric 6cm from the top.
Step 2

Use round nose pliers to twist the negative leg on the LED into a loop.

Push it flat and stitch the loop to the inner layer fabric using oversewing stitches and conductive thread.
Ensure the stitches are tight around the leg to ensure there isn’t a break in the circuit.
Step 3

Stitch small running stitches with the conductive thread to get to the negative side of the cell holder which should be positioned about 1cm below the LED.
Step 4

Use round nose pliers to twist the positive leg on the LED into a loop.
Push it flat and stitch the loop to the inner layer fabric using oversewing stitches.

Stitch small running stitches to get to the popper position 1cm from the bottom edge of the band.
Stitch one side of the popper in place using oversewing stitches.
Step 5

Using a new piece of thread oversew the positive side of the cell holder to the inner layer fabric.

Stitch running stitches to where the other side of the popper will be (2cm below top edge).
Leave the thread hanging loose while you prepare the next stage.

Lay the inner layer fabric on top of the main fabric with the two wrong sides facing each other.
Match the edges up and slot the LED through the metal eyelet.

Take the thread from the running stitches through the inner layer fabric and through the right side of the main fabric and stitch the popper into place on the right side of the main fabric.
If you need to hold the fabrics together to prevent movement use a glue stick in small amounts rather than pins.
Step 6
Use a sewing machine to stitch the 2 backing fabrics together along the long edge leaving a gap in the centre twice the length of the cell holder.
You may find this easier if you iron the seam open.

Lay the backing layer on top of the inner layer positioning it so that the gap lays over the cell holder and the top edge of the fabric sits just below the popper.
Match up all of the edges carefully.

Stitch all layers of fabric together using a sewing machine.
Use a zip foot to allow you to get close to the edge of the fabric.
Download a pdf version of this page here ![]()
This tutorial was produced for Kitronik by Julie Boyd who is a specialist in e-textiles design.