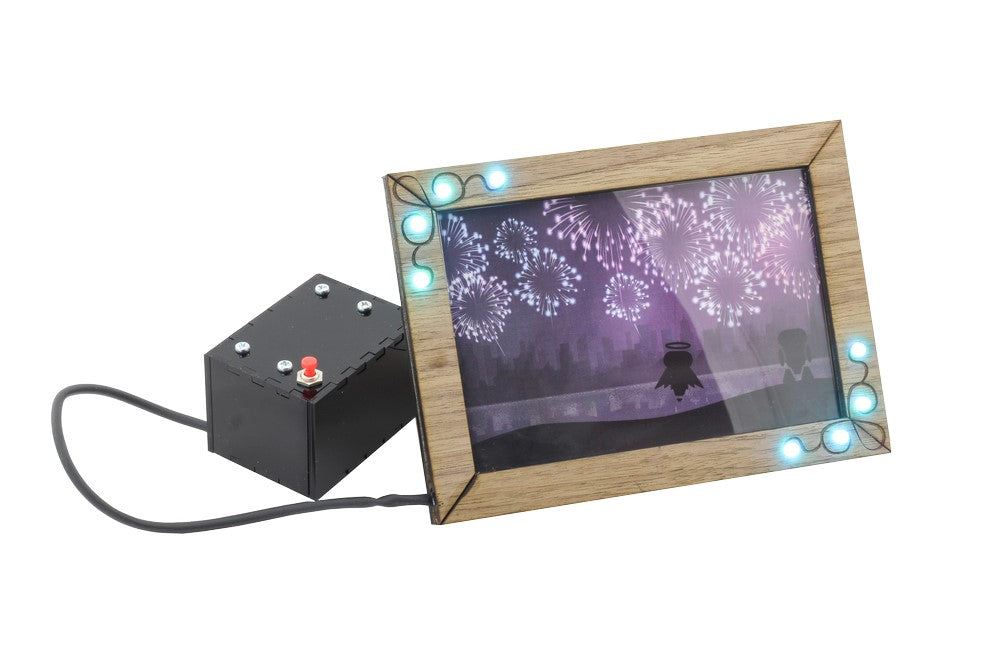
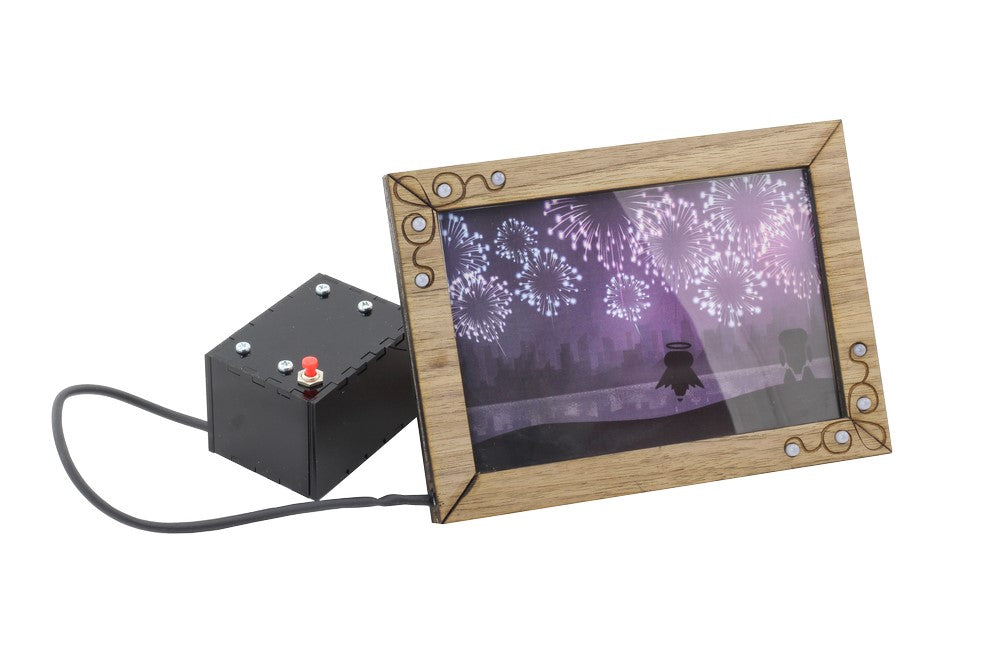
Emma shows you how to make a custom LED picture frame, using our LED picture frame kit. Although there is quite a sizable parts list, the step by step instructions should make it a breeze.
As always, the DXF file is freely downloadable and can be used as is, or tweaked to suit your needs. Let’s get stuck in!
You Will need:
- Kitronik picture frame kit.
- Laser cutter.
- This DXF.
Frame Parts:
- A 3mm material of your choice for the frame – we used American Walnut Veneered MDF
- 2mm Laser Compatible MDF
- 4mm Laser Compatible MDF
- 0.8mm Clear Polypropylene
- 8 x 5mm LEDs of your choice (We used 3527)
- Lengths of red and black wire
- A hinge with appropriate screws for the stand.
- 2 x 6mm M3 Pan Head Screws
Electronics enclosure:
- 3mm Black Acrylic
- 4 x 12mm M3 Pan Head Screws
- 4 x M3 Hex Nuts
- 4 x 6mm Plastic Spacers
- A length of heat shrink tubing
- 3 x AA Batteries
How To Make A Custom LED Picture Frame:
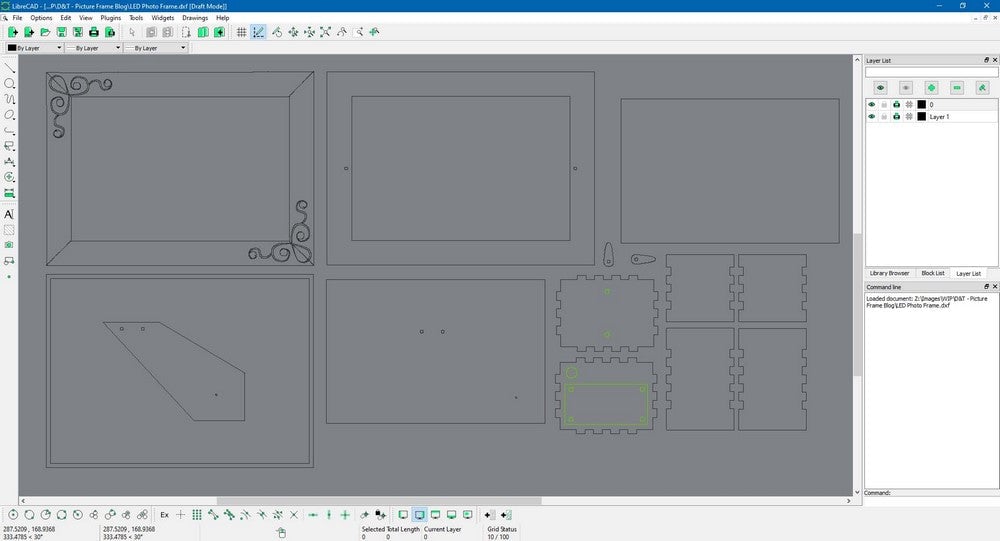
Once you’ve got all of the parts/materials you’ll need, grab the DXF. You can either go straight to your laser cutter, or load it into your favourite CAD software for some tweaking.
Step 1 To the laser cutter:
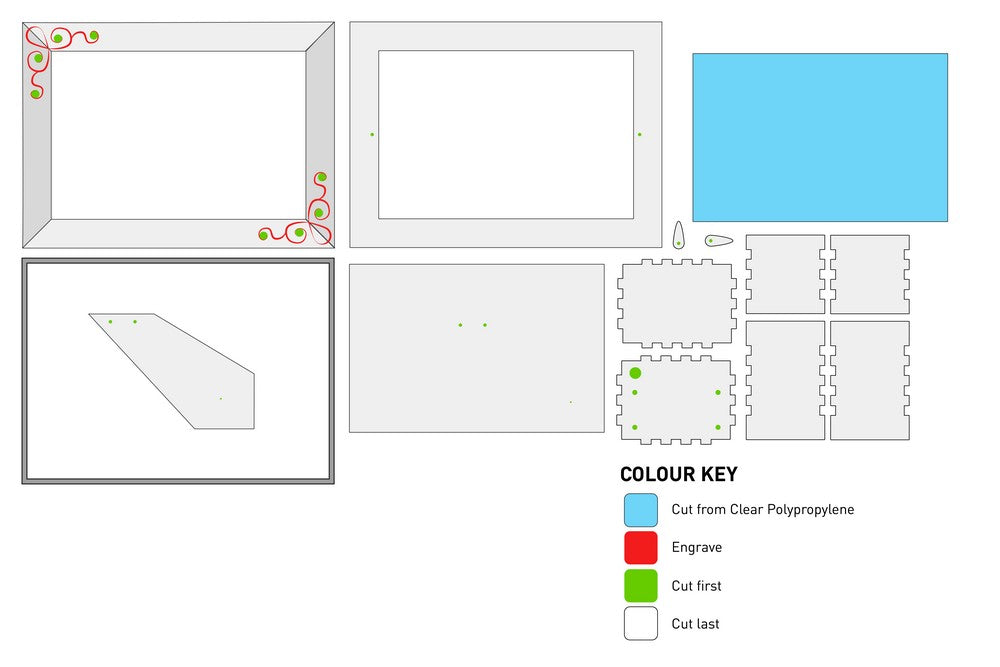
Cut out the DXF, using the above image as a guide. The parts that you want to keep are shaded in. Cut the Thicker frame pieces from your veneered MDF, the thin spacer rectangles from 2mm MDF, the back and stand from 5mm MDF, the blue rectangle from clear polypropylene, the small tabs from the same veneered material as the frame, and the small enclosure from 3mm black acrylic.
Step 2 Soldering the LEDs:
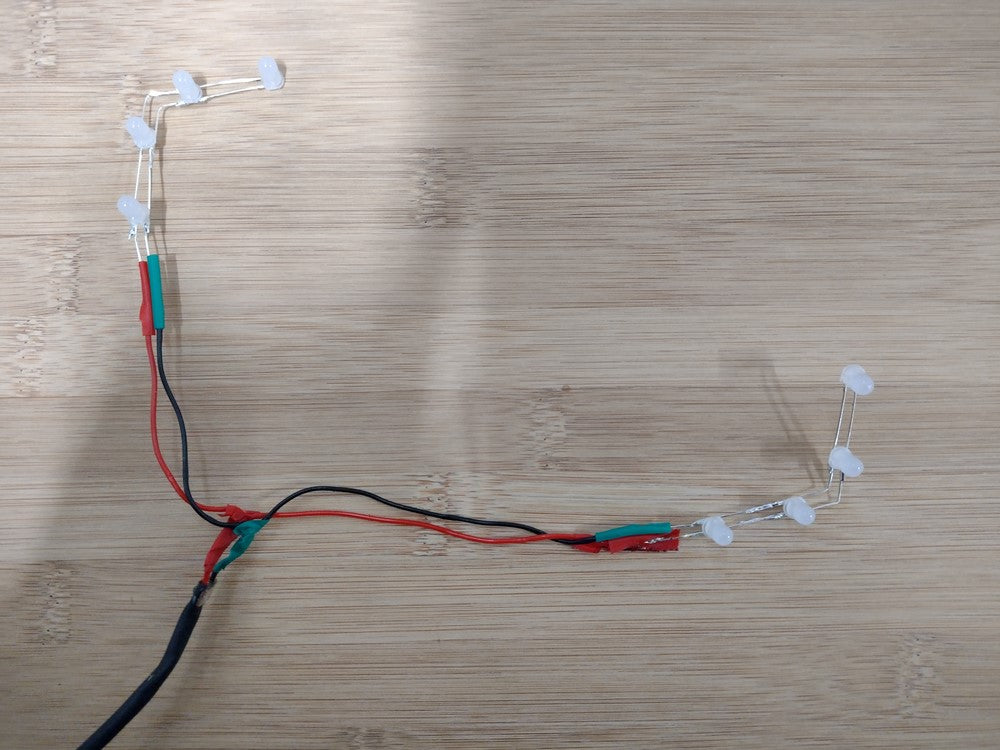
Solder together your LEDs in carefully in right-angled groups of four, positive leg to positive leg and negative leg to negative leg, so they are in parallel. Make sure to account for the shape of the frame and make sure the LEDs fit out of the holes in the frame. Attach one colour of wire (we used red) to the positive side of each set, and another (we used black) to the negative. Then connect each of the same colour together.
Step 3 Assembling and mounting the kit:

Assemble your kit using the kit instructions, and mount it into the enclosure as per the above image:
Step 4 Assembling the back:
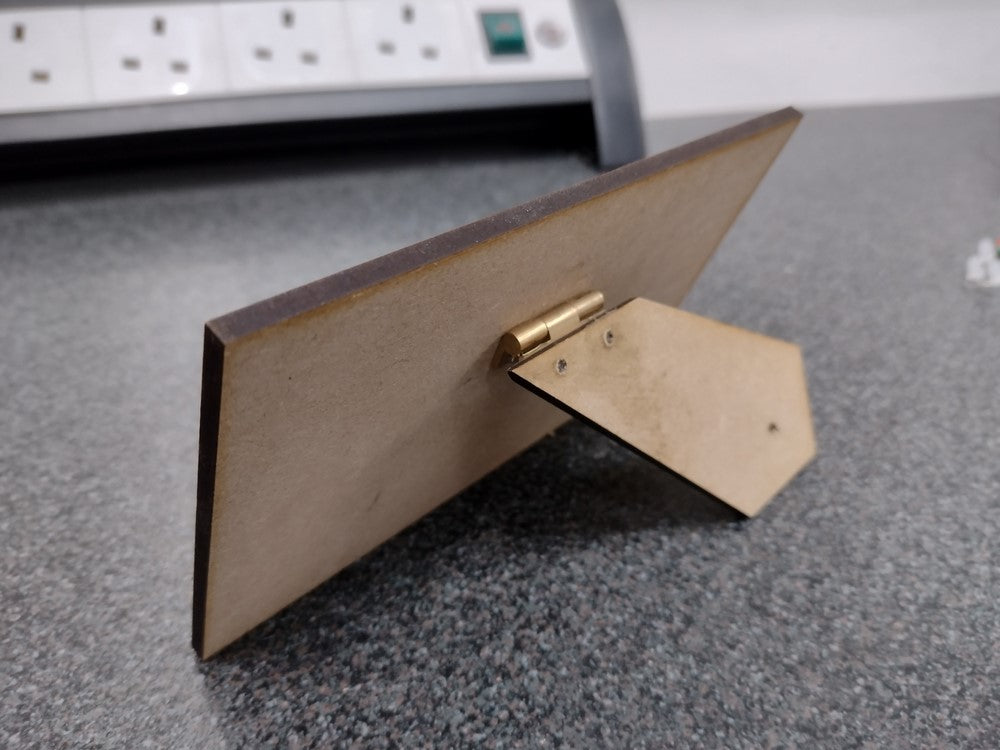
Assemble the back by attaching the stand to the back panel. This can be done in any way you feel is appropriate.
Step 5 Assembling the frame:
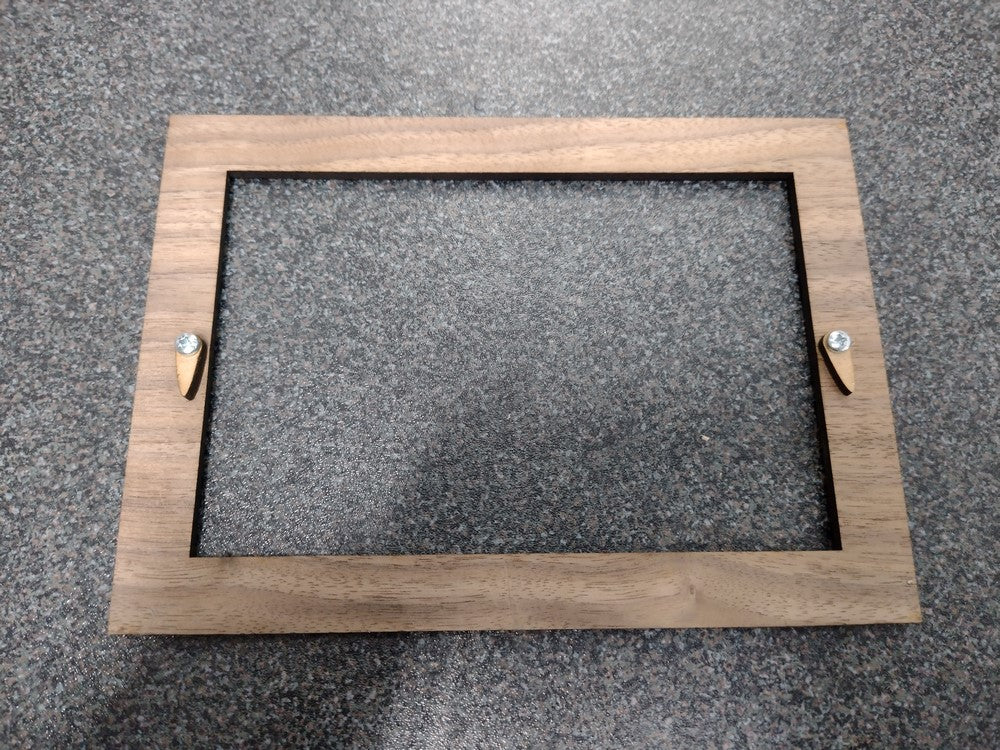
Assemble the back of the frame as shown, screwing the tabs into place. Glue the spacer to the inside of this piece.
Step 6 Final assembly:
Make an electronics sandwich! Stick together the four front pieces, allow to dry, and push the LEDs into the holes. Find where the wire will exit and cut a little piece out of the MDF spacer accordingly. Now glue the front, LEDs still inserted, down on to the spacer. Clamp until dry, slot in your Polypropylene window and photo, pop on the back and you’re done!
One of the best sources of new Kitronik information is our Newsletter. To make sure you always know what’s going on, sign up for our newsletter here! The ext one’s a good one, don’t miss it!