
With the next excuse to dress up (Halloween) rapidly approaching, we can’t help but start to plan our costumes! Here is the first inspiration we’re sharing with you: HIPS makes for great heat-formed and laser cut costume parts!
Here Emma used this hardy material to make a mask, but you could use this as a base for cat ears, pieces of armour or even wings! Read on to learn how to make a mask from High Impact Polystyrene!
We Have Used:
- This DXF
- HIPs Sheet (Black)
- Laser Cutter
- Heat Gun, Strip Heater or other heating implement.
- A ribbon or elastic that will reach comfortably around your head and tie.
Step 1 – To the laser cutter:
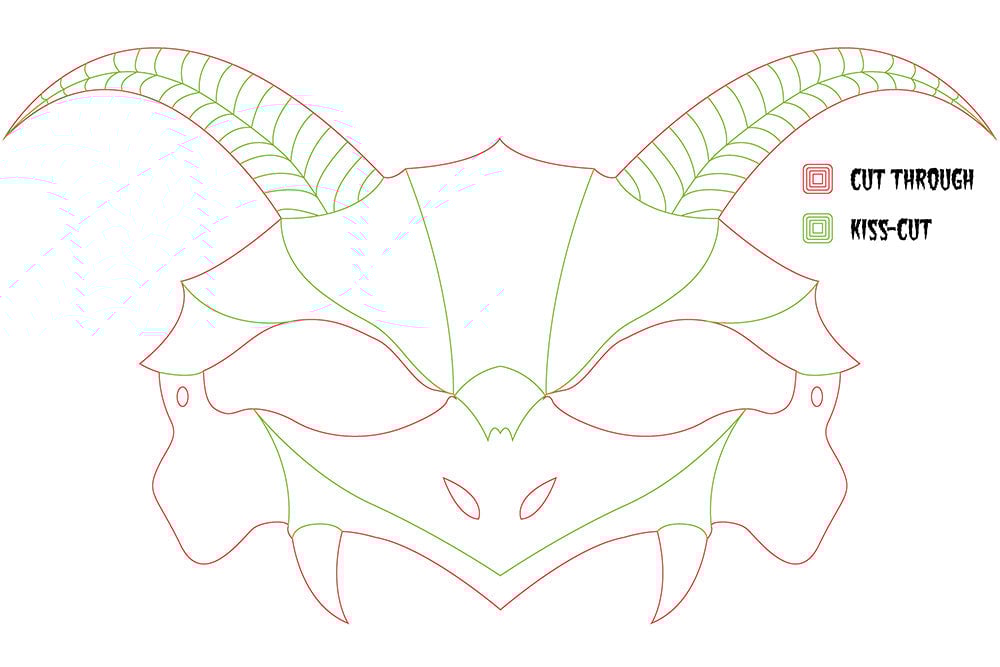
Load the DXF onto your laser cutter software. Set the laser to cut and kiss-cut (cut part-way) the HIPs sheet as per the above diagram.
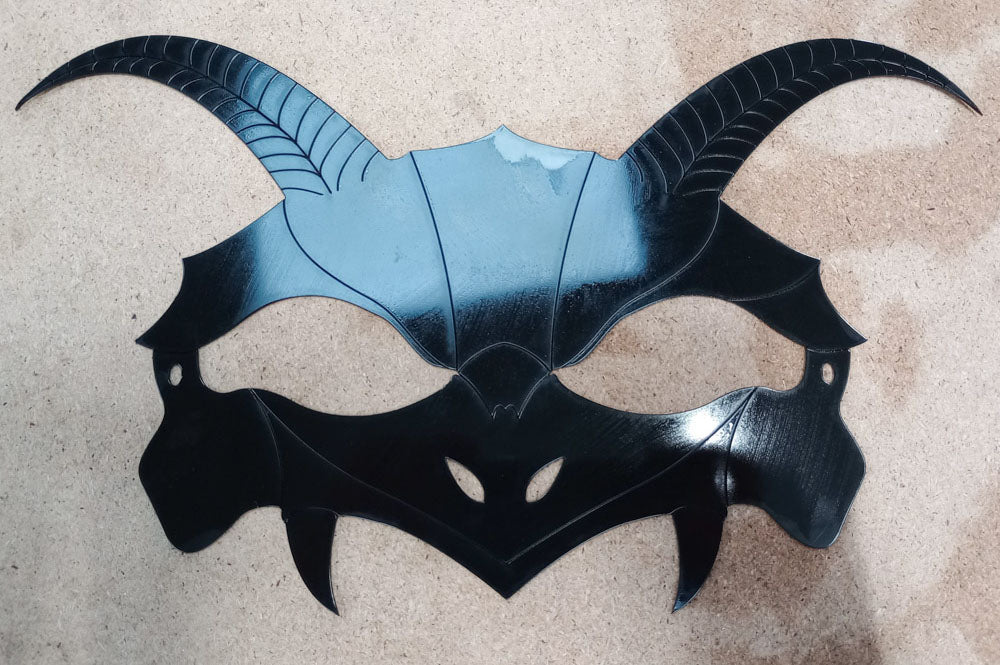
Then, laser cut away for the above result!
Step 2 – Heat forming:
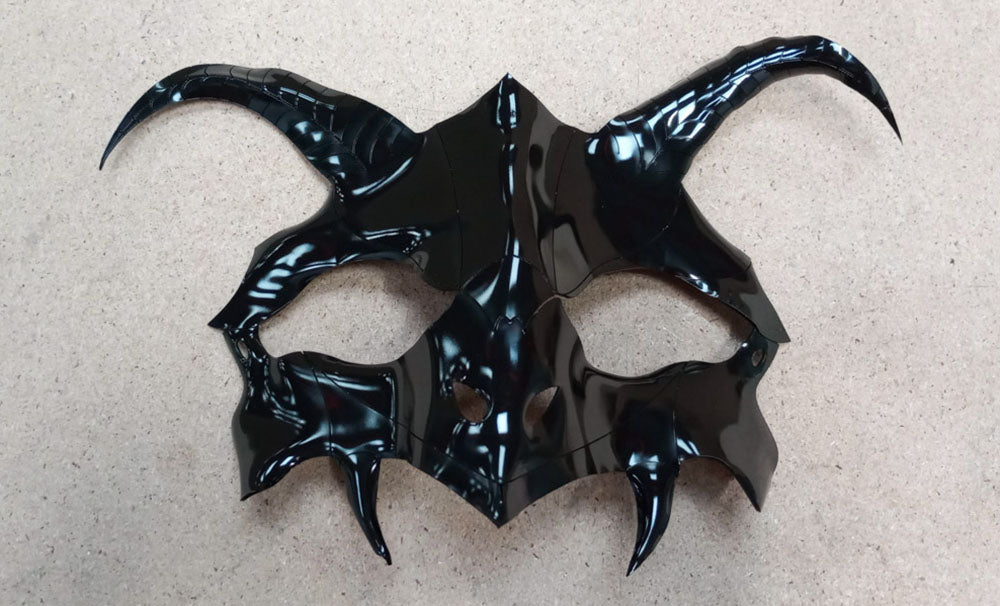
Once your Mask is cut out, use a heat gun or similar tool to heat select areas of the mask and bend them to your liking. An easy way to get the shapes you want is to bend gently along the scored (kiss-cut) lines. If free-forming with the heat gun, you can achieve more organic shapes, though using a form will make it easier and safer to produce a more precise shape.
- NOTE: This material, if over-heated and melted, may stick to things and stretch out, leaving thinner deformed areas. It may also curl at the edges in this case.
- WARNING: Be careful! The HIPs, especially black HIPs, will retain heat for a long time and it is very easy to burn yourself with a heat gun. Please wear gloves and avoid directly handling where possible.
Step 3 – Elastic headband:
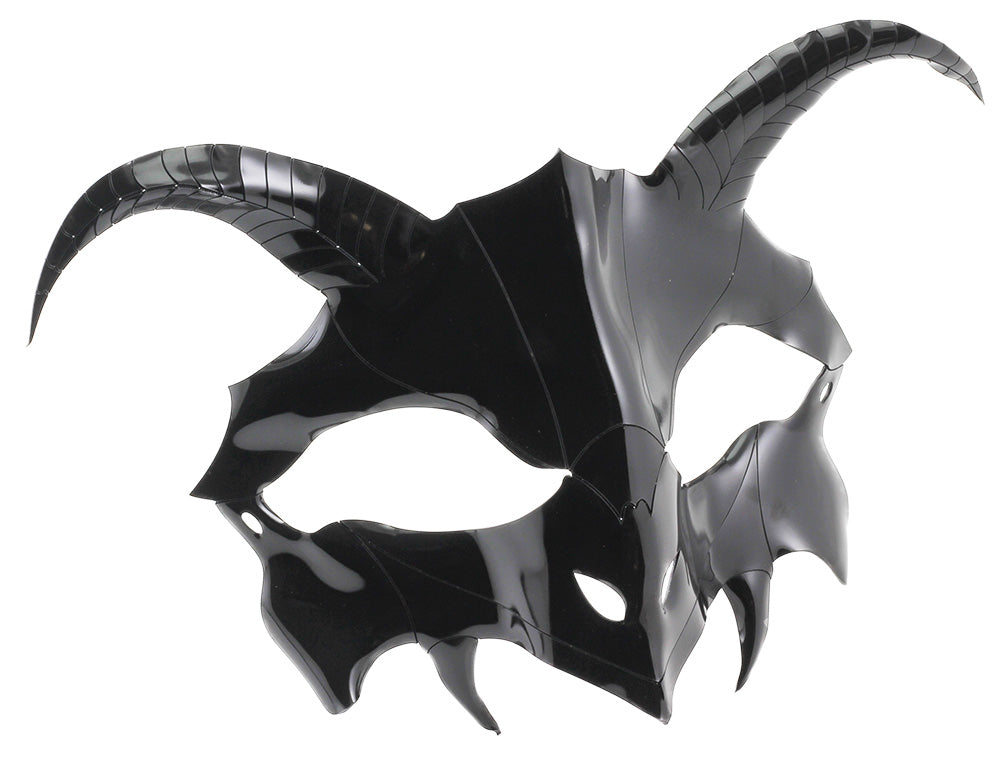
Use a ribbon of your choice, or a length of elastic, and tie it through the holes at the sides of the mask. Then you’re ready to get spooky!
Make sure you don’t miss out on other news or free resources by signing up for our newsletter here.