After so many clock face makes, we thought it was time to show you how to customise your clock hands! This make requires the use of the bottom of the second hand as a base for your customised versions, so it will require either one whole new clock movement set (short spindle or standard spindle), or some of our separate sets of hands (short or standard) if you already have a clock movement you wish to use.
This is an opportunity to really get creative with this – do you want wiggly clock hands? Gothic style like those on Big Ben’s clock face? Hands with words on them? The world is your oyster! Of course, if you’d like to use some of the designs we’ve provided here, feel free!
*Price per student calculated based on exVAT prices and based on a tray of 100 short-spindle Quartz Clock Mechanisms and fitting 12 designs on one 457mm x 254mm Black HIPS Sheet. Background Image by Laura Ockel on Unsplash.
This Make Covers:
What did we use?
- Quartz Clock Movement (2801)
- OR Short Spindle Quartz Clock Movement (2810)
- OR Standard Hands and Fixings for Quartz Clock Movement (2817)
- OR Short Hands for Quartz Clock Movement (2814)
- Any thin, light, rigid material of your choice, such as:
- Superglue
- A Laser Cutter
- This design DXF.
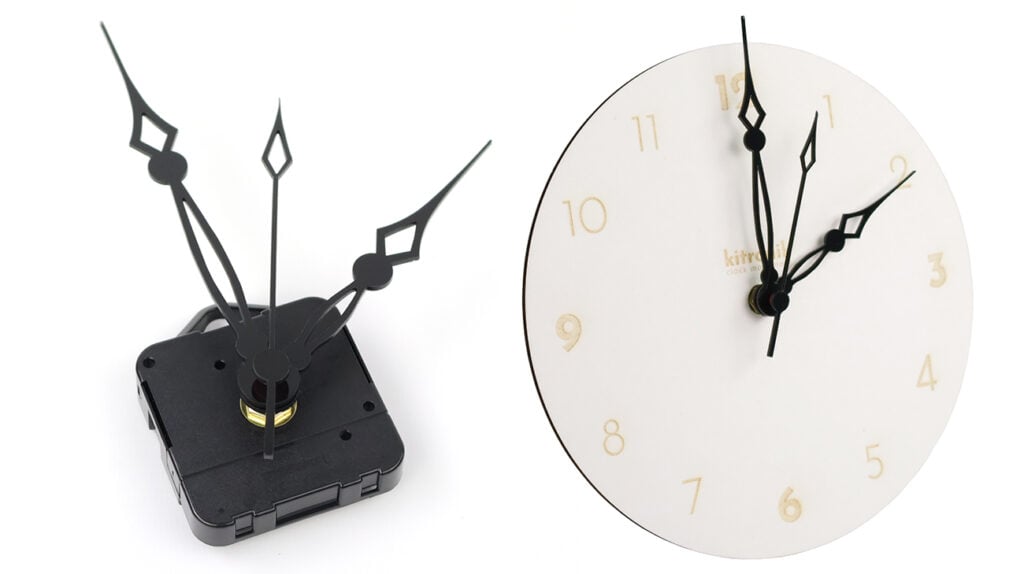
Step 1 – Design your clock hands, or check out ours!
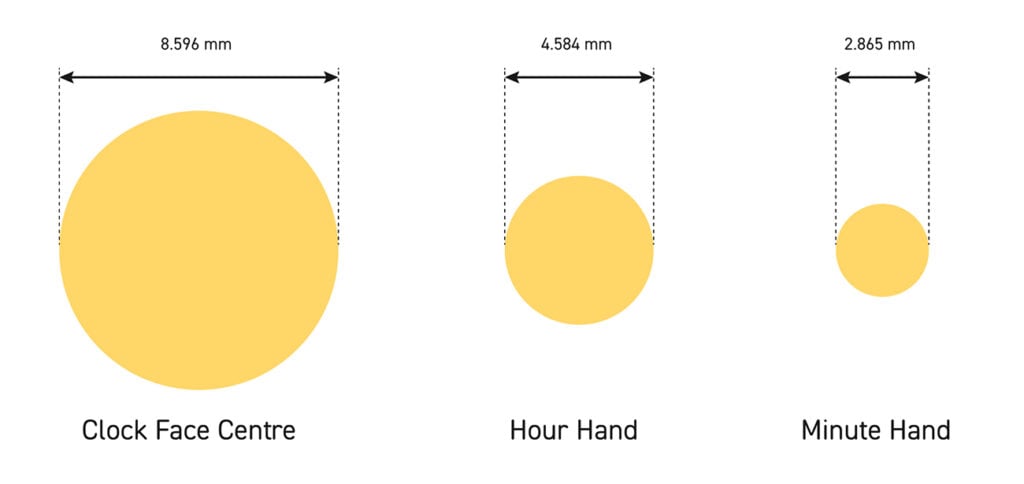
This DXF contains the designs for this project, including the hole sizes required for the hands to fit the spindle. The hole sizes are as follows:
Here are the designs provided in the file, too:
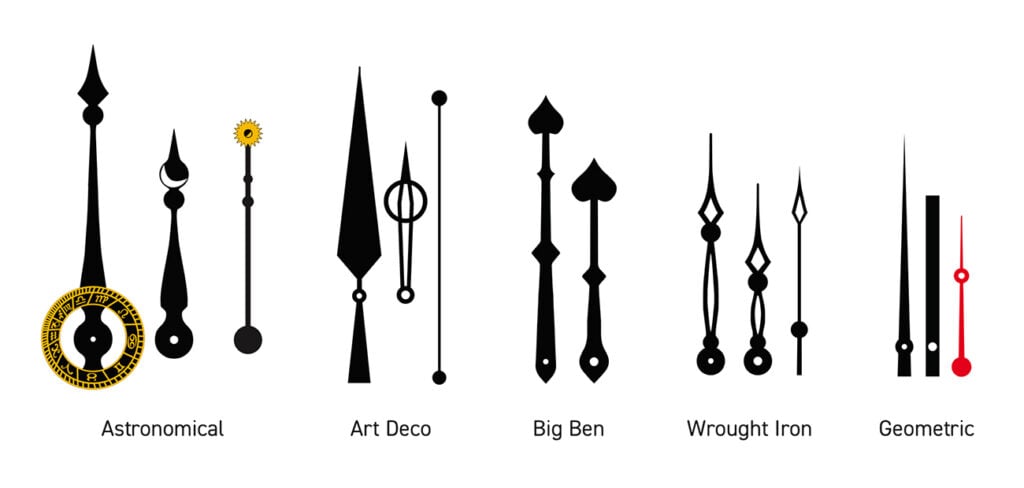
One notable example above is the astronomical clock hands, based on the Prague Orloj – an astronomical clock on the Old Town Hall in Prague, of which the earliest parts can be dated back to 1410. Another is the third set, based on the clock hands on Elizabeth Tower, the clock tower housing the bell “Big Ben” at the Houses of Parliament in London. Why not research some clock towers yourself for inspiration?
Step 2 – Laser cut the design!
Once you’ve designed your own or picked out one of the included ones, cut out the design. You don’t necessarily have to use a laser cutter, but we find it useful in achieving the exact dimensions required in the holes in the hands so that they will friction fit.

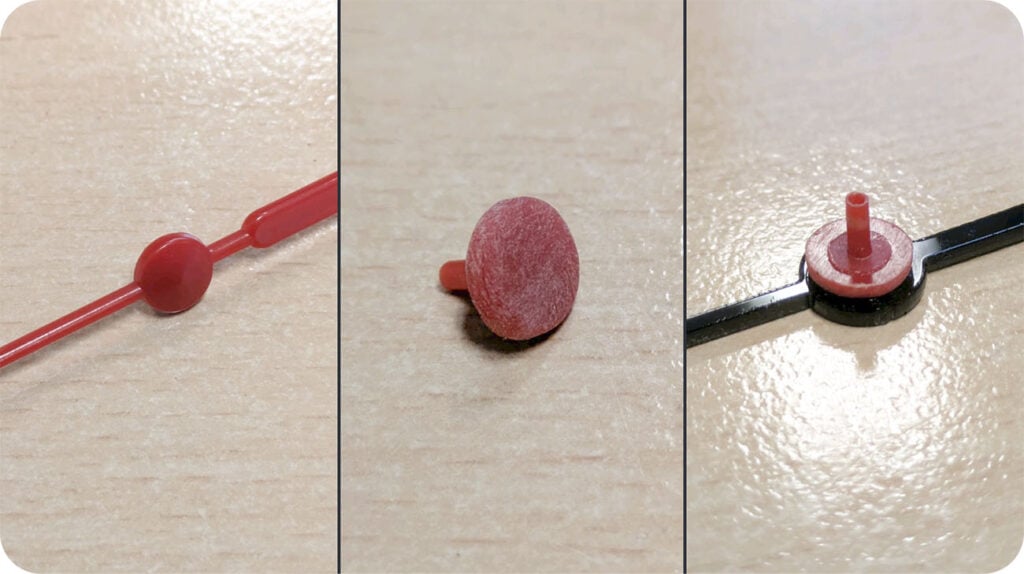
Step 3 – Prepare the second hand.
The second hand needs to be mounted onto the central peg from the original clock hands, and the easiest way to do this is to cut the hand off of the peg and sand the top flat before glueing your custom hand to the peg.
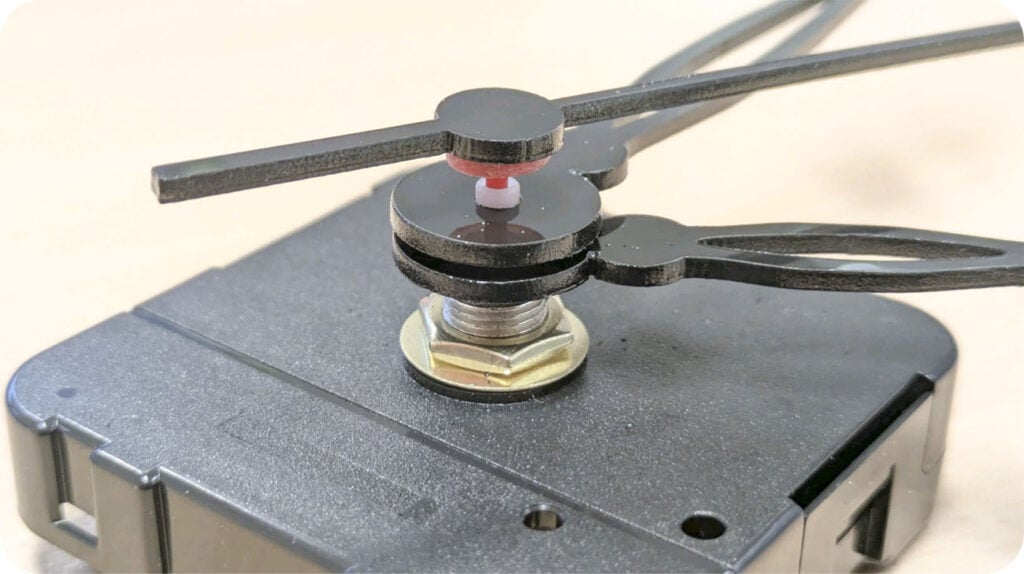
Step 4 – Stack your hands on the spindle.
This is a good time to see how your hands fit together and go back to the drawing board if they are unwieldy. Some common problems to encounter when designing your clock hands include:
- The hands are too thick and do not fit together properly.
- The hands are too long, and sag at the ends, causing them to interact.
- The hands do not suit your design.
It’s an interesting design challenge, but because the parts are relatively small and easy To produce, following an iterative design process is nice and simple.
Step 5 – You’re finished!
