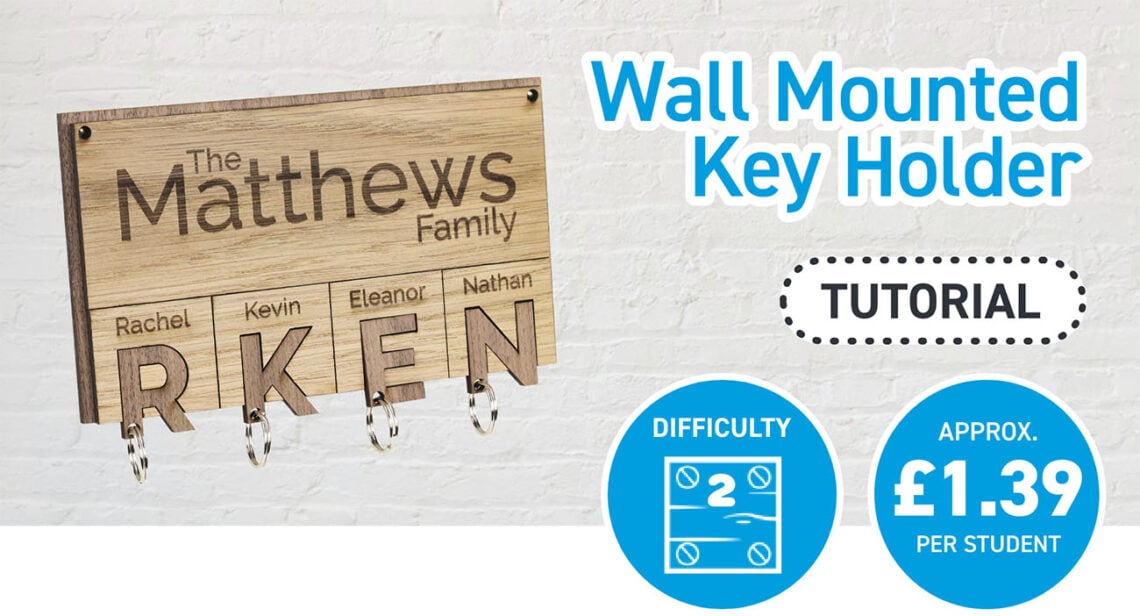
Practical and beautiful, there is a lot of room in the design of something like a key holder to consider and learn about balancing form and function. In the files for this make Emma has provided three different examples, though she only made one of them, to give you a little extra inspiration!
*Price per student calculated based on exVAT prices for 30 students producing the example design pictured, and using a total of 3 sheets of Oak Veneered MDF and 4 sheets of Walnut Veneered MDF for the whole group. Background Image by Joe Woods on Unsplash
This Make Covers:

What did we use?
- Oak Veneered MDF 600mm x 400mm (3219)
- Walnut Veneered MDF 600mm x 400mm (3280)
- Split Key Ring Attachment (2291)
- A Laser Cutter
- PVA Glue
- Wall Fixings
- This DXF File

Step 1 – Check out our designs!
This DXF contains the designs for this project, plus two extra designs. Load them up and use them either for inspiration or use them directly! We have shown you the three designs below – the one we have gone on to make is on the left, and holds initial keyrings in place using a negative version of the initial.
The other two are a pegboard design made with holes to hold our 4mm diameter dowel, which could be drilled into to create a hole for a keyring, and a vintage-style plaque version with hooks made to be cut from either 6mm thick material or two 3mm pieces that are glued together.
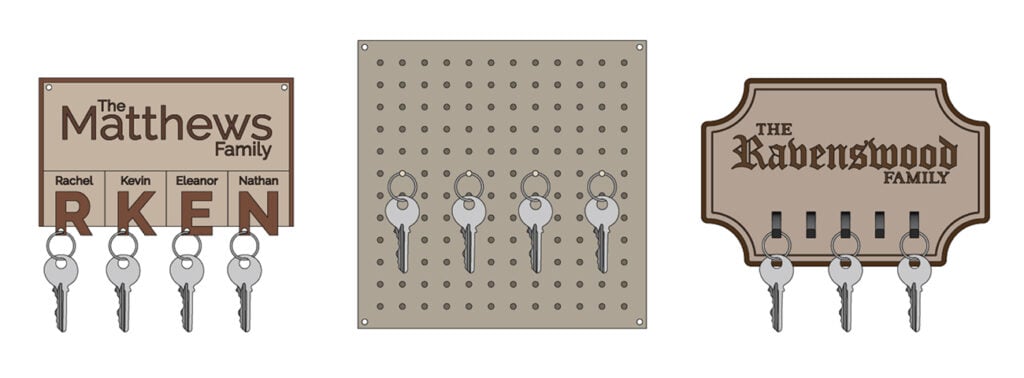
Here is how the designs will look in the design file as downloaded:

Step 2 – Laser cut the design!
Once you’ve designed your own or picked out one of the included ones, cut out the design. We have used two different types of Veneered MDF – Oak and Walnut – to give the key holder some contrast.
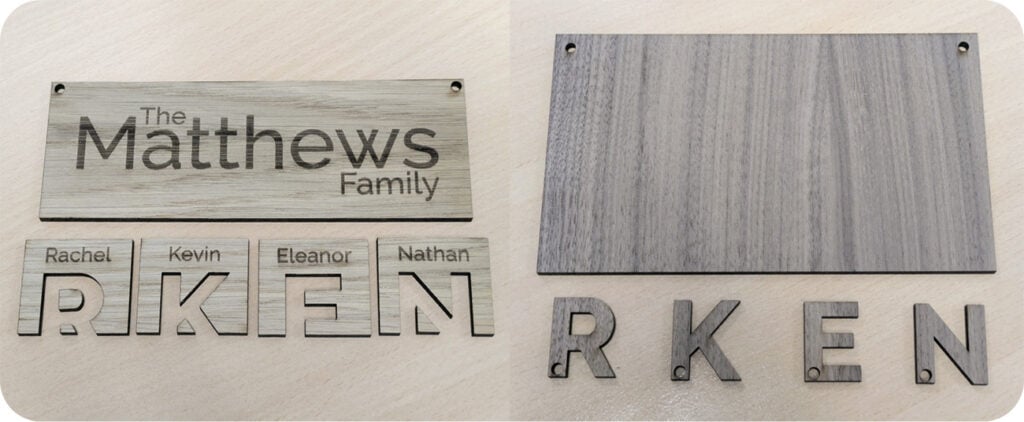
Step 3 – Glue the Oak pieces to the Walnut pieces.
Excluding the Walnut initials (these are the keyrings), use PVA glue to affix the layers together as shown, making sure that the small parts surrounding the initials are precisely placed so that they fit the initials.
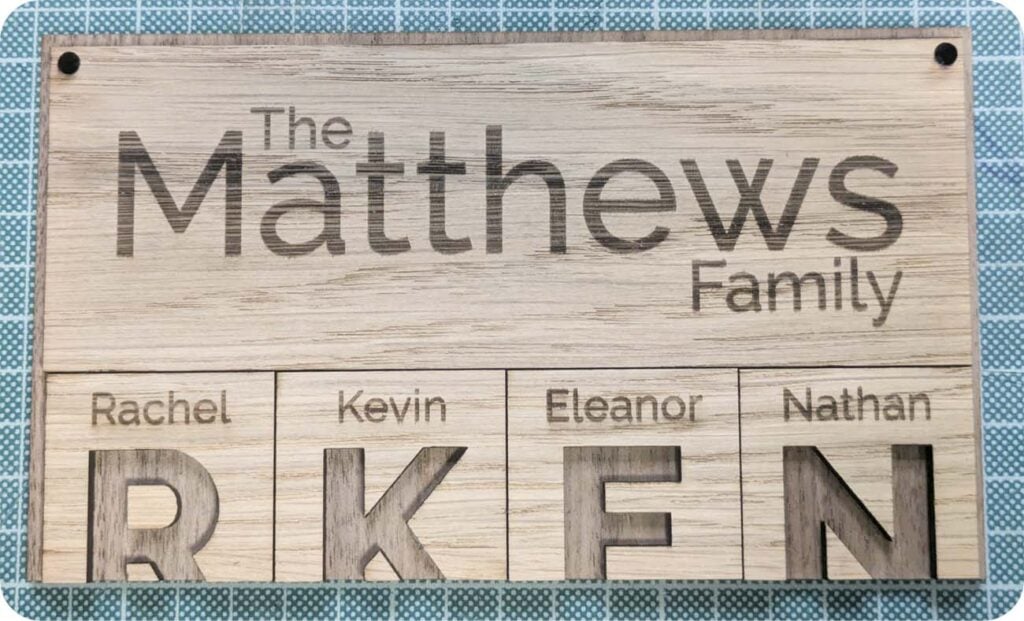
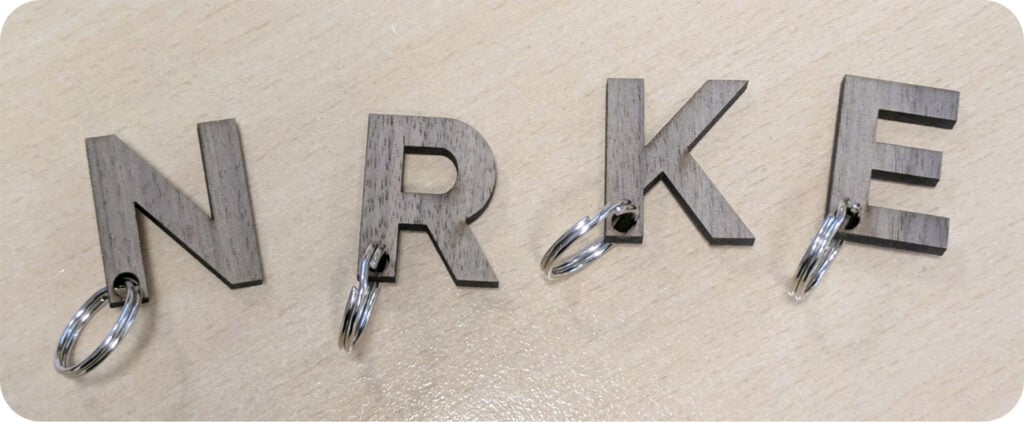
Step 4 – Attach the split rings to the initials.
Construct the keyrings by threading the split rings through the holes in the initials.
Step 5 – Mount the design to the wall, and you’re done!
Attach the keyrings to your keys, and now every member of the family has their own place to store them. No more lost keys!
