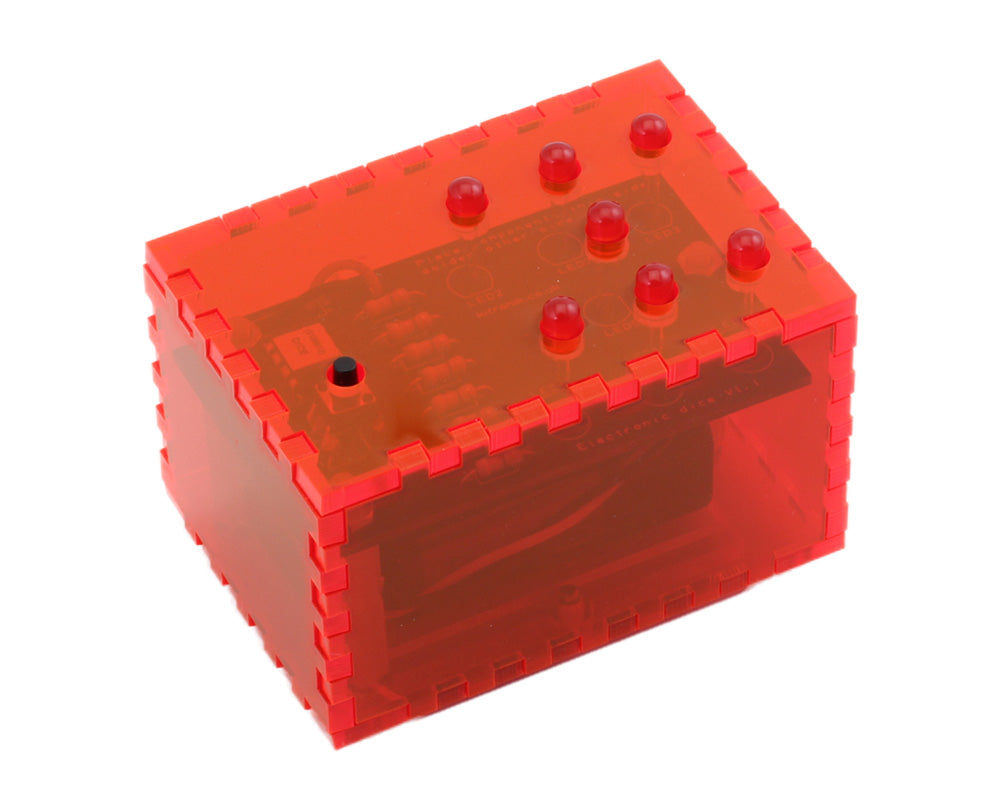
A lot of our Project Kits are bare boards – which can be an attractive look, but this leaves the board unprotected. That’s why transparent enclosures are a great way of presenting your kit – you can see the inside workings and protect them at the same time! Follow along with Emma and learn how to make a simple yet effective enclosure for the Kitronik Dice Kit.
Once I had made this I realised this was incredibly similar to a dice kit enclosure made by a student at Hardenhuish School that we were sent in 2014 – shout out to them for beating me to it by a whole 8 years!
We Used:
- Kitronik Dice Kit.
- 3mm Fluorescent Red Perspex®.
- 3 x 10mm M3 Plastic Spacer.
- 3 x 10mm M3 Plastic Standoff.
- 3 x Plastic M3 Hex Nuts.
- 3 x M3 Hex nuts.
- 3 x 30mm M3 Pan Head Screws.
- 2 x 6mm M3 Pan Head Screws.
- 1 x PP3 9V Battery.
- A Laser Cutter.
- This DXF File.
Step 1 – Putting The Kit Together:
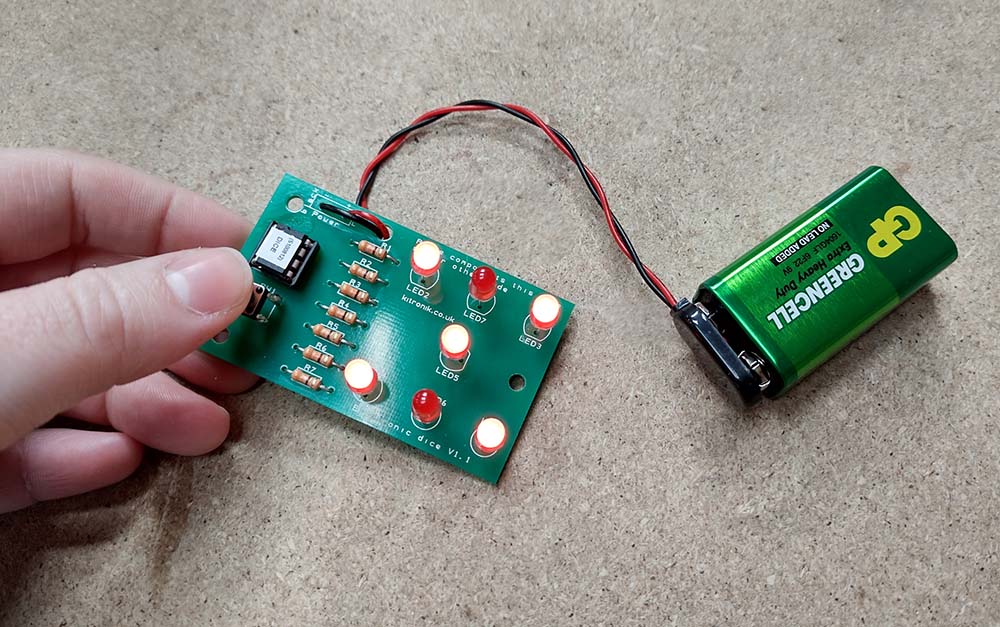
Put together the kit! Make sure to leave the LEDs on long legs so that they stick through the enclosure when it’s put together. Instead of the included battery pack, I have used a single PP3 9V Battery.
Step 2 – To The Laser Cutter:
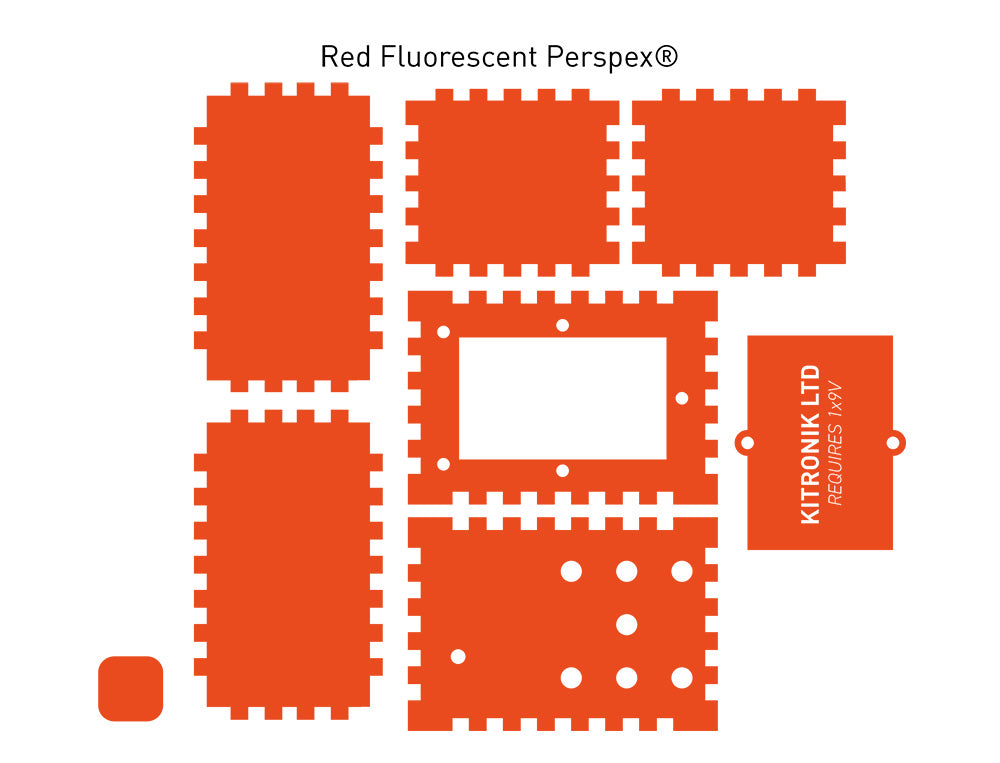
Open our DXF and cut everything except the words on the battery door, which you should engrave. These words can be changed to anything you like.
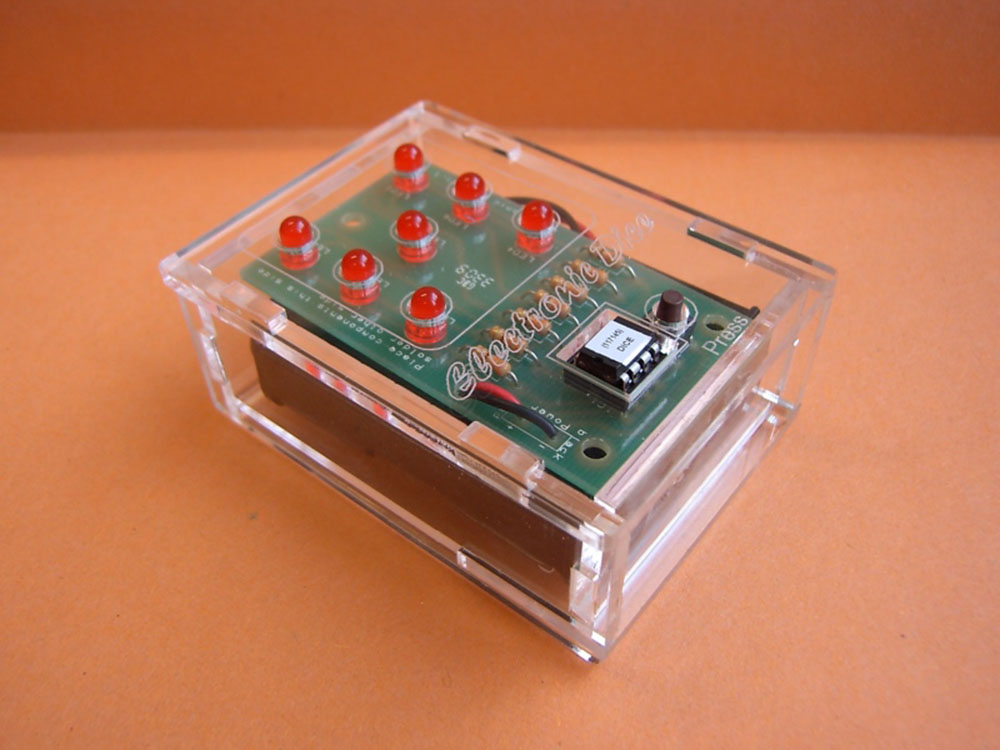
Step 3 – Assembling The Enclosure:
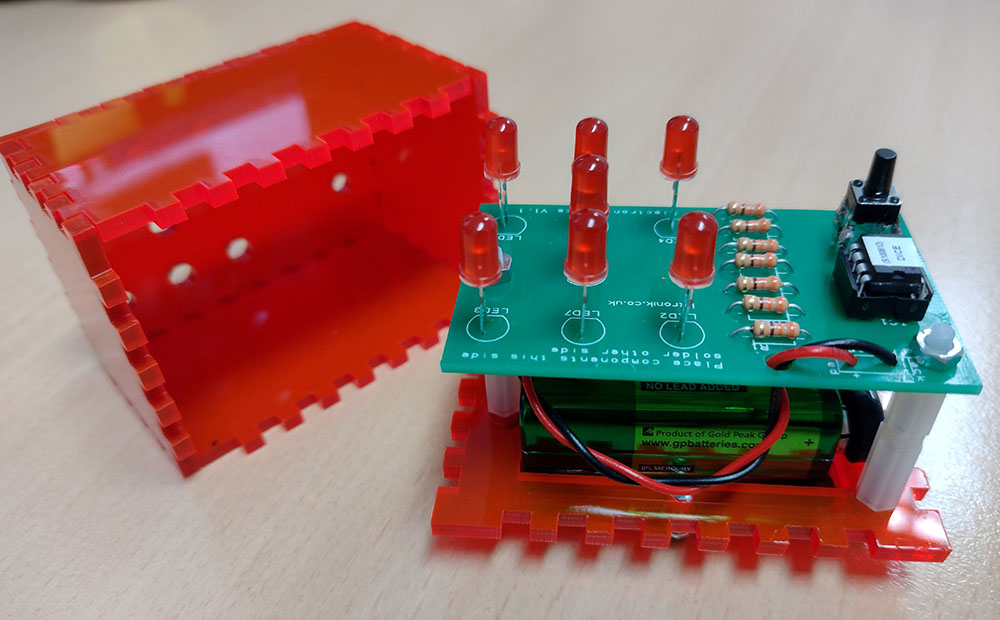
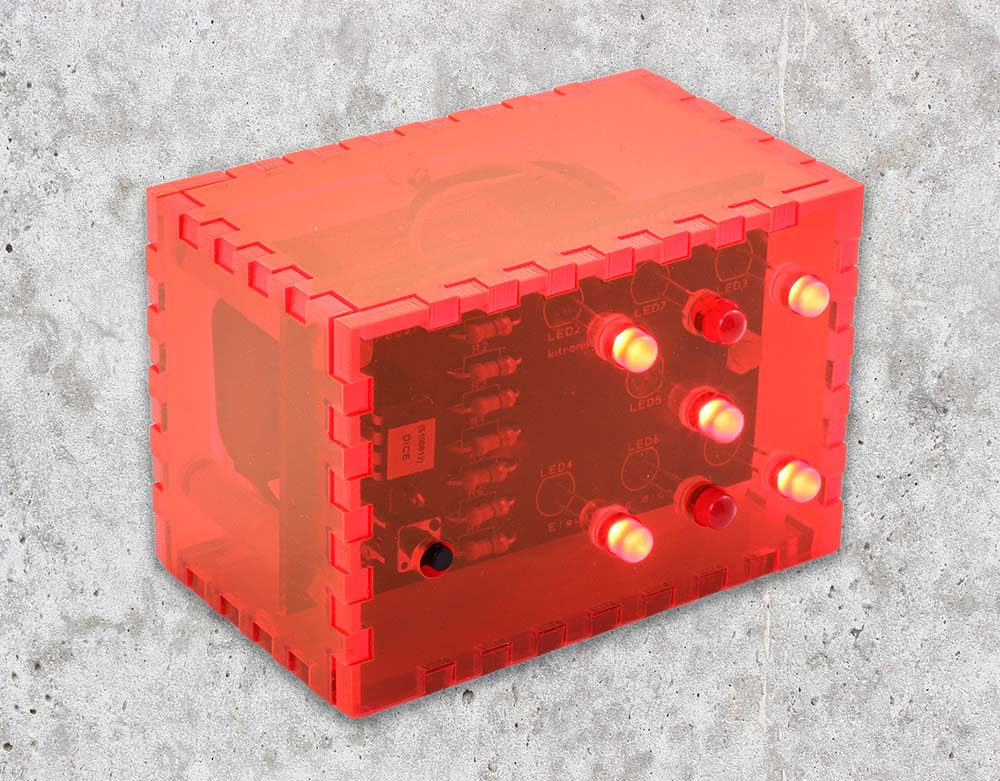
The finger joints should be friction fit, so this is a glue-free make! As per the image below, assemble the kit and build the enclosure around it, using the standoffs to hold the PCB up to the top of the enclosure.
Step 4 – Attaching The Back plate:
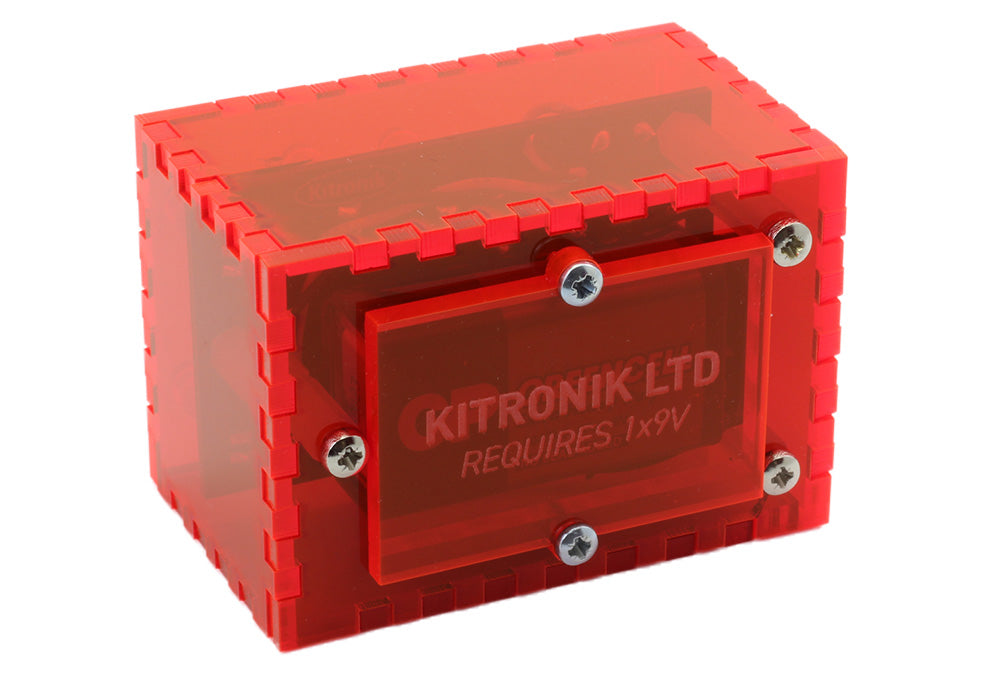
Just screw on the plate and you’re done! You should now have something that looks like;
Keep yourself in the loop and sign up for our newsletter here!