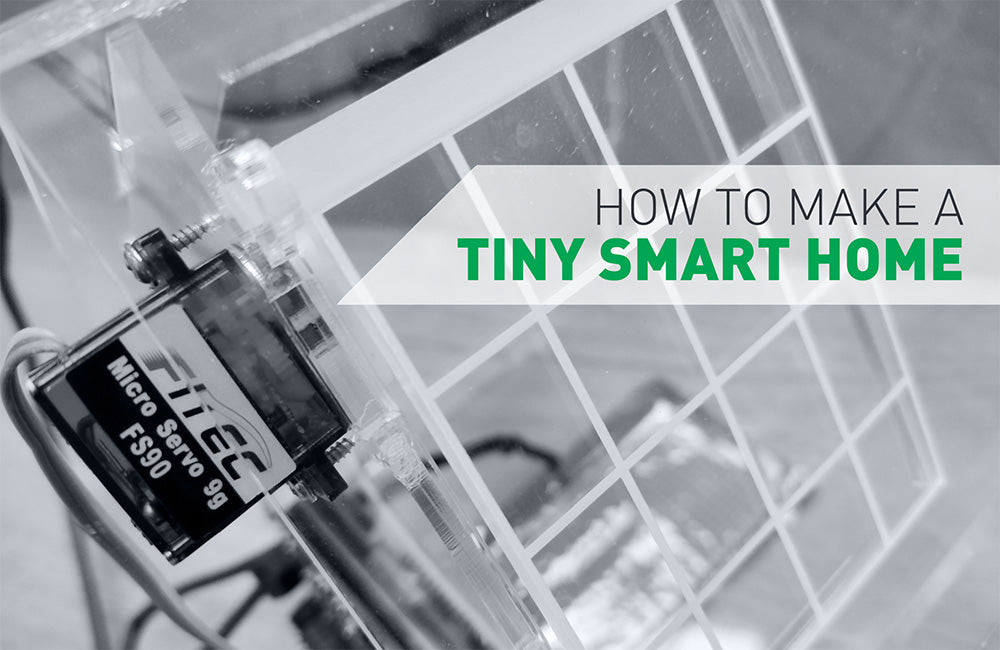
The last Tech Talk we did covered the Air Quality Datalogging Board for Raspberry Pi Pico, and Emma and Alasdair collaborated on a project to show off its capabilities: A tiny smart home! In this blog we are going to show you how to make your own smart house – just follow along!
This make is a demonstration of the sort of processes that go into smart home automation in the real world. As an entry to understanding the wider picture, this tiny smart home shows you how several common aspects of smart environmental control work. Featured is a readout of environmental conditions, light colour control, automatic heating control with a heating pad and a window, and also a potential green twist with the option of powering the whole setup with a solar cell! Let’s do this!
We Have Used:
- 1 x Kitronik Air Quality Datalogging Board for Raspberry Pi Pico.
- 1 x 3mm Clear Perspex® (600mmx400mm).
- 1 x ZIP Stick.
- 1 x Servo Extension Lead (For ZIP Stick).
- 1 x 180 degree Servo.
- 1 x Solar Cell kit with 3 x rechargeable batteries included.
- 1 x Heating Pad.
- Extra wire to extend wires from components. Heat shrink for the wires, if you want to tidy them up.
- A Laser Cutter.
- This DXF.
Step 1 – To The Laser Cutter:
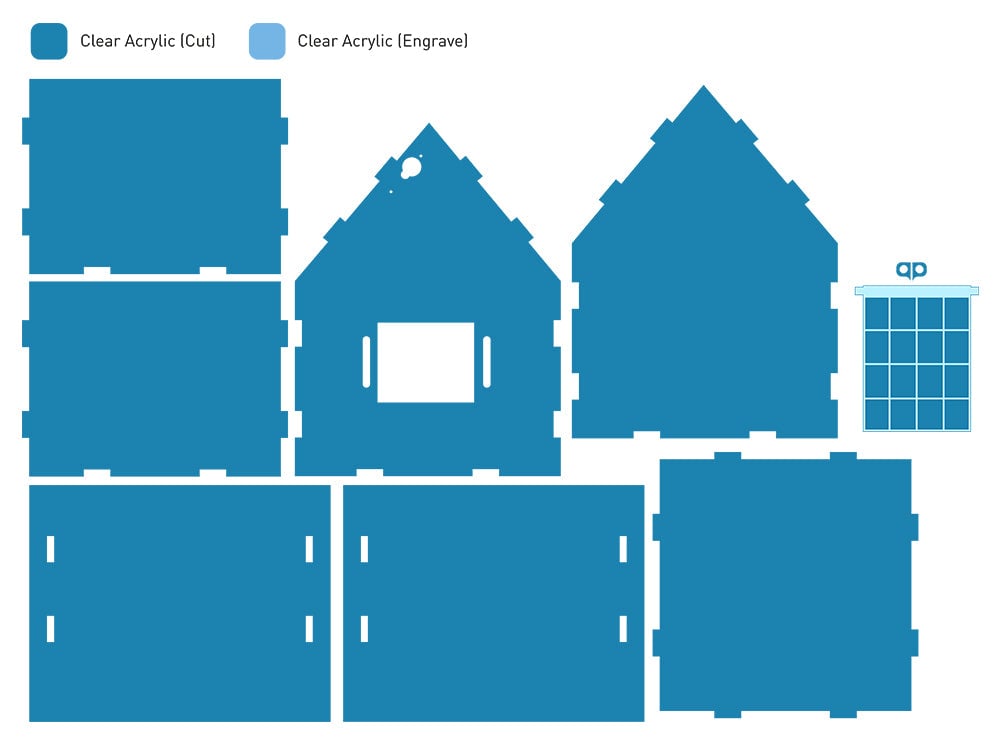
Download our DXF and cut the design out in any 3mm clear acrylic. This is a simple design, just a house shape with holes for the board and wires on one side, and a window. Just pop it on your laser cutter software and engrave the window design, then cut the rest of the lines!
Step 2 – Assembling The House & Components:
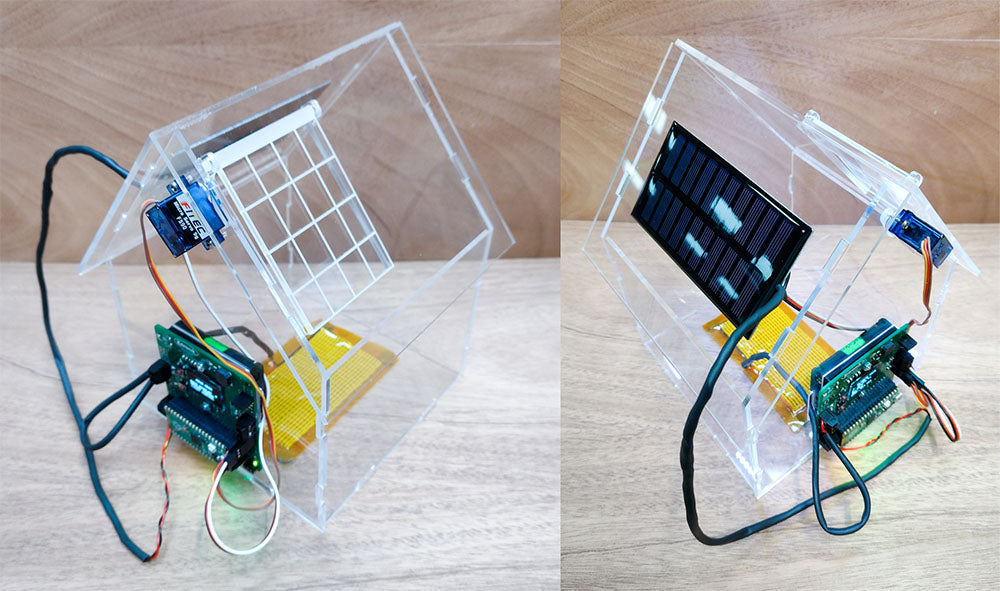
Assemble the components as shown in the image above inside the house shape.
NOTE: To fit the window, you’ll need to glue the two hinges in place on the roof before assembling the rest of the house. The easiest way to do this is to have them in place on the tabs on the top of the window, then glue the flat sides to the roof. This ensures the hinges are in the right place and is easier than trying to fit the windows in later.
Step 3 – The Code:
Alasdair has provided some code and explained it all below! The MicroPython code for this project, ‘smart_house_example.py’, can be found on the Kitronik GitHub page for the Pico Smart Air Quality Board, under the ‘Example Code’ directory. Note: In order for the example program to work, the main module file (‘PicoAirQuality.py‘) also needs to be saved the the Pico.
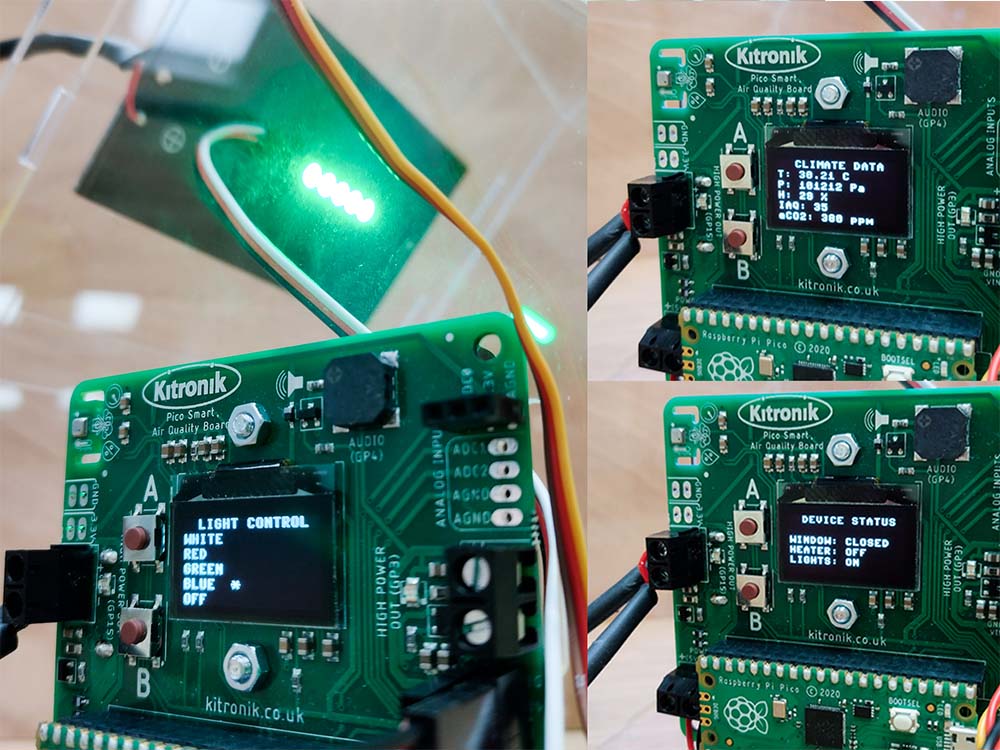
Software Explanation – The main premise of the software is that it uses a combination of sensor readings, user settings and user control options to carry out a number of automated or user selected actions for external physical devices. In addition to this, all sensor readings and the current state of the physical devices are logged every 30s to a data file for future analysis.
There are three main sections to the program. First, classes are instantiated, comparison constants are set and variables are set to their initial values. Second, functions are defined for displaying and controlling the menu through button presses, and controlling the physical devices. Finally, the main ‘while’ loop – which runs forever – measures sensor readings, checks conditions for automated device control and writes data to the log file.
Although the idea of ‘smart’ products and systems can sometimes seem complicated, the processes in this program are actually quite straightforward.
For the window and heater control, humidity and temperature readings are compared against thresholds set by the comparison constants, and depending on what the values are, the window is opened or closed and the heater is turned on or off. The same process happens for visually displaying the air quality and estimated CO2 values on the ZIP LEDs. For the lights, they are either controlled by the user through the ‘LIGHT CONTROL’ menu, or by checking the time on the RTC (Real-Time Clock) and comparing the hour with the set threshold, turning them on in the ‘evening’ and off in the ‘morning’. Navigating the menu system is also quite simple, using a check of which button has been pressed and which menu screen is currently displayed to determine the correct action. Using the other sensors, and the current readings in a different, and the other outputs and devices on the boards, other features could very easily be added to the smart home setup.