Get to grips with GitHub, with this quick and simple beginner’s guide. Learn how to make the most of the online repositories we set up for some of our in house products.
As more and more of our products are being released with GitHub resource pages, we thought it would be useful to have a simple guide to help you hit the ground running.
This guide covers;
- An overview of what GitHub is and in particular, why we use it.
- What’s in it for you?
- Setting up a GitHub account (optional).
- Finding our free Kitronik resources on GitHub.
- How we name our repositories.
- How to make use of the resources.
You will need;
- A browser and an internet connection.
- An Email Address (If setting up an account).
A Beginner’s Guide To GitHub – What is GitHub:
Git is a free, open-source version control software created by Linus Torvalds. It was first set up to allow several developers to work on the Linux Kernel at the same time.
GitHub is a cloud-based service that offers a simplified web-based interface for Git that allows people, organisations, and teams to manage coding projects online. GitHub automatically tracks changes to your project and keeps all of your files in one place. This means developers don’t have to update files in multiple places whenever a project is updated. You will often see repository shorted to repo, they are fully interchangeable and either is fine. GitHub is the platform of choice for most open source software development around the world.
When you open a GitHub repo, you are always shown the most recent version of all of the files. On the right hand side of the page you will see a section named Releases. The number of releases will be displayed, along with the current release and a clickable link. The link will take you to a page that lists the releases from newest to oldest, you can then browse this list to see what was added or changed in each release.
This is a simplified description, but it gives us some background, and a hint at why we find it useful for some resources.
What’s In It For You?

Prior to our use of GitHub, example code for one of our products may have been obtained in a number of different ways. File downloads, blogs, product descriptions, and Datasheets are just some of the possibilities. Keeping all of these up to date is difficult and prone to error. When getting code from GitHub, you know that you are always getting the most recent version of that code. There is usually additional useful information in the repos, that is similarly always up to date.
Kitronik uses GitHub for the following things;
- For creating custom blocks for the MakeCode environment.
- To house Modules for use with some of our products.
- To provide example code for some of our products.
How To Set Up A GitHub Account (Optional):
Note: As you can freely browse GitHub and grab our free code without an account, setting one up is entirely optional. Skip this section if you would rather not set up an account.
Follow these steps and get your account set up in minutes.
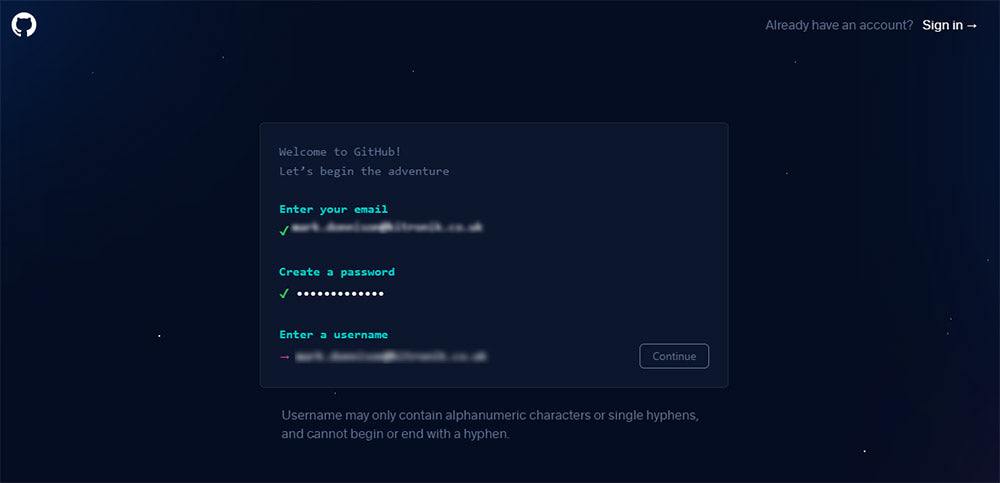
- First, head to https://github.com/ and click the signup link (top right).
- Then, enter your email address, password, and username.
- Answer a question allowing/disallowing email updates, and then another couple to prove you are human.
- Finally, get and enter the activation code sent to your sign up email address.
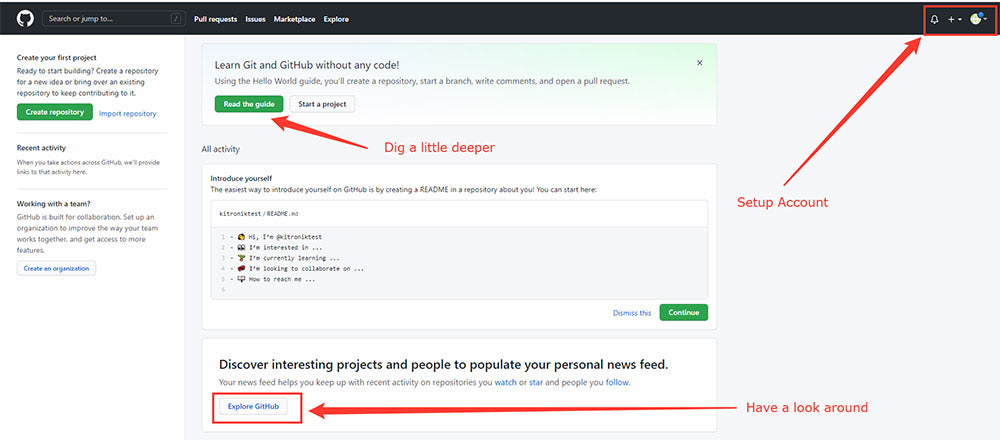
Congratulations! You now have a GitHub account! First, let’s click the Explore GitHub button and have a look around. Follow some of the links on the page that opens and get a feel for the place.
How To Find Our Repositories:

In the top left, you should see a search bar. Type and enter Kitronik. You should now see a list of about 130 plus results listed.
This list contains all of our repos plus any repos that other users have copied to maintain their own versions. This is called forking and it’s pretty common among open source projects as it helps to breathe new life into software that is no longer being actively developed by its creators. To ensure that you get the best resource for any of our products, we would recommend that you use our resources.
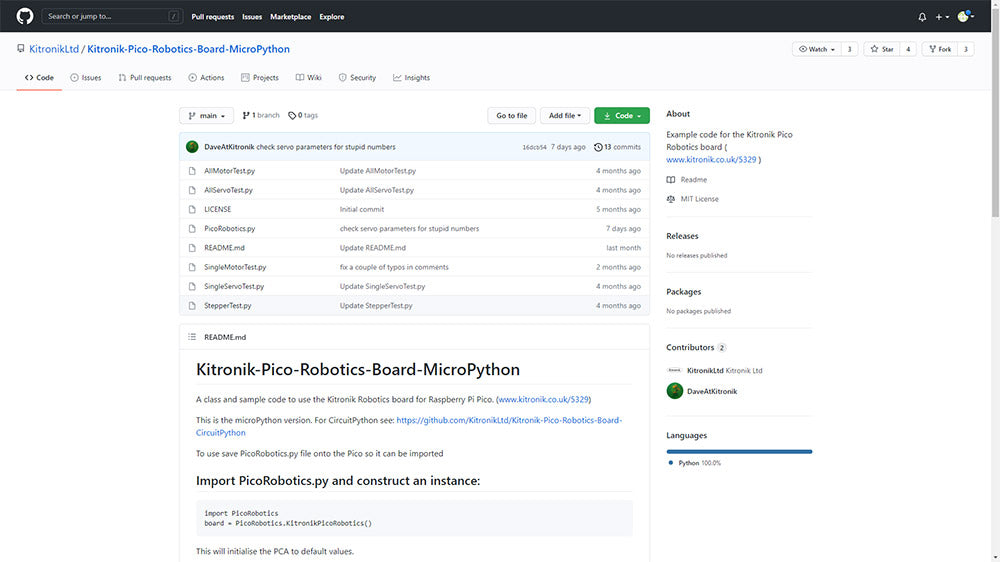
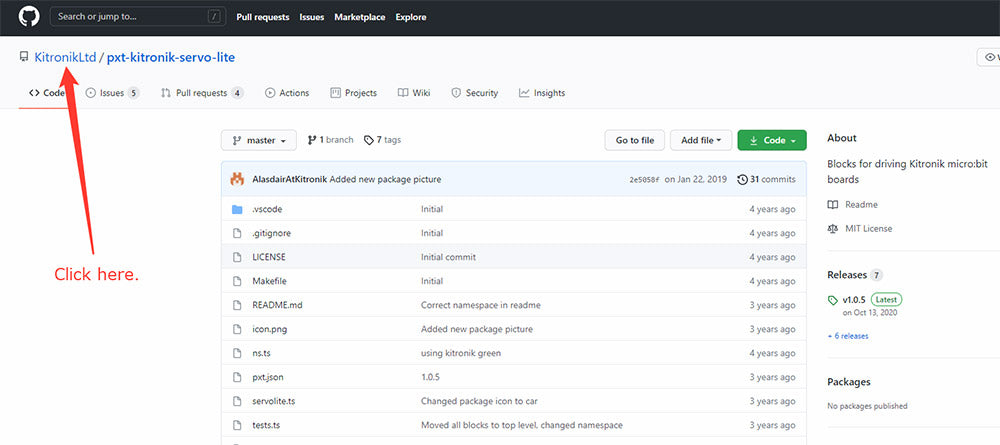
Pick one of our repositories to have a look at, such as; KitronikLtd/pxt-kitronik-servo-lite. Firstly, you can tell this one of ours as it starts with, KitronikLtd. This particular repository is our custom MakeCode blocks for our Servo:Lite board. When we make changes to the repo, those changes are reflected in the MakeCode editor. This repo can also give you insight into the code behind the blocks.
If you click on the KitronikLtd part of the repo address you will be taken to another page that only lists the repositories that we maintain. On the tabs, change from Overview to Repositories and you will have a list of all of our repositories. There are 68 at the time of writing. You can also enter search terms like; kitronik motor driver to get more focused results.
Kitronik Repository Naming Conventions:
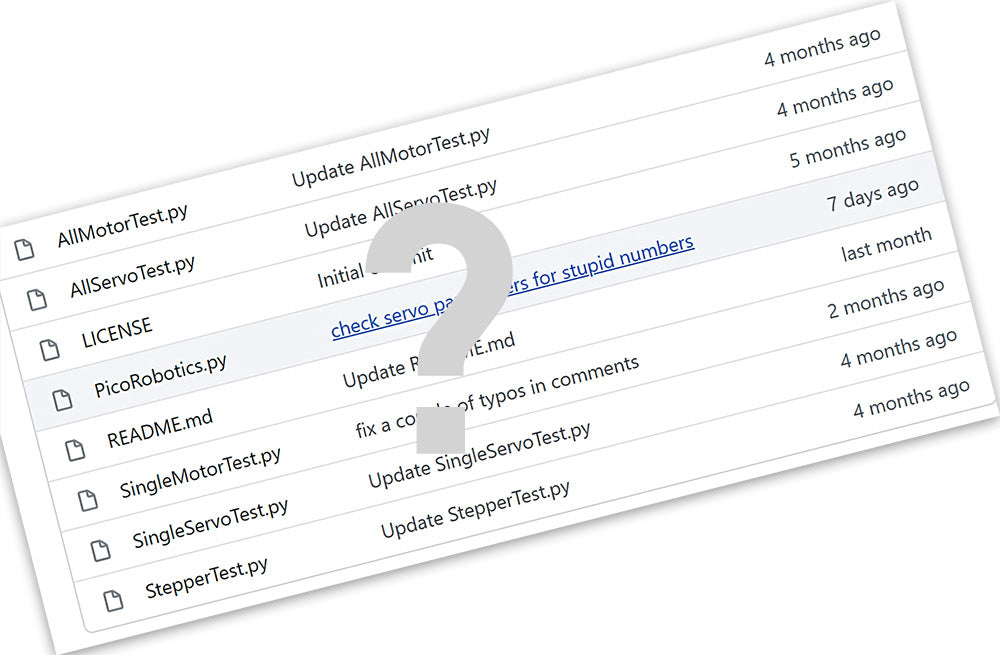
When viewing one of our repositories, you may find that the names often look a little strange. This is because they follow a naming scheme that helps you identify what the repository is for, without the need for searching for the information on the repos front page or readme files. These naming conventions are;
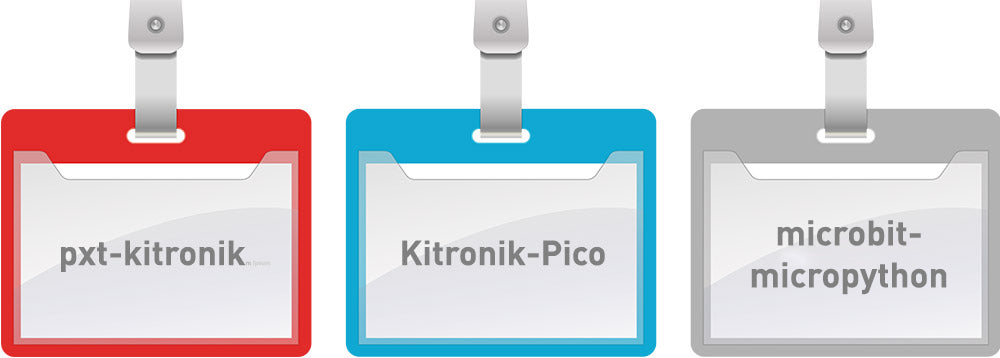
- All of the micro:bit MakeCode block repository names start with pxt-kitronik. This is then followed by the Product Name, such as; pxt-kitronik-move-motor – this is repository that contains the custom blocks for use with the :MOVE Motor buggy.
- Repositories for use with the MicroPython port for the BBC microbit start with micropython-microbit-kitronik, for instance micropython-microbit-kitronik-halohd. These repositories contain sample code as well as the required code to drive the product.
- There is also a microbit-micropython-modules repository – this contains ‘module’ versions of the microbit micropython code – that is without example code. These modules can be imported into the microbit python editor, you can find more information on this here.
- Repositories for other platforms are named: Kitronik—. For instance the CircuitPython version of the example code and library class for the Pico Roboitcs board is: Kitronik-Pico-Robotics-Board-CircuitPython, the micropython version of the same code is: Kitronik-Pico-Robotics-Board-MicroPython.
How To Make Use Of Our Repositories:

At the beginning of this post we pointed out that we produce three type of repository, they are;
- For creating custom blocks for the MakeCode environment.
- To house Modules for use with some of our products.
- To provide example code for some of our products.
Custom Blocks: There are two main reasons why these repos’s might be of interest to you. First, you can use the URL to add the blocks to your current MakeCode project. Second, you can see what TypeScript (.ts) code is behind each block, giving you a greater insight into how they function.
You can add our custom blocks to the MakeCode editor in one of two ways; click on the cog icon in the top right of the editor and select Extensions. You can then either copy the repository URL into the search bar and hit enter, or you can type and enter Kitronik into the search bar and then click on the tile you want the blocks for. Using either method will result in the custom blocks being added to the editor.
Modules: This code is designed to be used as a module. See: this guide by Dave Sanderson for more information.
Example Code: These repositories are usually additional resources in languages such as Python/MicroPython/CircuitPython. For example, the majority of the resources produced for micro:bit accessories are for blocks programming, for some of these accessories we’ve also produced example Python code which we set up in a repository.
To use the example code; click on the file in the repository that you want the code from. The, click on the Raw button. You can then select all of the code (CTRL + A) and copy and paste it into your favourite editor; MU, Thonny, etc.
Conclusion:
Although this guide contains everything you need to know to make full use of our free GitHub resources, it barely scratches the surface of what GitHub has to offer. If you have any questions on any of the content, feel free to leave a comment below.
This guide will be followed up with a guide on how to locally clone a repository, so keep an eye out for that! You can ensure that you are notified when we put up any new guides by signing up for our newsletter here.