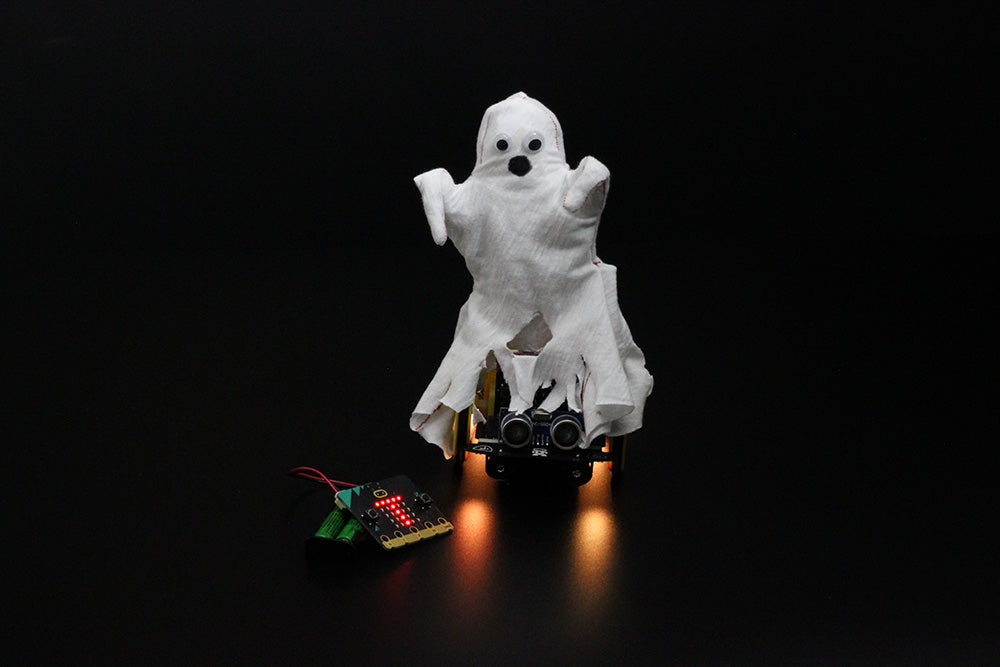
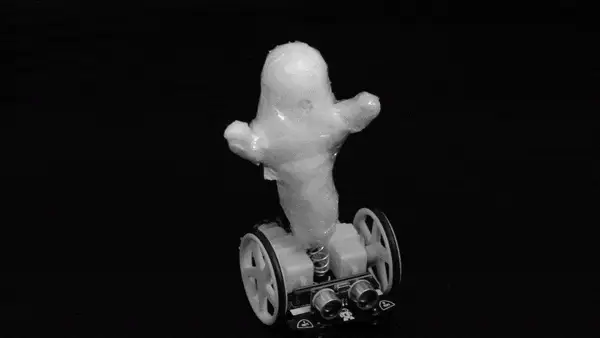
The Spookmobile. Wraith Wagon. Spectre Sedan. AaAaAaAAaaAAutomobile. All good names for this make, but I certainly couldn’t choose so I’ve included them all.
This is a simple make that sits on top of your :MOVE Motor and adds some Halloween drama to your remote-controlled buggy. The LEDs are used to replicate the flickering of candles, and the V2 micro:bit’s speaker is used to make a ghostly noise when you shake the remote micro:bit. Follow along with Emma’s instructions and mod your :MOVE Motor.
We Used:
For the Ghost:
- White Material.
- Thread and Needle (Or a Sewing Machine).
- Googly eyes.
- A Black Pen.
- Thick Wire (You could use a wire hanger).
- Tape.
- A stuffing material such as scrap material, paper or stuffing.
- Two discs of sturdy material.
- 1 x 16mm M3 Pan Head Screw.
- 1 x M3 Hex Nut.
This make falls into three sections:
- Make the Ghost
- Attach the Ghost
- Code the Spookmobile
In essence, the first two sections can be done however you want to do them. A 2D paper ghost on a spring taped to your buggy could still be spooky!
Making The Ghost:
Step 1 – Framed:
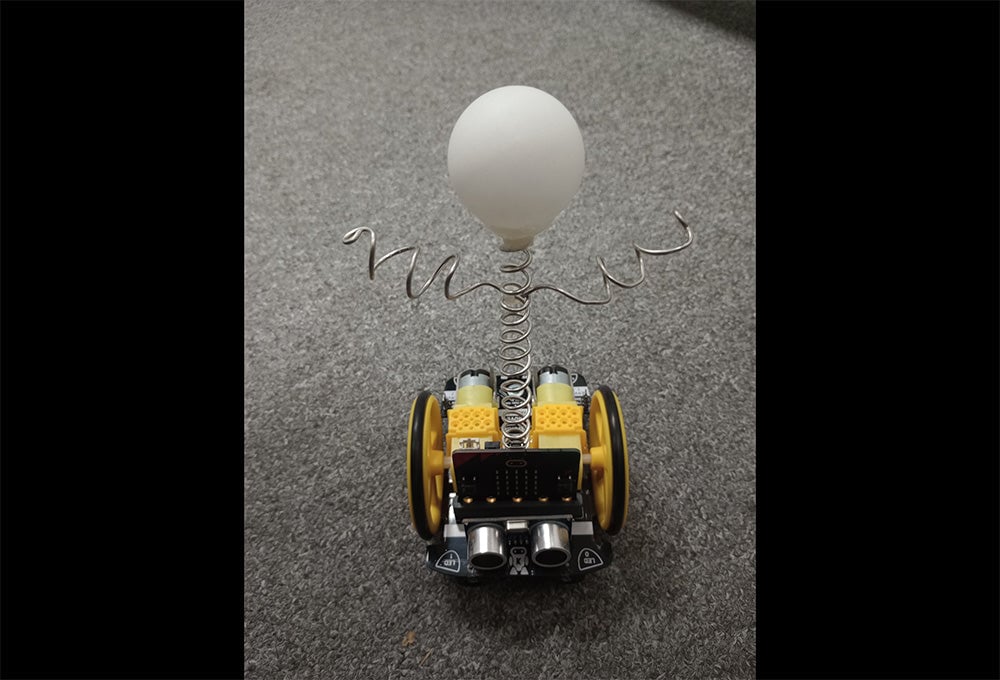
Build an armature for your ghost. This is like a metal skeleton which will hold the ghost in position. I have coiled a thick wire to give the skeleton some thickness to build off of so that the lower portion of the wire that is not covered by the ghost will act as a spring.
Step 2 – The Body:
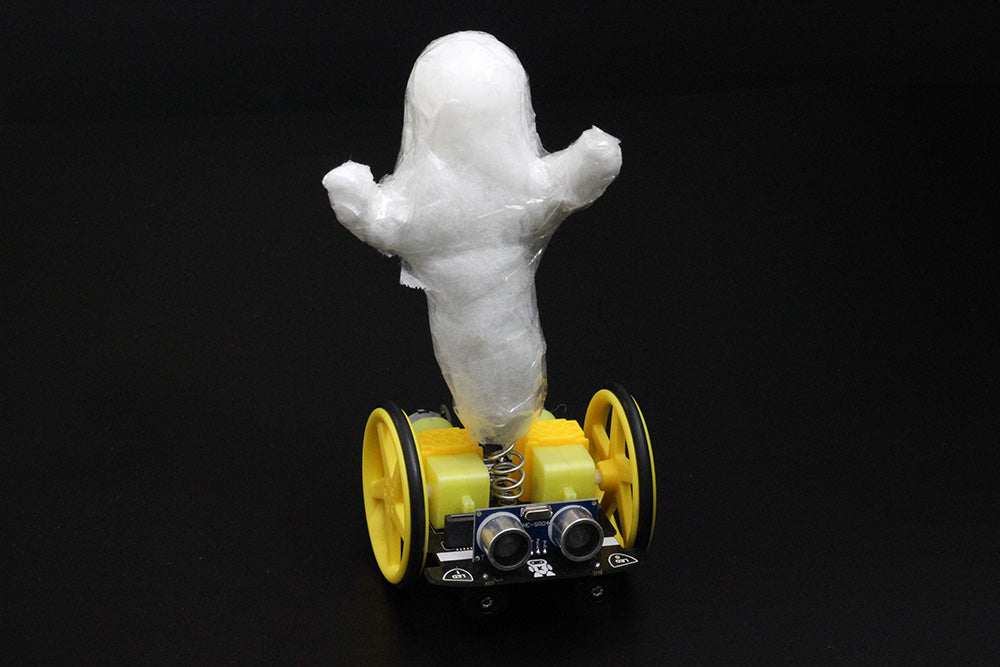
Next, build a body shape off of the armature. I’ve used a stuffing material held down with tape to build the ghost. Make yours any shape you like!
Step 3 – Adding the Costume:
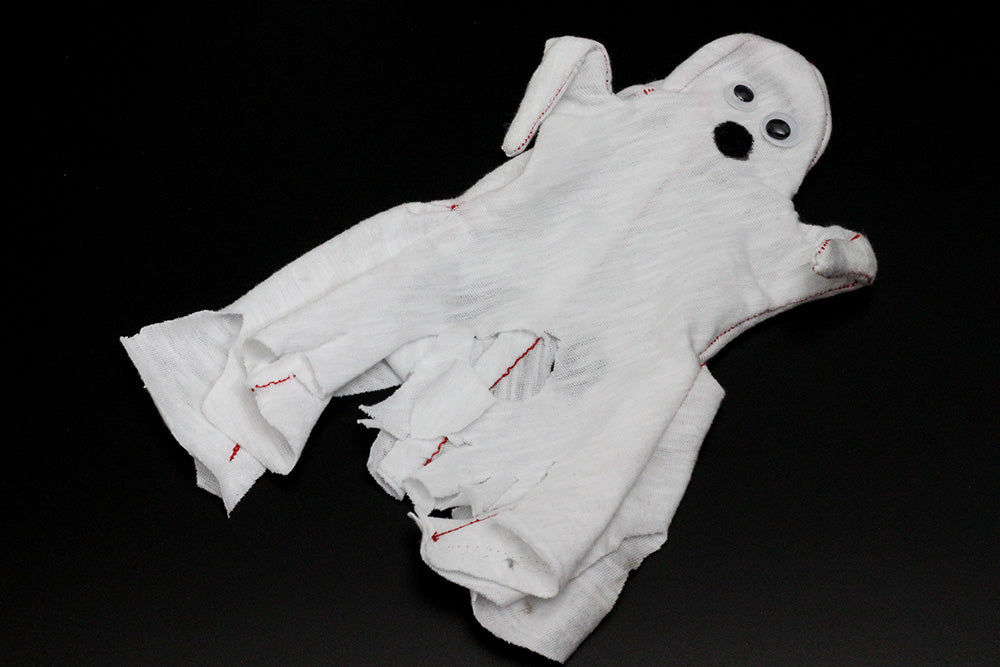
Lastly, cover with a costume! I made a tailored ghost-sheet-costume on a sewing machine, then added googly eyes and a marker pen mouth.
Attaching The Ghost:
Step 1 – The Screw:
Make sure the bottom of your Armature is coiled in a tight enough loop to wrap snugly around the M3 screw. This is so that it can be secured down using the screw.
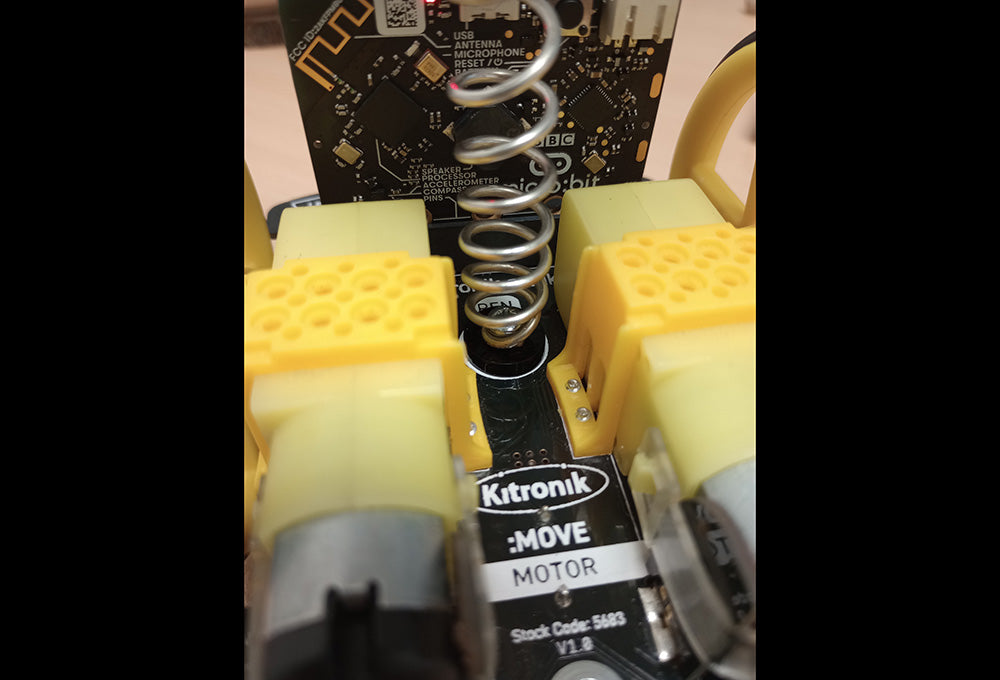
Step 2 – The Pen Hole: In order to attach the ghost, we are going to use the pen hole in the centre of the PCB. Using appropriate means, cut from a sturdy material two discs that are just slightly larger than the pen hole – ours are 13mm in diameter. In the centre of each disc, cut a 3mm hole to accommodate the screw.
Step 3 – Assembly:
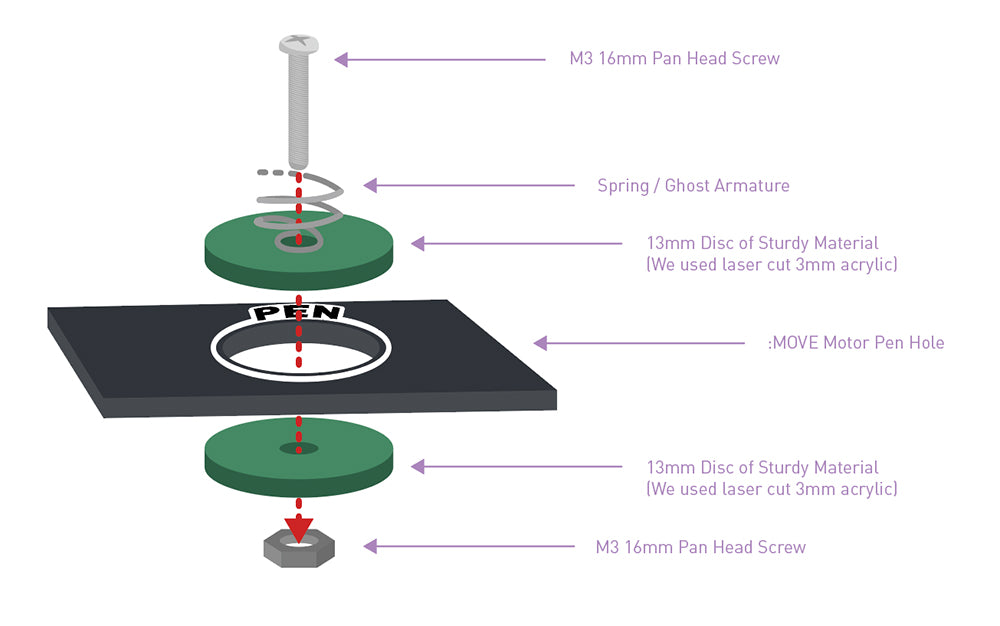
As above, attach the ghost using the Screw and Hex nut, securing the wire armature to the two discs on either side of the pen hole.
Coding The Spookmobile:
The code for this buggy is in two parts: A Transmitter and a Receiver. This means you will use one micro:bit as a radio control for the other, which will be plugged into the :MOVE Motor. The transmitter code is as follows:
This is a simple bit of micro:bit code that uses the radio controls to send words (“strings”) to the other microbit. Depending on the input, a different string will be sent which the other micro:bit will correspond to different movements. The receiver code is as follows:
This code allows the receiver micro:bit to translate the words sent by the transmitter micro:bit into movements. It will have the :MOVE Motor perform different actions depending on the word it receives.
This code also has two spooky additions: Flickering candle-style LEDs and a spooky ghost noise made using the “sad” audio preset in MakeCode.