This morning, Monday 3rd October, saw the release of the new micro:bit Python Editor by the micro:bit Educational Foundation. This guide has been produced to help you get going straight away. This guide also contains a video that walks you through the basics, essential viewing for the new user.
What is Python?
Python is a computer programming language that was first released in 1991. It was designed to be fun and easy to learn and to be a multi-purpose language. Today, Python is the most widely used and fastest growing developer language in the world and has a broad application of uses. From powering machine learning to web development and data analytics. From a developers point of view, development with Python is often very fast, as Python does not need to be compiled.
“*Python is fast enough for our site and allows us to produce maintainable features in record times, with a minimum of developers,*“ said Cuong Do, Software Architect, YouTube.com.
Despite being easier to learn than most other text based languages, it can still be difficult in the early stages of learning. This also makes it challenging for teachers, who have to devise ways in which to help students over come those initial hurdles. This was one of the main drivers for the development of the new micro:bit Python editor.
Video Guide:
Watch the video for look at how to use the micro:bit Python editor. If you have a little more time on your hands and want to have a go at some tasks, you can also read through the text guide below, which contains a little extra information.
The Beginners Guide To The New micro:bit Python Editor:
The new editor has lots of features designed to make it easier to teach and learn Python, It removes all of the usual hurdles that make learning text based languages tricky for the beginner. It does this by providing easy to find snippets of code that you can quickly drag and drop into the editor. All of the code contained in the snippet is full visible and fully editable, making it easy to shape the code to your needs. In the next section we’ll take a closer look at the editor.
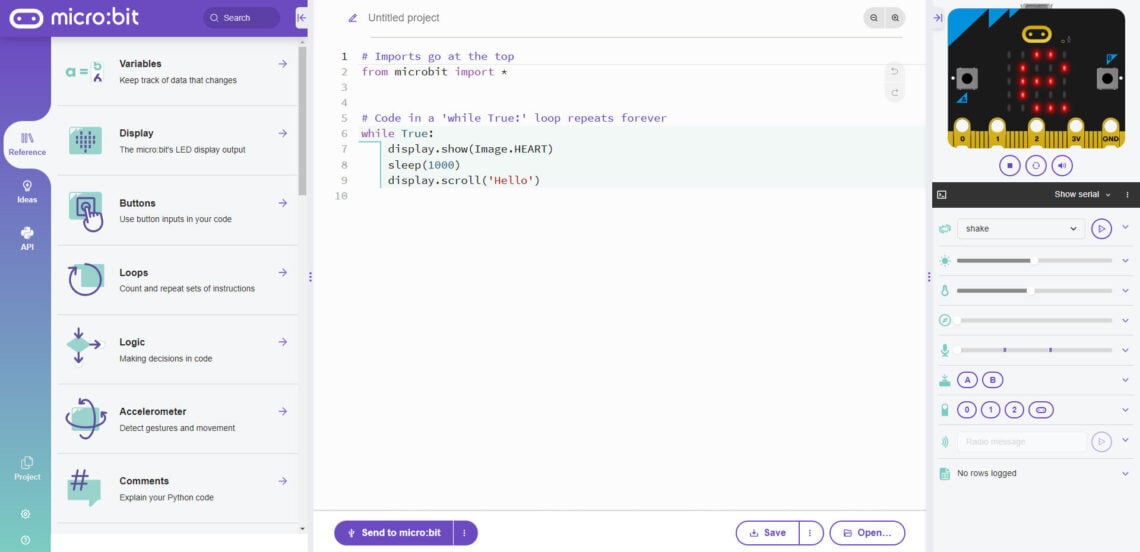
The Editor:
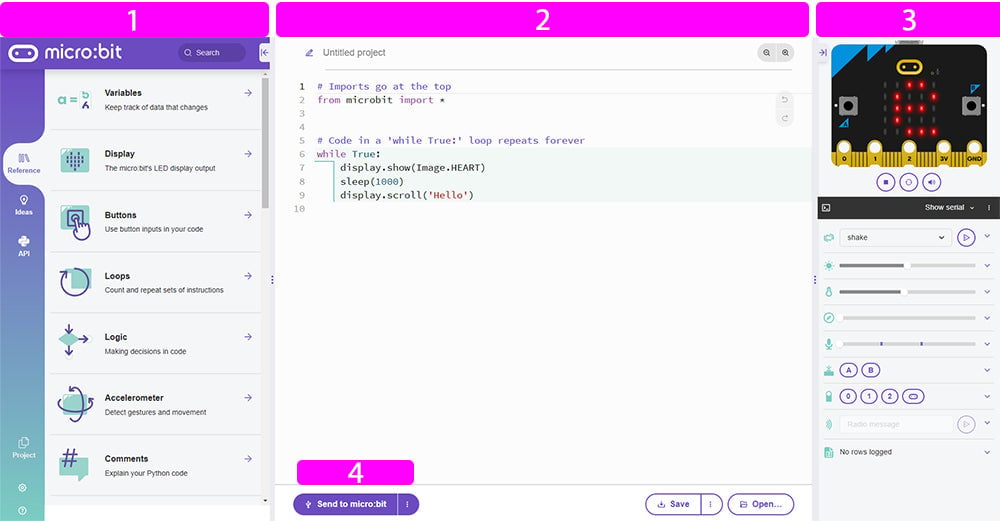
We have highlighted four areas of the editor in the above image; 1 – Code Library, 2 – The workspace, 3 – The micro:bit simulator, 4 – Send code to the micro:bit.
First we will explore what these 4 areas are and how to use them. After that we’ll construct a simple program, and then run it using the simulator..
Section 1 – Code library:
This section contains the reference section which contains all of the available code snippets. Today’s guide will focus solely on the Reference menu, as this is where the general code snippets are.
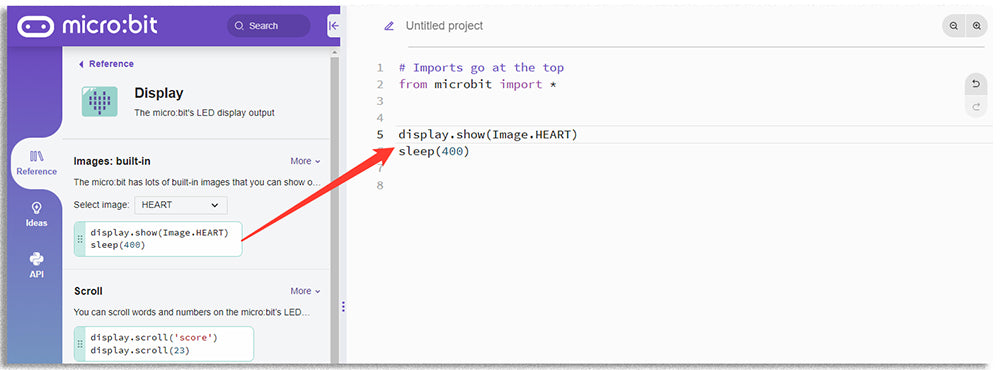
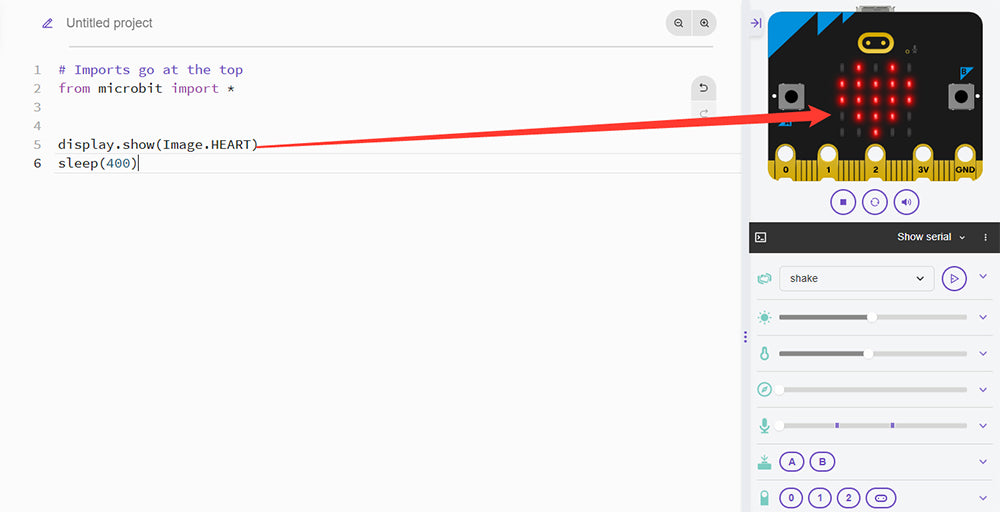
Select one of the menu items, such as Display and a list of all of the available code snippets for that section will be displayed. You can then simply click on one of the snippets of code and drag it into the workspace (Section 2), as shown above.This code will display a heart image on the micro:bits LED matrix display.
Activity: Have a browse through the snippet headings, (Variables, Display, Buttons etc) to get a feel for how the snippets have been organised.
Section 2 – The Workspace:
Section 2 is the coding workspace, this is where you build you programs. Initially you will drag almost all of the code over from the Reference section and edit it to suit. The editor isn’t all about drag and drop, it is also built to allow you to grow as a coder and to offer you new assisting features as you do.
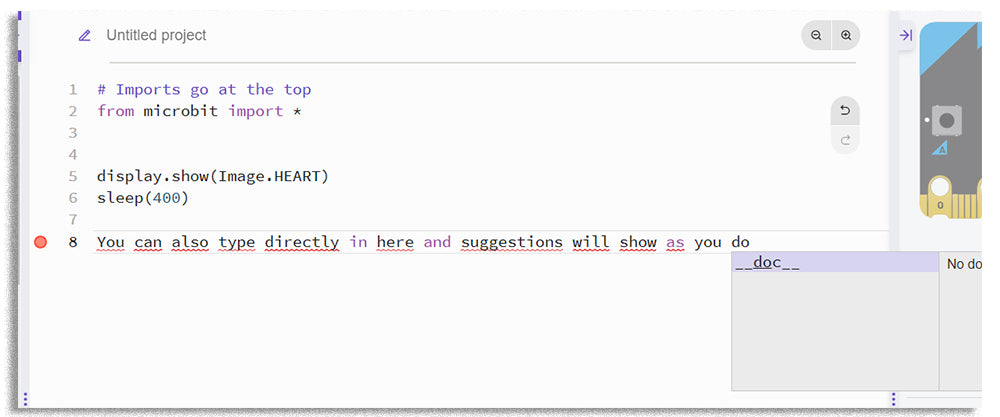
As you gain understanding and confidence, more and more of the code in the workspace will be typed directly into the editor. As you type, the editor will assist you with suggestions that you can navigate with the arrow keys and then select. This helps to protect your code from typos, and once you’ve become accustomed to to selecting them, will speed things up nicely.
Activity: Try typing random words into the editor to see what the suggestions pop up looks like. Try using the arrow keys to move up and down the list and then select one of the suggestions. You will soon come to realise how useful these features are.
Section 3 – The Simulator:
Section 3 of the editor is the micro:bit simulator, this is a great tool for both testing your software in place and it also allows someone who doesn’t have a physical micro:bit to run their code once it is complete.
As you build your code, the simulated micro:bit will be grayed out and there will be a large play icon over it. Once your program is ready to be run/tested, just click on the play icon and your code will run on the simulator in just the same way as it would on an actual micro:bit.
Underneath the editor you will notice a variety of sliders and buttons. These cover a number of functions, buttons, the logo, shake. As the simulated micro:bit is static some of the buttons allow you to test movement based functions. The sliders allow you to test code for things such as sound, temperature, compass heading etc.
Activity: Try clicking on some of the buttons underneath the editor, like A, B, and logo and see what happens. Hint, this will only work if the micro:bit is not grayed out. Try running a simple snippet first.
Section 4 – Sending a program to a connected micro:bit:
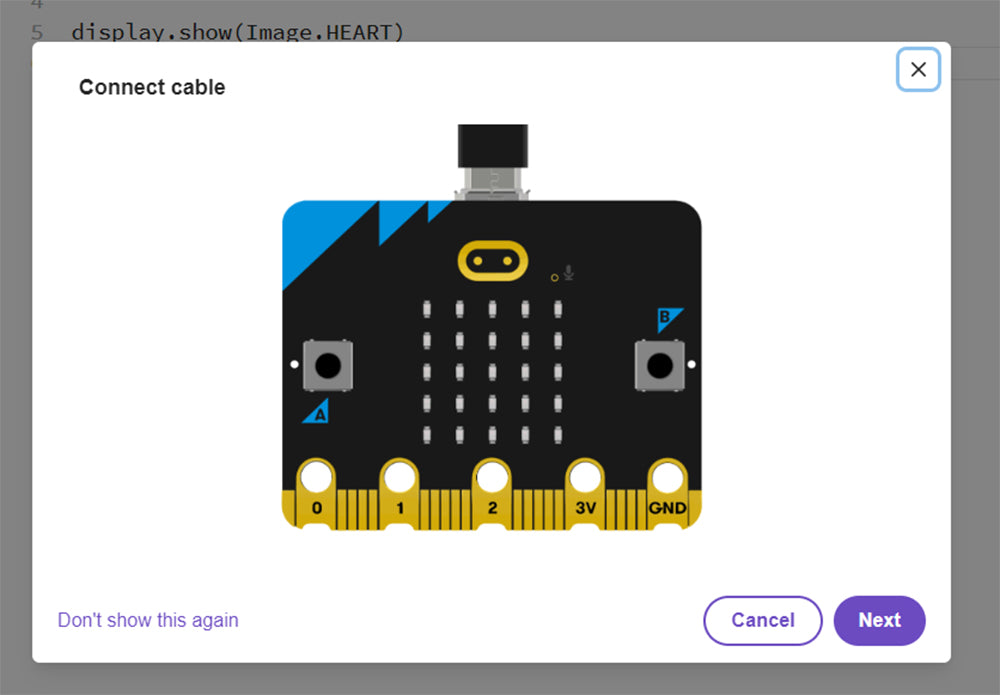
Once you’ve completed your program and tested your program, the next step is to download the code directly to your micro:bit. It’s as simple as clicking the Send to micro:bit button and following a couple of onscreen instructions. Firstly you will be asked to connect the micro:bit to your computer via USB, then you will be asked to choose the micro:bit and press the select button.
It’s that simple! Now that we’ve had a look at the basics of using the editor, it’s time to try our hand and making something simple and getting it to run on the simulator.
Let’s Code – Activity:
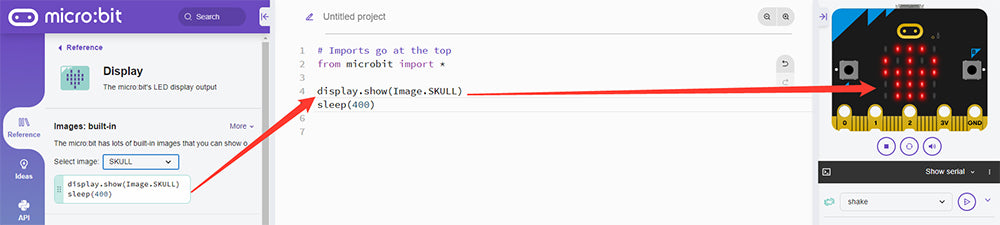
Browse the Reference menus and look in Display. Before dragging and dropping the code snippet at the top that displays a heart, try changing the heart to another image first. Once you’ve chosen your image, drag and drop the code snippet into the work space.
Now the code has been built, all that remains is to run it. Press the large play icon on the simulator and watch the image that you chose appear on the simulated LED matrix! For extra bonus points, if you have a micro:bit and a USB cable to hand, why not download your code onto the micro:bit and test it there too.