EduBlocks is a drag and drop blockly style coding editor that is based on Python. It is aimed at making the transition from Scratch to Python easier and it also has support for the microbit. It includes most MicroPython features that allow you to control the onboard microbit features as well as external components.
In this getting started guide, we cover the information you need to get up and running fast. Don’t worry if you are new to Python and/or coding, once you learn the editor the rest will come in time.
Getting Started With EduBlocks For BBC microbit:
The EduBlocks editor is a drag and drop coding editor for the microbit that provides a simple introduction to programming. The blocks snap together to build programs and are grouped by the type of function they do. If you are familiar with other block style editors, such as MakeCode, then this editor should feel very familiar. Conversely, if you are new to coding then you may require a little help finding your way around. There are a few notable differences between this editor and the Microsoft MakeCode editor. The MakeCode editor is based on JavaScript and you can change between blocks and JavaScript at any time. EduBlocks is the same but rather than being based on JavaScript it is based on MicroPython.
Course Contents:
- Selecting blocks and building Programs.
- Downloading your code.
- Deleting blocks.
- Video demonstration.
- Useful links.
Selecting Blocks and Building Programs:

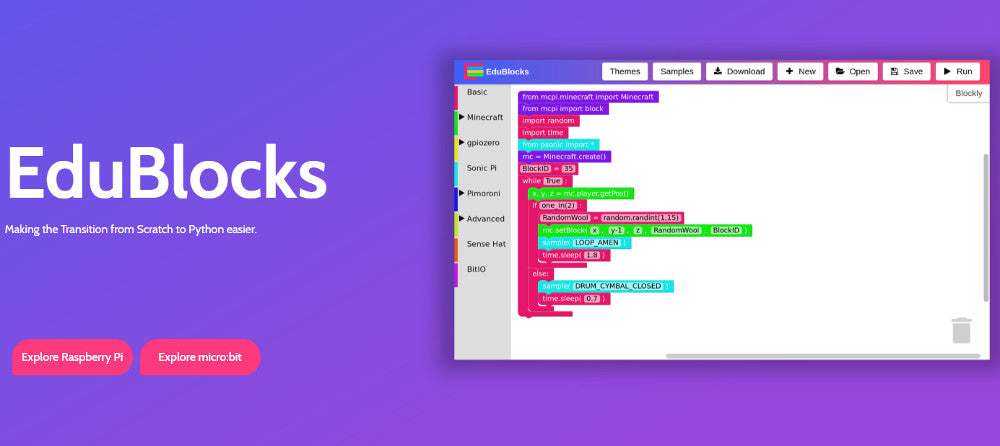
1. Firstly, the list on the left of the above image shows the different blocks categories. Move your mouse over a category and click to display the blocks contained in it.
2. Once you click on a category it displays its contents in a verticle line. If the list is longer than the height of the screen you can scroll down with your mouse wheel.
3. Click on the block you want and drag it directly into the workspace. You form programs by snapping blocks together. The blocks are shaped so they can only be connected to the right type of blocks. In the picture above you can see how the blocks form a program, in this case, a simple hello world program. 4. Lastly, to the far right of the editor is a tab that has Blockly in it, if you click on it the editor switches to the Python Editor. Click the same tab to return to blocks view. You can code in either view and jump between the two as desired. You can try writing your code in MicroPython and whenever you are unsure of how to code something, you can pop into blocks and do it there before jumping back to the python editor.
Saving And Downloading Your Code:

There are two main reasons why you might want to save your code. Firstly, so that you can drop it onto your microbit and also, so you can save your code so you can resume working on it later. Download Py and download Hex; If you want the run the code on your microbit then either of these two options is suitable. The downloaded code will appear in your default downloads folder. The microbit will show up as a removable drive when connected to your computer via USB. You can then drag and drop the code straight onto it. Save: Users can use the save button to save a copy of the code to the hard drive. There is no cloud save, so when you exit the editor your code will not be there when you go back to it. With this in mind, it is good practice to save often as you work. You can reload saved files into the editor via the ‘Open’ button.
Deleting Blocks In The Editor:
1. Select the block that you want to delete, then press delete on your keyboard. 2. Select and drag the selected blocks into the ‘bin’ shaped icon in the bottom right-hand corner of the editor.

3. Select the block and right-click on the selected block. A drop-down list will appear and select the ‘Delete Block’ option.
Video Demonstration:

Useful Links:
- Visit the EduBlocks website.
- Use the online EduBlocks editor.
- Check out the EduBlocks learning portal.
- Learn more about MicroPython.
- Find more Kitronik microbit ‘Getting Started’ guides.
- Need a microbit? Buy microbit.