The Christmas Fair Bandstand and Stalls is the third and final model from our Christmas fair. This time showing how to make an animated display featuring figures. Just by using a servo, a microbit, and a tiny snippet of code.  The model and figures can all be made by hand from cardboard. What better way to take care of all of those Amazon boxes! If you would rather use the laser cutter instead, we’ve also included the files you’ll need to do this. That gives you the option of going for a more sturdy build with something like plywood or Perspex sheet.
You Will Need:
- A 180 degree Servo.
- BBC micro:bit.
- A servo control board, such as the all in one robotics board.
- Corrugated card.
- Dowels for the character blanks to pivot on.
- A printer.
- Craft knife/scissors/or laser cutter.
- Glue gun.
- Leftover component legs.
- MakeCode Editor.
- Our design files, DXF for the laser and PDFs for making by hand (code also included).
Kitronik Christmas Fair Bandstand and Stalls:
 Step 1: Print off the PDFs provided and cut out the all of the different parts. Use these cutouts to mark out the cardboard and then cut out all of the parts. Alternatively, laser cut the parts using the DXF files provided.
  Step 2: Score the nets for the bandstand and stalls, as shown in the above picture. This will allow you to bend them into shape easily.
  Step 3: Fold the nets for both parts into shape, as shown in the above picture. Note: Do not glue anything into place at this stage as we still need to insert the servo and the figures.
  Step 4: Print off the PDF that contains the figures decorations, as shown above. Then cut them out with a pair of scissors.
  Step 5: Next we need to secure the servo in the base of the bandstand. You’ll note that we went hi-tech and broke out the blu tack. Alternatively, you could use sticky pads but we preferred the blu tack as it will be easier to adjust the positioning.
  Step 5 continued: Before the next step, just take a moment to ensure that the servo is suitably placed. If you used blu tack, shifting it around will be relatively easy.
  Step 6: Then we need to glue the pivots to the base. ensure two of the character blanks are slid onto the dowels before glueing. Then, check that the two characters move freely from side to side on the dowels.
  Step 7: Now, push the stage into place. The Blu tack on the top of the servo should be enough to hold it down. If it pops up, just add a little more blu tack.
  Step 8: Now, glue the servo horn to the middle character and join the three characters together using a card strip as a coupler. Fix the characters to the coupler with the component legs/paperclip/glue.
  Step 8 Continued: If you used component legs, ensure that you also bend them down so that they can’t pull free. Also, ensure that you do the same around the back.
  Step 9: Now it’s time to add the figurines to the cardboard blanks. You can either use glue or a prit stick, Also, ensure that there is an even and total covering to avoid any curling up around the edges.
  Step 10: Now we can glue the remaining decorations in place and then glue the rooves to the stalls. Note: The smaller model goes together in much the same way as the bandstand, only without the servo. The figure can be glued directly to the stand as it is not to be animated.
  Step 11: Connect it all together, as shown above.
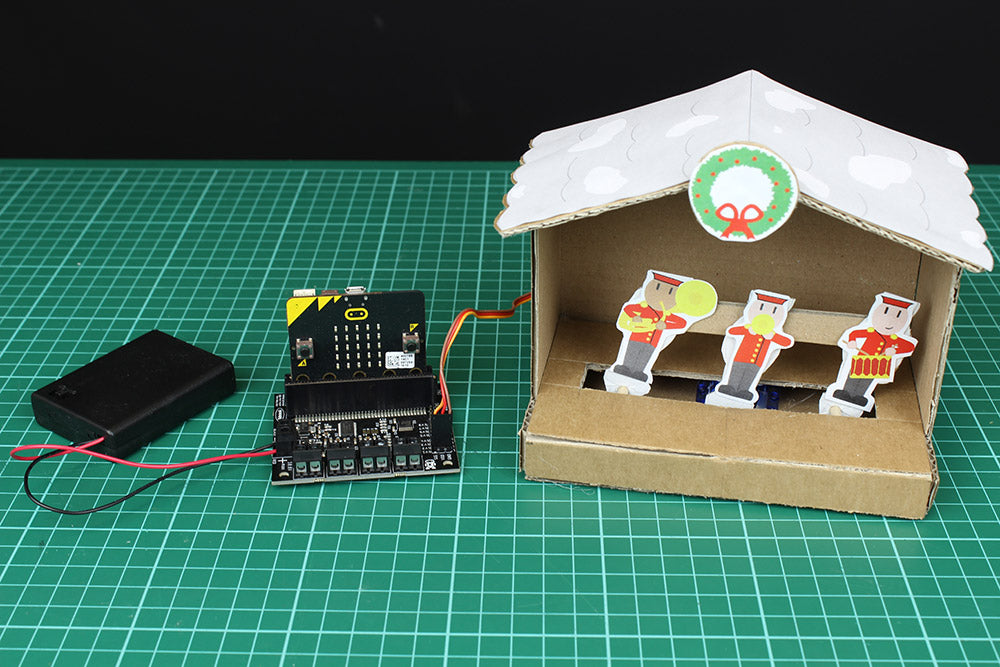
Step 12: Finally, it’s time to add the code the Christmas Fair Bandstand and to see it in action. You can either get the code from the embedded editor above or from the files we provided at the top of the article.
The Christmas Fair Resources:
| Ferris Wheel. | Helter Skelter. | Bandstand & Stalls. |
| A Perspex Ferris Wheel, driven by a stepper motor connected to an All-in-one Robotics Board. | A Helter Skelter featuring a moving ZIP LED slide, driven by a ZIP Halo. | A Bandstand and stalls, animated with a servo that is connected to an All-in-one Robotics Board. |