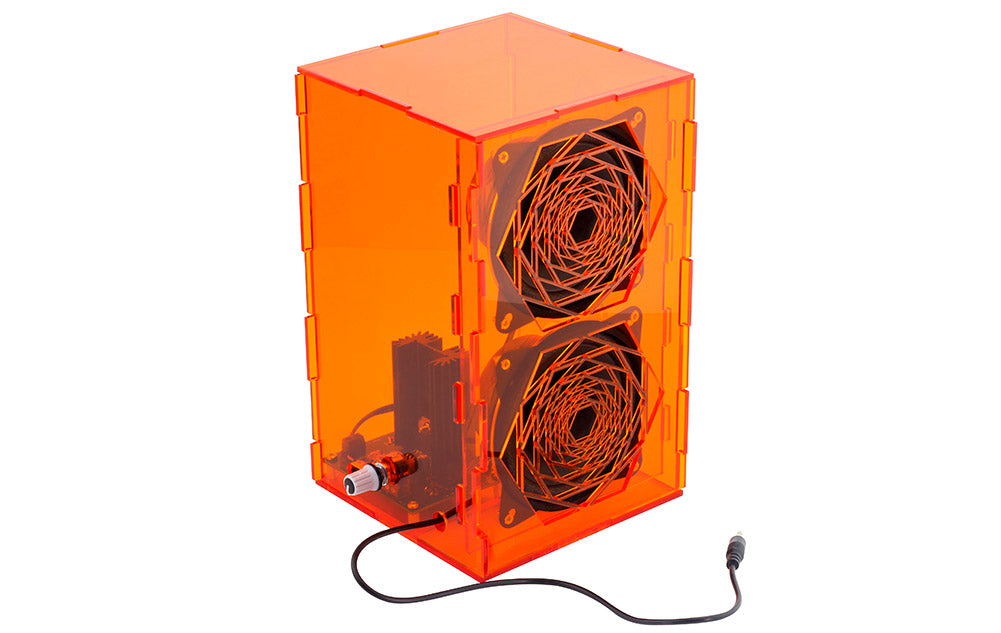
Emma shows you how to make a custom case for one of our high powered stereo amplifier kits. This howto comes complete with a list of the items that we used for this project and a free DXF download so you can get to work straight away. We chose to use a transparent orange Perspex sheet, but any transparent acrylic will do just fine.
We Used:
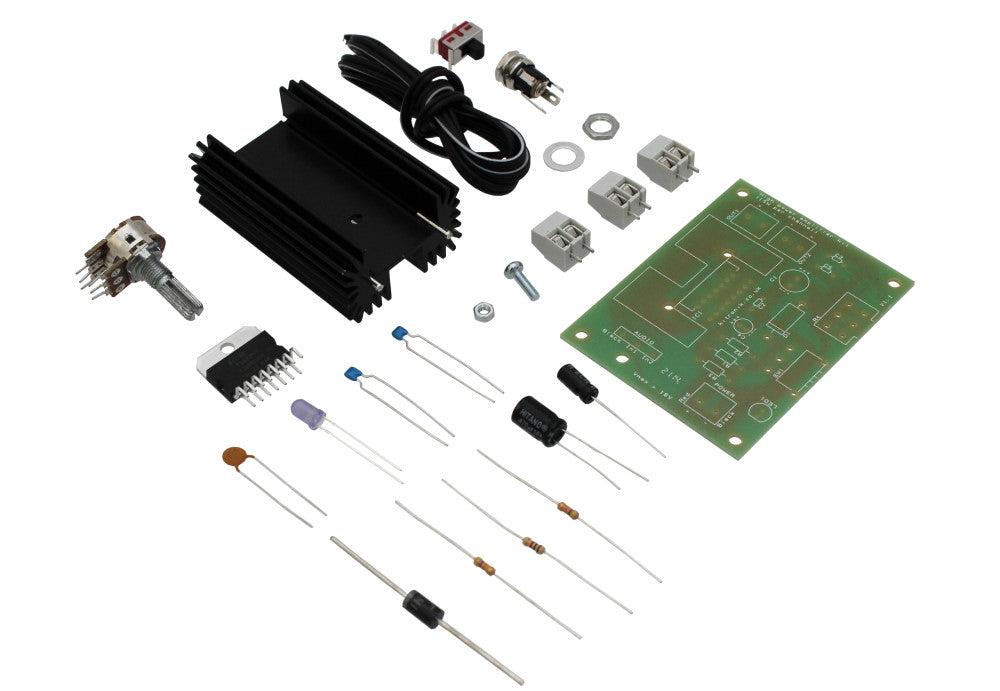
- 1 x High Power Stereo Amplifier Kit.
- 1 x Transparent Acrylic of your choice. (We used)
- 1 x Potentiometer Knob.
- 12 x 12mm M3 Pan-head Screws.
- 4 x 8mm Plastic Spacers.
- 8 x M3 Hex Nuts.
- Plastic Cement or Superglue
- A Laser Cutter
- This DXF File.
Make A Transparent Custom Amplifier Case:
It’s nice to make your own cases for the kits and projects that you build, even better when the kit you built is still visible inside the case. That’s why we went for a transparent material, a functional enclosure and a display case rolled into one! Lets get to it!
Step 1: The Design
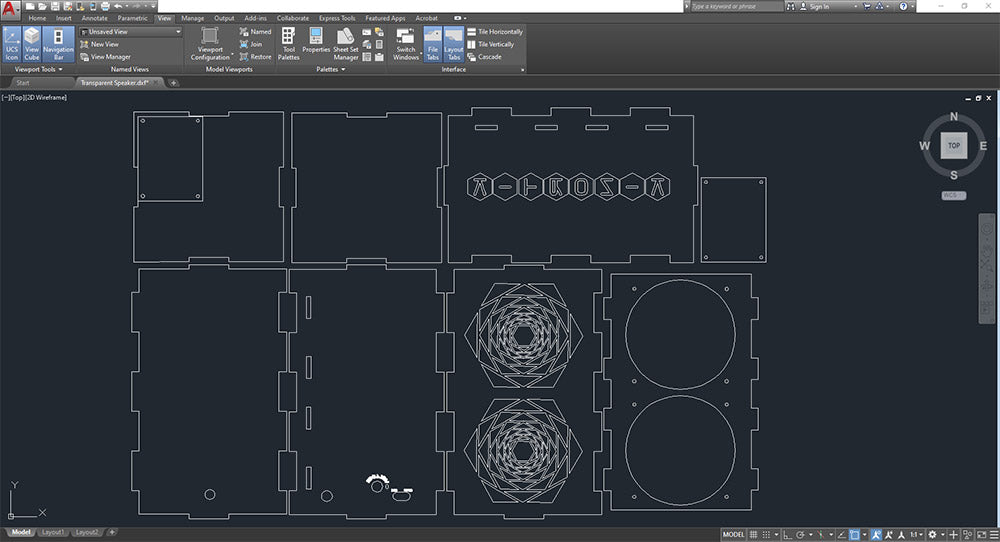
If you’re happy with our design as is, then skip straight to step 2. Otherwise, you can open the DXF file in the CAD software of your choice and add your own logo or design flourishes.
Step 2: To The Laser Cutter!
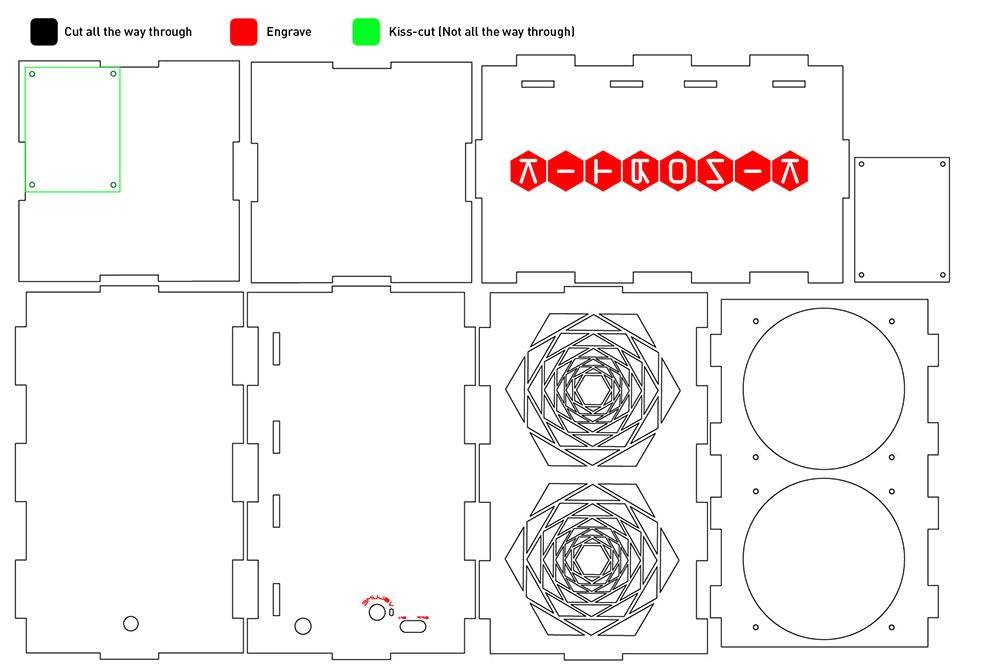
Open the free DXF file and kiss-cut, engrave and then cut as per the diagram below. Remember to cut the outlines last, so the panels don’t move while the inside cuts are being made! This design is specifically made to fit an acrylic sheet sized 400mm x 600mm.
Step 3: Build Your Amplifier Kit
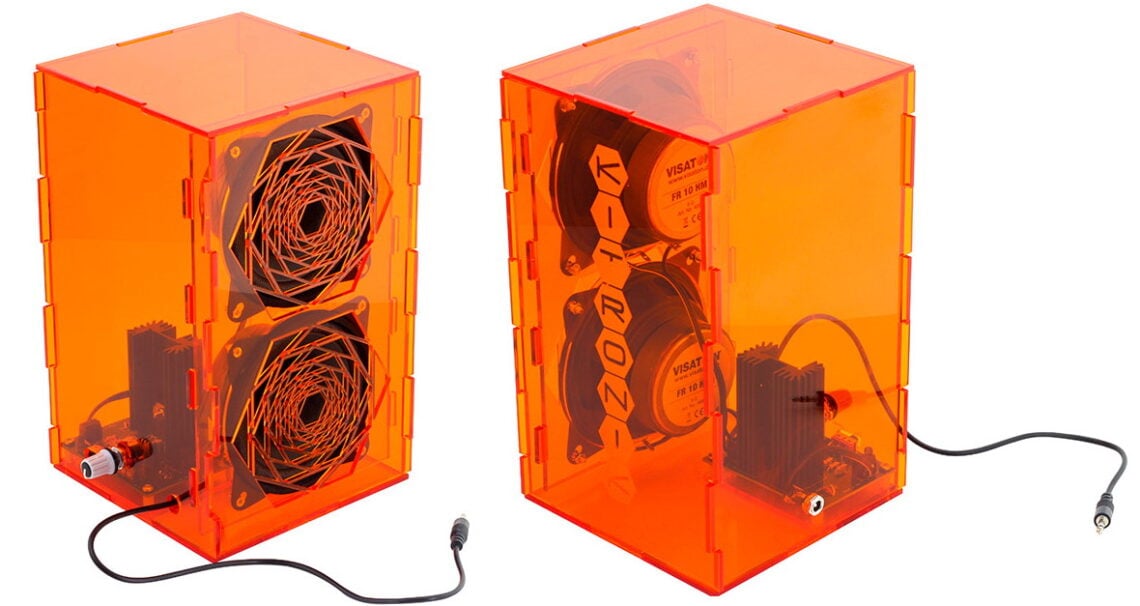
Assemble your kit! Begin by screwing your speakers into the acrylic plate with two large holes after soldering the wires to them, since you won’t be able to mount them after they are attached to the board. You’ll need to use 8 M3 screws and 8 M3 Hex Nuts for this.
Step 4: Assembly:
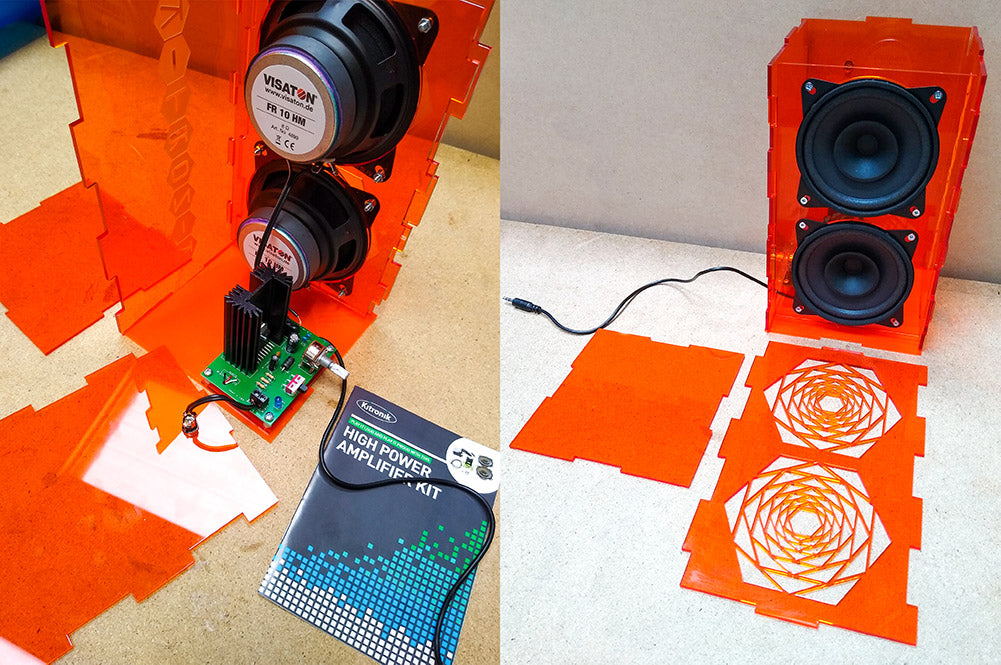
After the Kit is assembled, use plastic cement or superglue to attach the small PCB mounting plate to the base of the speaker, where the exact shape of the small plate is kiss-cut. Screw the PCB down into the plate, using the 8mm spacers so the PCB sits off of the base of the speaker.
Then, screw the power cable connector into the hole in the back panel of the speaker.
Assemble the rest of the speaker around the kit! Make sure to fit the volume knob and the jack lead through the hole in the side before gluing the side on to the base. Once the case is assembled, then push a potentiometer knob onto the volume knob on the board and you’re good to plug in and play! (After the glue dries, of course).
And just like that, you’re done!