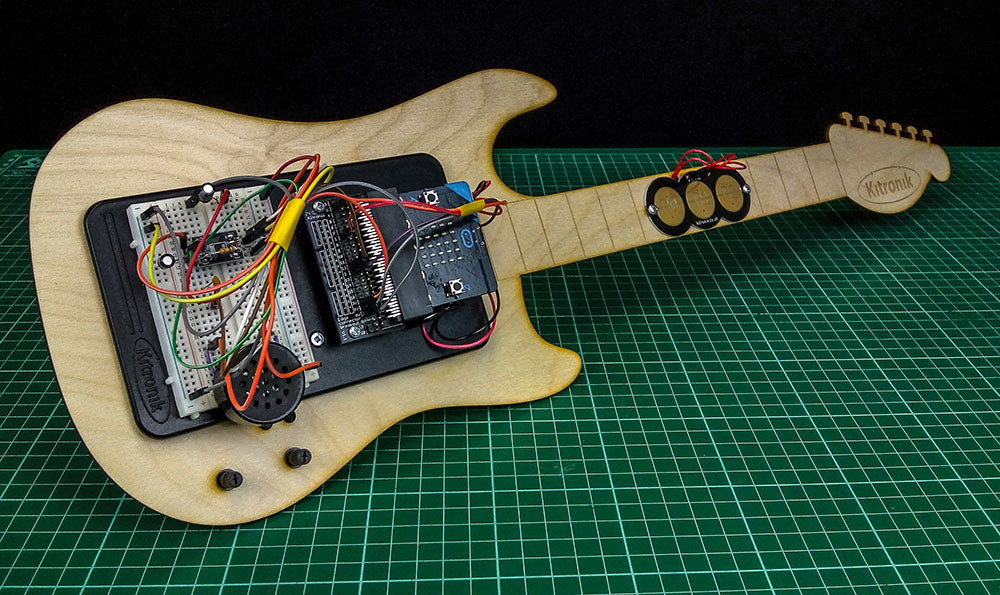
See how we made a microbit Guitar using the all-new Noise Pack Add-on for the Kitronik Inventors Kit. We’ve also included all of the files we’ve used as free downloads, see below. So, you can either create one yourself or take inspiration for your own noisy touchpad instrument.  Since it’s launch, the Kitronik Inventors Kit for the BBC micro:bit has gone on to become one of our most popular lines. It offers a great introduction to programming and hardware interaction with the BBC micro:bit. We have also released two add-on packs to pick up where the Inventors kit leaves off. This resource is based on the newest of these two add-ons, the Noise Pack. You can find all of the Inventors Kit family of products via the links below.
- Inventor’s Kit for the BBC micro:bit.
- ZIP LEDs Add-On Pack for Kitronik Inventors Kit for micro:bit.
- Noise Pack for Kitronik Inventor’s Kit for the BBC micro:bit.
Make A microbit Guitar With The Inventors Kit Noise Pack Add-On:
My name is Matthew Moeser, I’m a design student and keen maker enthusiast. I’ve just completed my second-year of product design BSc at Nottingham Trent University and I’m currently working with Kitronik on a 12 month placement before going back to complete my final year. Since joining Kitronik I’ve been given all sorts of projects to work on, one of which is this resource for our new Noise Pack add-on for the Kitronik Inventors kit. It proved to be a lot of fun for such a simple build, and I hope to get lots of bigger exciting projects out to inspire you soon!
The Things You Will Need:
- Inventor’s Kit for the BBC micro:bit.
- Noise Pack for Kitronik Inventor’s Kit for the BBC micro:bit.
- A BBC micro:bit.
- USB Type-A to Micro-B USB Cable.
- 6mm M3 screws and nuts (10mm if a thicker material than 3mm is used).
- A single sheet of 600mm x 400mm material, either;
- Access to a laser cutter.
- MakeCode Editor.
- Our DXF design files.
Step 1 – Laser Cutting The Parts:
 The image above image illustrates that you can cut two guitars from one 600mm x 400mm sheet. Using a laser cutter and our DXF files, cut out the Guitar shape from your preferred material.
Step 2 – Mounting The Inventors Kit and Noise Pack:
 The baseplate and touchpad mount to the guitar using 6mm M3 screws and nuts (10mm if a thicker material is used). The potentiometers can mount through the two large holes in the bottom left. Cables from the touchpad and potentiometers can be run behind the guitar body and up through some handy holes near the baseplate.
Step 3 – Building An Experiment On The microbit Guitar:
 The kit can then be assembled into any of the noise pack experiments, pictured here is experiment 4. If you feel the need to make a Guitar face and slide across the floor on your knees, be sure to make sure everything is secure.
Optional Step 4 – Further microbit Guitar Experimentation:
 The touchpad can take multiple inputs at once, so experiment in your code with different finger combinations and using the micro:bit buttons to change the sound. Above is an example of a combination we used. The above code is for illustration only, you can download the code here. The hex file is zipped up, once unzipped it can be dropped directly onto your microbit. You can also drag and drop the hex file into the MakCode editor for viewing or editing. Finally, you can find more fun things to do with your micro:bit in our ever-growing list of free resources at the Kitronik University. Also, you can sign up for our newsletter here.


