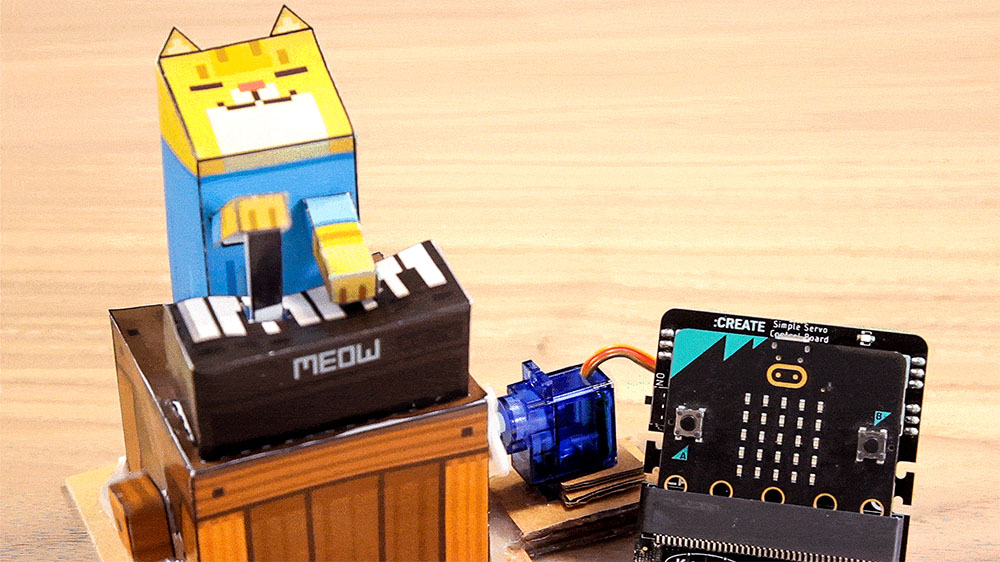
Everything you need to know to get up and running fast with the Simple servo control board for BBC micro:bit by Kitronik. To open up this board to children of all ages Kitronik has produced some simple to use custom blocks for the Microsoft MakeCode editor.
This guide only assumes that you have a:
- micro:bit
- Kitronik Simple Servo Control Board for BBC micro:bit
- Suitable 180 degree or 360 degree servo(s).
- Computer with an internet browser.
- Very basic understanding of computer use.
- USB data lead to connect the micro:bit to your computer..
Getting started guide:
All the knowledge you will require is contained in this guide and can be followed by people of all ages. We will learn how to connect everything together, and write code using the MakeCode editor to make a servo move. We will also show how to modify the code for more servos, and then how to get your program onto the micro:bit.
- You can Download this guide as a PDF.

Connecting it all together:
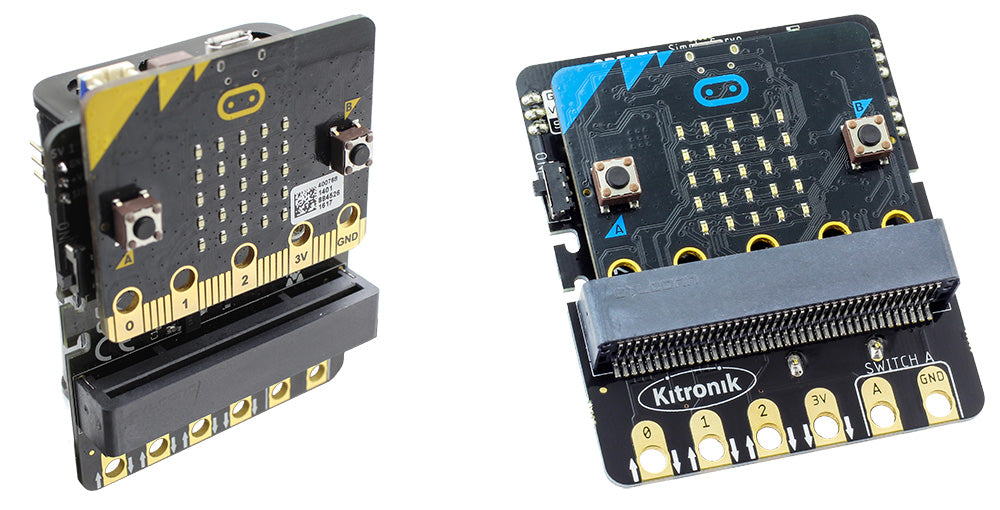
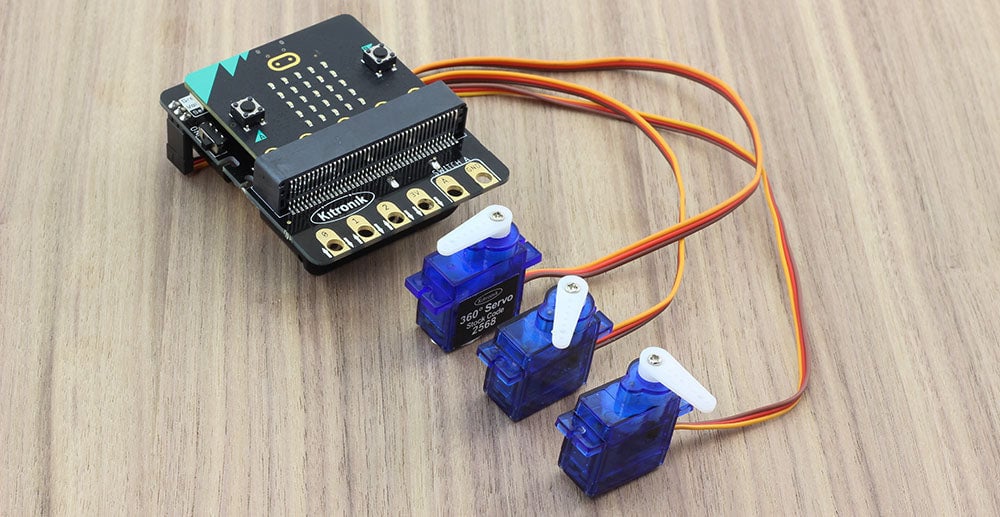
The edge connector: The micro:bit slots straight into the onboard edge connector, if you can see the micro:bits LED matrix then it’s the right way around (shown above).
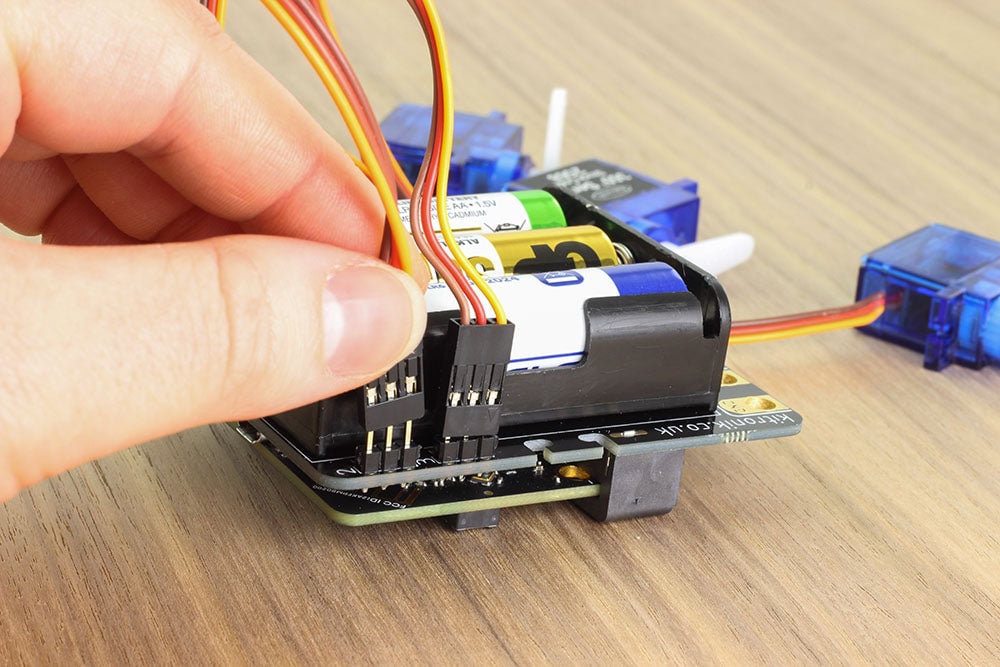
The servos: The board supports up to 3 servos and each connection point on the board has standard 3 pin connectors that the servos plug straight into, the pins are labelled G, V, S for ground, volts and signal, with signal being the bottom pin for all 3 servo connectors. On a standard servo, the signal wire is usually orange. Please see the table below.
| Simple Servo Control Board | Servo Wires |
|---|---|
| G (Ground). | Brown. |
| V (Volts) | Red. |
| S (Signal) | Orange. |
The Batteries: The onboard battery holder takes 3 x AA batteries and shows which way around each of the batteries should be inserted. The board features an on/off switch and power indicator LED. Provided you switch the board off after use, you can leave the batteries in without worrying about draining them between uses.
Adding the Kitronik Custom Blocks to the MakeCode Editor:
- Head to https://makecode.microbit.org/ and start a new project. Once you’ve picked a name for your project the editor will open. The first job is to add our custom blocks;
- Click on the cog icon in the top right of the editor.
- Select Extensions from the menu.
- Type and enter Kitronik into the search bar.
- Select the tile for the Simple Servo Control board.
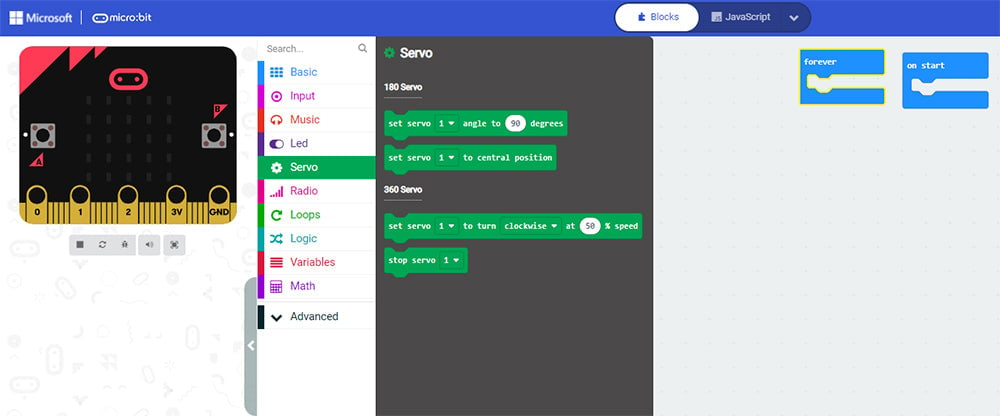
Our blocks should now be added to the editor. If you click on the word Servo in the menu list it will open up and show you the blocks that you have available. There are only 4 blocks, they are,
- 180 Degree servo:
- Set servo to angle
- Set servo to central position.
- 360 degree Servo:
- Set servo to turn
- Stop servo
Writing code to take control of a Servo:
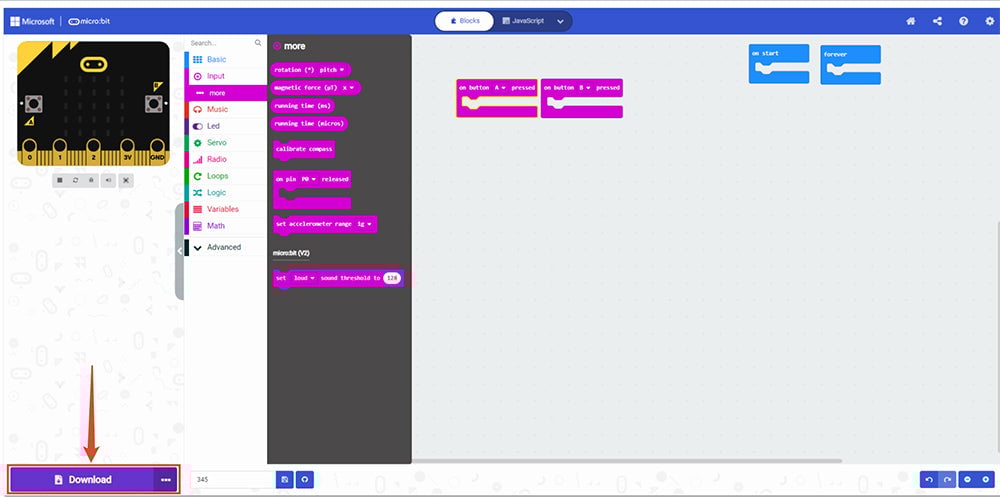
In the code example above we make a 180 degree servo move to a point that we choose, and then reset it to its starting point. We made use of the buttons on the front of the micro:bit to make this happen.
The above code shows how simple it is to get a servo moving. When we press button A on the front of the micro:bit, the servo moves to the 90 degree point and then stops. When we press button B on the micro:bit, the servo returns to its starting point. We can do this as many times as we want and the results will be the same each time.
The blocks: The ‘on button pressed’ block can be found the Input menu and the block used to move the servo can be found in the Servo menu.
By default the on button pressed block is set to A. Click on the A of your second block to change it to B. After placing the set servo into the first on button pressed block it is ready to go, the values we want are the default values so we don’t need to change anything. The same is true for set servo to central position block, just place it straight into the on B pressed block by dragging and dropping and it is good to go.
Adding more servos:
See the code below to see how easy it is to add more servos to our code. Just remember to click on the 1 in the two set servo blocks and change it to 2 for the second and three for the third.
Extension Task 1: Why not try experimenting with different angles. Click onto the number and select a new value. Hint: you can enter a value with your keyboard or drag the slider around.
Extension Task 2: Additionally, try stacking multiple ‘set servo to angle’ for a single servo, each with a different value for degrees. To make the result easier to see, use a pause block set to 500ms (half a second) between each of the set servo blocks. You can find the pause block in the ‘Basic’ menu.
Getting your program onto the micro:bit:
We’ve connected everything together, written some code, all that’s left to do is to get the code onto the micro:bit and use it!
Connect the micro:bit to a spare USB port on your computer. For a Windows PC, the micro:bit will be detected and set up automatically. If you open file explorer, you will see that the micro:bit shows up as a drive. Note: Some USB cables that are supplied as chargers with some devices do not have the data pins connected up, if your micro:bit doesn’t show up as a drive then this might be the reason. If this is the case, try a different cable or get a dedicated USB cable just for your micro:bit, like this one.
Once you are sure the micro:bit has been detected and is ready for use, click the Download button in the editor and the code will be sent to your micro:bit. As this happens the orange data light on the back of the micro:bit should begin blinking, once it finishes blinking it is ready to use.
If your micro:bit is already pushed into the edge connector on the simple servo control board, switch the board power switch to the on position and press the A button on the front of the micro:bit and your servo should move to the angle you chose in your code.
Note: Your program will stay on the micro:bit until you overwrite it by downloading another program. This is great as it means you can come back to your micro:bit at any time and the last program you downloaded will still be there and will be running as soon as you provide the micro:bit with power.
Once you’ve got to grips with everything here, you will have all the knowledge you need to begin creating cool projects. Whether your end goal is robotics or animated art, this is a great starting point. We hope you have a lot of fun and create a lot of cool things!
Troubleshooting:
The board won’t power up when switched on – Make sure the batteries you’ve used aren’t flat and that they are the right way around in the onboard battery holder.
Unexpected Servo behavior – ensure that the set servo block(s) specify the correct servo, 1, 2, or 3 and that the angles that you want have been entered correctly.
- More detailed information can be found in the simple servo control board Datasheet.
- Download this guide as a PDF.
One of the best sources of new Kitronik information is our Newsletter. To make sure you always know what’s going on, sign up for our newsletter here! The next one’s is bound to be a good one, don’t miss it!