My name is Sean Drummond, I’ve just completed my second year product design BSc at Nottingham Trent University and I am currently doing a 12-month placement with Kitronik before going back to complete my final year. Since joining Kitronik I have been given a number of projects to work on, one of these is a 3D printed lamp resource to fit our 5V LED lamp kit. I thought that this would make a great learning resource as it highlights what a great prototyping technology 3D printing is.

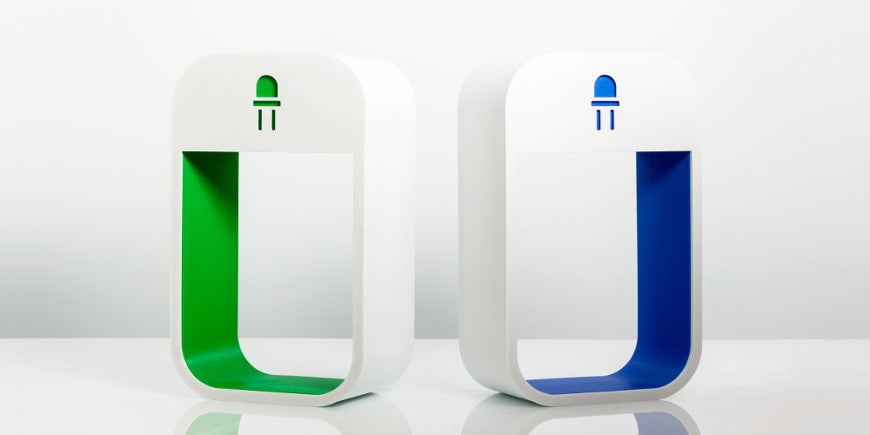
This 3D printed lamp resource has been designed for the 5V LED lamp kit. This enclosure shows that even with a prototype style manufacturing platform, it is possible to produce production quality products. The design was printed on our Robox 3D printer, using White Colourfab XT for the exterior and Green/Blue PLA for the interior, however any colours can be used to create the contrasting aesthetic.

The lamp has minimal overhangs which makes it very easy to print and also removes the need to remove support material after the print has completed.

Desktop 5V LED Lamp Design Aims:
- Simple & Clean design.
- Very easy 3D print.
- Easy assembly.
- Hides cables.
- Fits designated kit.

Every designer is different and will start the process of design in a different way. As a designer with an engineering background, I tend to design from the inside – out, and consider the function and manufacturability before the aesthetic.

For example, before starting, I knew this product was to be 3D printed, therefore I wanted a design with minimal or no overhangs as these can be the key to great surface finish.

It can be quite difficult to create a striking design with such a simple shape, however using heavily contrasting colours can greatly improve the overall look of a design. The lamps were created in Autodesk’s 3D package, Fusion 360.

Quick Tip:
If you press ‘S’ on the keyboard, it brings up the search function, where you can type the first couple of letters of any feature and it will bring them up in a list you can select from. This saved me loads of time!
Time to Print:
 Using Robox’s open source software AutoMaker I set them off to print! One of the great things about Robox printers are that they use smart reels which tell the printer what material it is using, this means the printer automatically sets the head and bed temperature.
  For more advanced users you can adjust these to suit the print better, the settings I found best for this particular print were;
Inner:
- Material – PLA
- Temperature – 195
- Flow – 100%
- Infill – 20-25%
Outer:
- Material – ColourFab XT
- Temperature – 235
- Flow – 100%
- Infill – 20-25%
Although this is what worked best for us, you may find for your individual printer the settings may be different. If you are experiencing issues with prints, you may find this link useful.

Issues I Faced:
The product is printed in three components, the interior, exterior and the battery cover. The inside and outside components slide together to form the product, so when the first prototype came off the printers, there was no gap between them. Resulting in a very strong friction fit where even standing on the two pieces couldn’t push them together, that’s when we brought out the hammer!

To resolve this issue the interior was made 0.35mm smaller, which allowed the product to be pressed together by hand.

I used the ColourFab XT for the outer shell as it is very strong compared to both PLA and ABS, however any of the smart reel materials could be used.
Assembly:

- Push together the interior and exterior components, these should slide inside one another without too much difficulty.
- For the rectangular desk-lamps, mount the switch through hole and use nuts provided to secure in position. The bulb design does not need this step as there isn’t a switch, as can be seen in the above photograph.
- Insert the components into the designated slots, and feed excess wire into the battery slot.
- Place cover over the back of the electronics and screw into place using an M3 screw.
