
One of our newest products is the Kitronik USB Rechargeable Torch Kit: a through-hole soldering kit designed to charge fast and provide a fun design challenge. Emma made this simple enclosure for you to use as a jumping-off point for your own design or perhaps just for some inspiration!
Follow Emma’s instructions below to make your own!
We have used:
- This DXF.
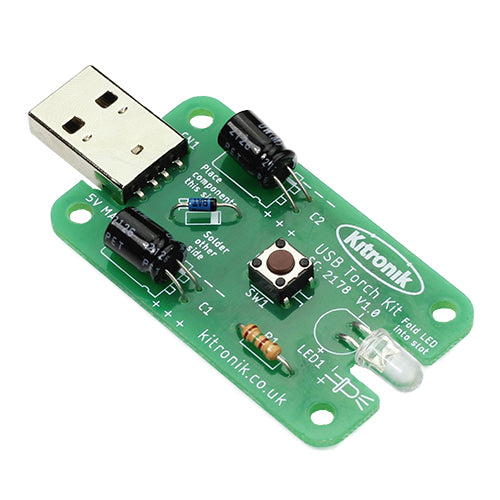
- Kitronik USB Rechargeable Torch Kit
- 3mm Opaque Purple Perspex® Sheet
- 3mm Gold Glitter Acrylic
- 4 x 6mm M3 Pan Head Screws
- 4 x 10mm M3 Pan Head Screws
- 4 x 8mm Plastic Spacers
- A Keyring
- Laser Cutter
Step 1 – Check out the design:
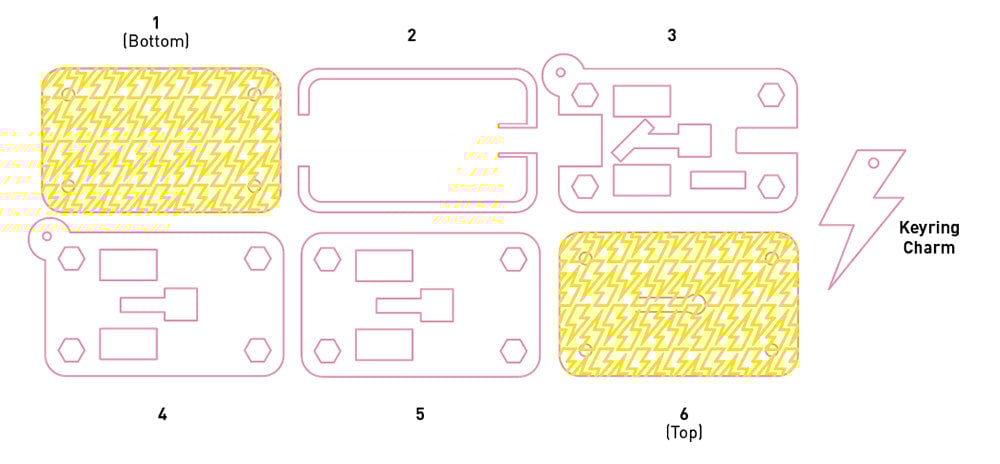
Check out the DXF! The layers are labelled in the order they will be assembled, bottom to top. The pink lines are to cut, and the yellow should be engraved.
Step 2 – To the laser cutter:
Take the design to the laser cutter! Remember! You should engrave first, then cut the inside shapes, then finally the outside shapes. This is to avoid shifting during cutting. We have cut the main torch body from opaque purple Perspex® and the lightning bolt charm from gold Glitter Acrylic.
Step 3 – Assemble the torch:
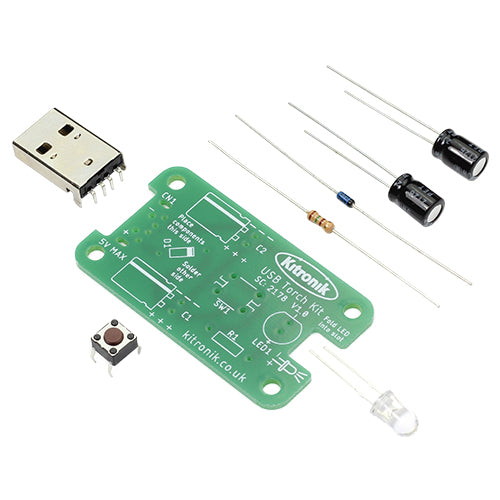
Assemble your USB Torch! You can find assembly instructions in this document – you can find this “Essential Information” document available for download at the bottom of the description on the product page too.
Step 4 – Switching it up:
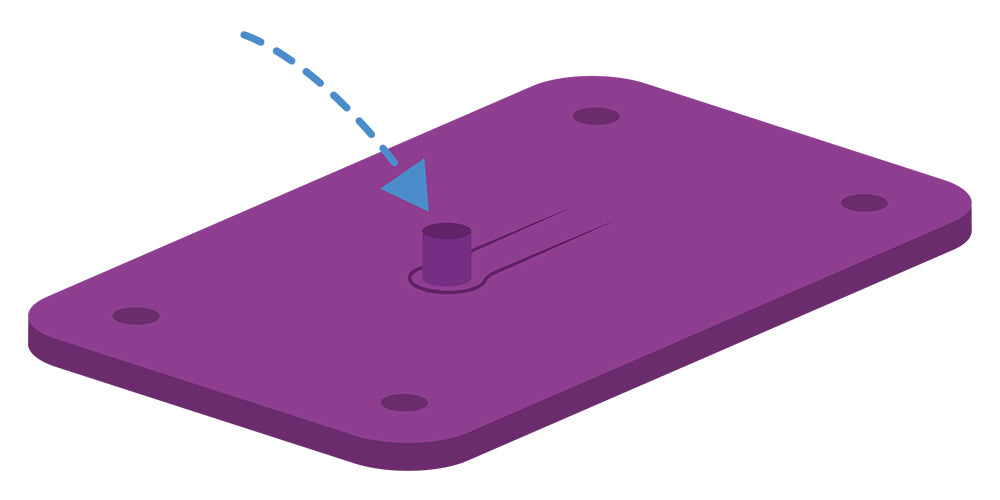
Before you assemble your torch, you will want to enable the tab on the top to reach the button on the PCB. In order to do this, you will want to save one of the cut out circles from the screw holes. Using a strong adhesive like superglue, attach a peg to the bottom of the wide part of the tab. You may need to make slight corrections to allow easy use, either sticking on extra offcuts or filing down the peg until it only reaches to push the button lightly.
Step 5 – Final assembly:
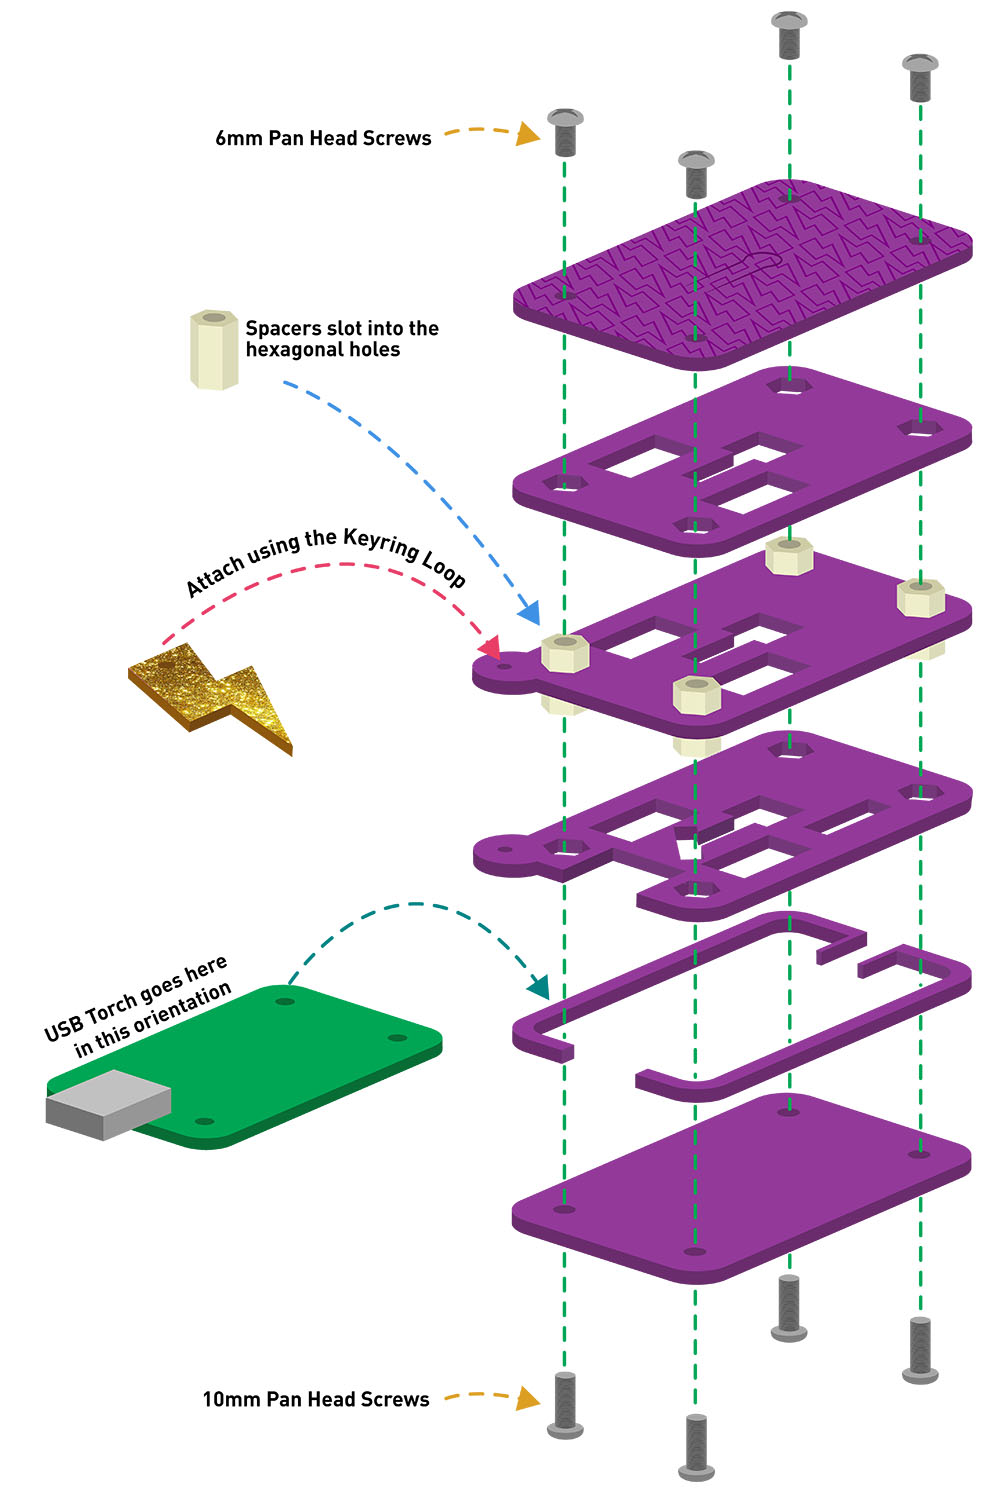
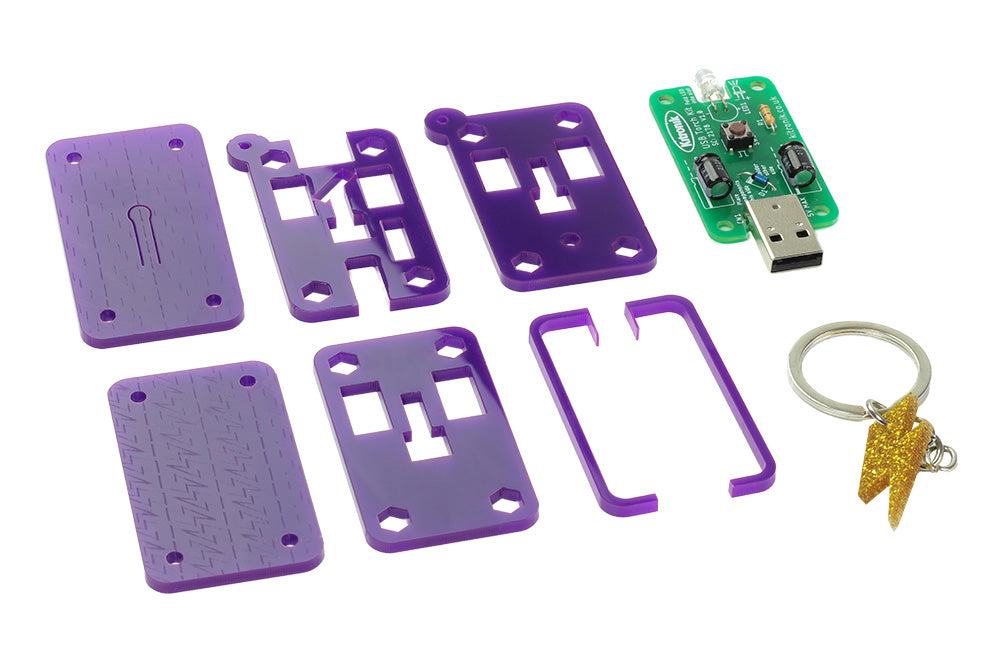
Assemble your torch! Use the below diagram to help with putting it together. You will want to assemble in the manner shown, securing the whole enclosure together using M3 screws in either side of the spacers.