Christmas Information: Kitronik will be closing 24th Dec December 2024, reopening on 2nd of January 2025. See our delivery schedule for more information.

Kitronik Inventor's Kit for the BBC micro:bit

Age 11+</> Blocks</> JavaScript
Stock code: 5603
filler

Pack Size: Single Pack
Pricing:Ex VATInc VAT
1+ £21.00
(excl. VAT)
£25.20
(inc. VAT)
10+ £20.00 £24.00
Stock:
This item is currently out of stock, but more are on their way, order now for shipping as soon as they are back in stock.
We will only use your email address to notify you that this product is available and for no other reason.

Buy locally from a partner

Bundled options

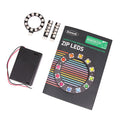
Buy the inventors kit with the ZIP add on pack
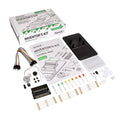
Kitronik Inventor's Kit for the BBC micro:bit+ zip large zip led add on inventors kit microbit hero

Total: £33.50ex VAT

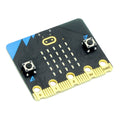
Buy the inventors kit with a BBC micro:bit

Kitronik Inventor's Kit for the BBC micro:bit+ micro:bit V2 board only angled

Total: £34.00ex VAT

Description

Exp No#. Experiment Name. Resource Type.
1 Say Hello to the BBC micro:bit. Further Help.
2 Pre V1.7 Using an LDR and analog inputs. Full Experiment + Further Help.
2 V1.7 Using a Light Sensor & analog inputs. Full Experiment + Further Help.
3 Dimming an LED using a potentiometer. Further Help.
4 Using a transistor to drive a motor. Full Experiment + Further Help.
5 Using the accelerometer to control motor speed. Further Help.
6 Setting the tone with a piezo buzzer. Further Help.
7 Wind Power. Full Experiment + Further Help.
8 Making a game using the compass. Further Help.
9 Capacitor charge circuit. Further Help.
10 Using an RGB LED. Further Help.
11 Making a pedestrian crossing. Full Experiment + Further Help.
12 Making a random dice. Full Experiment + Further Help.

Third-Party Resources:

Insight Resources Mr Bit is an online educational coding platform that also features sections devoted to some of our key micro:bit accessories, including this kit. To access these resources, please visit;

Same Day Dispatch

  • Orders placed online before 3:00pm Monday - Friday (excluding public holidays and our Christmas shutdown period) are always dispatched the same day provided the goods are in stock. If the goods are not in stock we will endeavour to contact you as soon as possible to discuss a dispatch date.

UK Deliveries

  • If you live on the UK mainland and don't have any large materials or lithium batteries in your order it will cost £3.95 (£4.74 including VAT) if you spend less than £40 (£48 including VAT).
  • If you spend between £40 and £200 (£48 - £240.00 including VAT, excluding large materials or lithium batteries) delivery is free to most locations, £12 (£14.40 including VAT, excluding large materials or lithium batteries) to Northern Ireland and £15 (£18.00 including VAT, excluding large materials or lithium batteries) to UK remote locations. For a list of postcodes that will be charged the remote location rate: remote area list.
  • If you spend over £200 (£240.00 including VAT, excluding large materials or lithium batteries) delivery is free within the UK.

Rest of the world

  • These orders are sent via UPS, and the cost is dependant on the service you choose at checkout. Alternatively you can choose the free collection option and have your own courier collect it from us. International orders can only be shipped to the registered card address. Please note: International orders may be charged import duty dependant on local import laws and duty rates. These charges are usually billed to you directly from UPS.
  • Delivery times vary for international orders depending on the service selected and the destination. You can see the delivery time and cost at the shipping stage, or by using the shipping estimator from within the shipping basket.

Collection

  • If you would like to collect your order, or use your own courier then there is an option you can select during checkout. We do not charge a packaging or handling fee for this service, and you will receive an email when your order has been processed, you can collect half an hour after receipt of this email.

Further Information

Please note: Instructions for using this product (if available) can be found under the product description.
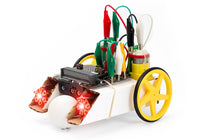
Adding ZIP Hex LEDs To The Simple Robotics Buggy Kit

A wide range of BBC micro:bit resources, what it is, the editors and using the micro:bit

Adding ZIP Hex LEDs To The Simple Robotics Buggy Kit

A wide range of BBC micro:bit resources, what it is, the editors and using the micro:bit

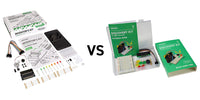
Comparison Between Inventor's Kit and Discovery Kit

Kitronik Inventor's Kit for BBC micro:bit has been one of the most successful products we have launched. Having discovered a need for an ultimate beginner product, we also recently launched...

Comparison Between Inventor's Kit and Discovery Kit

Kitronik Inventor's Kit for BBC micro:bit has been one of the most successful products we have launched. Having discovered a need for an ultimate beginner...

10 Recommended Products to Support Home Schooling

In uncertain times, we must come together and help one another. From this Friday, a lot of schools in the UK will close for the majority of children, which means...

10 Recommended Products to Support Home Schooling

In uncertain times, we must come together and help one another. From this Friday, a lot of schools in the UK will close for the...

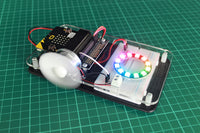
Inventors Kit Fan Controlled ZIP LED Ring

As a fun demonstration piece for shows, we created an interactive fan controlled ZIP LED experiment on the Inventors Kit that uses a motor as an input device. When someone...

Inventors Kit Fan Controlled ZIP LED Ring

As a fun demonstration piece for shows, we created an interactive fan controlled ZIP LED experiment on the Inventors Kit that uses a motor as...

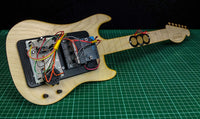
Make A microbit Guitar With The Noise Pack Add-On

See how we made a microbit Guitar using the all-new Noise Pack Add-on for the Kitronik Inventors Kit. We've also included all of the files we've used as free downloads, see...

Make A microbit Guitar With The Noise Pack Add-On

See how we made a microbit Guitar using the all-new Noise Pack Add-on for the Kitronik Inventors Kit. We've also included all of the files we've...

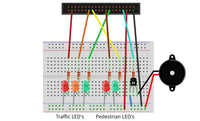
BBC micro:bit Pedestrian Crossing Project featured image

This Pedestrian Crossing project was submitted to us by Thomas Stratford. Thomas started this project to try out the pre-written code that came with the IET Pedestrian Crossing resource. The aim is...

BBC micro:bit Pedestrian Crossing Project featured image

This Pedestrian Crossing project was submitted to us by Thomas Stratford. Thomas started this project to try out the pre-written code that came with the IET Pedestrian...

Kitronik Inventors Kit Resources

The Kitronik Inventor's Kit for the BBC micro:bit is a great way to get started with programming and hardware interaction with the microbit . This Inventor's Kit contains everything you need...

Kitronik Inventors Kit Resources

The Kitronik Inventor's Kit for the BBC micro:bit is a great way to get started with programming and hardware interaction with the microbit . This Inventor's...

ZIP LEDs Experiment 10 - Using A Potentiometer

ZIP LEDs Experiment 10 for the ZIP LEDs Add-On Pack for the Kitronik Inventors Kit for the microbit. This experiment covers how to use a potentiometer to control the speed...

ZIP LEDs Experiment 10 - Using A Potentiometer

ZIP LEDs Experiment 10 for the ZIP LEDs Add-On Pack for the Kitronik Inventors Kit for the microbit. This experiment covers how to use a...

Q:
The buzzer does not work. How can I test it? I tried a battery across it but there is no sound.
Asked by: Gerry
A:
I understand the physics of a buzzer, it was attached to the board at first and the code was downloaded to test it, the buzzer does nothing, i used an LED to show that the Micro:bit and code worked, the LED did light up, so the only remaining untested item is the buzzer. (www.gbsepmt.com)
Answered by: Gerald Sheble
11-Apr-19

Q:
is there anyway to code the experiments in micropython?
Asked by: joe curran
A:
Hi Joe,

Thank you for your quesion, it should be entirely possible to do all of these experiments in micro python but as we were aiming this as a starter guide we have not written up full experiments for this.

Best Regards

Cullen
Answered by: Cullen Lewis
09-Jan-19

Q:
how do you code the wind power project in blockly
Asked by: nb
A:
Hi there,

Thank you for your question, if you type out the code in make code Java script you should then at the top of the screen have an option to press and alter the code to appear in a blocks format.
Answered by: Cullen Lewis
23-Oct-18

Q:
Is the inventors kit the equivalent of the Crumble Playground Kit? I want students to build a fairground ride using the microbit (I have seen it done using a Crumble) but the microbit playground kit doesn't include a motor. Is this what I need? or could I just buy a simple 360 servo?
Asked by: Emma
A:
Hi Emma, You may be able to use parts in the Inventor's kit to do this, however it hasn't been designed with that in mind. It may be it is better to purchase the individual items needed, however the micro:bit board is very limited on items it can power. As such you would likely need a circuit or driver board to drive a motor/servo for what you require.
Answered by: Michael Lockhart
04-Jul-18

Q:
Hi,
As i'm awaiting my kit, I was wondering if the manual was only in english ?
Is it possible to contribute to get other versions available to people ?
Thanks a lot for putting up the kit.
Asked by: Pierre-yves
A:
Hi Pierre-yves, The manual is only available in English through ourselves currently, however we have worked with Hands on Science AB in Sweden to produce a Swedish version which they will shortly be stocking. We are considering if there are other version which may be worth producing.
Answered by: Michael Lockhart
03-Apr-18

Q:
Great kits in general, but no sign of battery cage and connector in the instructions or video. The only additional requirement is the micro:bit (link takes to board only). Either missing from our kit or instructions are not clear. Thanks
Asked by: kit
A:
Hi Kit, Firstly I'm pleased to hear you like the kit. However I'm sorry to hear that you have found it a little unclear on the use of a battery cage or USB cable. It is unlikely they were missing as the standard inventor's kit (5603) is just the inventor's kit without a micro:bit. The only other option is 5618 where it is the inventor's kit with a starter kit included so you would get the micro:bit as well as battery cage and USB cable. I can see if we can make this clearer on the standard item so that it is known a USB cable and battery cage may be required.
Answered by: Michael Lockhart
07-Mar-18

Q:
The tutorial book mentions (and shows in the diagram) a battery pack, which it says is for "optional use". Is this meant to be included as part of the inventor's kit? We can't find it.
Asked by: Helen
A:
Hi Helen, The inventor's kit shouldn't include a battery pack as you would likely have one with the micro:bit. However I am unable to find the text in the booklet to confirm what this is referring to.
Answered by: Michael Lockhart
02-Jan-18

Q:
The blocks used for programs in the Tutorial book are different to those on Microbit App that my Grandson is using on an ipad pro. Is there an App that I can use that will have them the same.
Asked by: Andrew Renton
A:
Hi Andrew, It is most likely that the inventor's kit you have has an old booklet if it was purchased a while ago. On the front at the bottom there should be a version number, currently we are on 1.5. The programming blocks have altered slightly but the use and title of these shouldn't have altered. If you have any questions you can email support@kitronik.co.uk for further help.
Answered by: Michael Lockhart
22-Dec-17

Q:
On the dice experiment is the If item is 1 command correct as it sets pin 0 to a zero value (off) should it be set to 1 (on)
Asked by: S Copeland
A:
Hi there,

This is correct as the purpose of the experiment is to create a blinking light that blinks quicker as you face in a particular direction. It is correct for the Pin 0 to be set to 0 otherwise the LED will remain on continuously.
Answered by: Cullen Lewis
29-Jun-17

Q:
Why wont be .hex files copy across to the microbit folder?
Asked by: Amy Young
A:
Hi Amy, When you download the .hex file it will show in your web browser. You would then need to drag and drop this into the micro:bit folder. What you should see happen then is the small yellow LED next to the reset button should begin to flash, once this stops the code has been loaded onto the micro:bit. Normally when you view the micro:bit folder after the code has been uploaded you can't see the file but it should be stored ready to use.
Answered by: Michael Lockhart
26-May-17

Q:
Why does my fan not spin? My code works well but we tried another experiment with the fan and that didn't work either.

Be grateful for any support you have
Asked by: Joseph Moon
A:

Hi Joseph, It is difficult to advise what could be causing the issue, however it is likely that either the terminal block isn’t quiet lined up on the breadboard correctly or the item that is placed onto the motor is to heavy and as such the motor can’t spin. If you send a photo of the circuit and a screenshot of the code to support@kitronik.co.uk we can take a better look and try to help further.

Answered by: Michael Lockhart
06-Mar-17

Q:
Any reason for not having connectors for pin 19 and 20 populated on the board.
I just realised there are no pins and was about to use the function presented on the board (i2c).
Asked by: Owen Brotherwood
A:

Hello Owen, The rationale behind the design is this: The micro:bit has 21 connections, however it is not possible to buy a 2 x 21 section of pin header. The 2 x 20 way is however readily available, so the board was designed with the most common connections going to the 20 way break out. As for the two I2C pins, we wanted to include these for more advanced users of the board, but placed them to one side. Anyone that wants to connect to these pins can either permanently solder in to them or add their own pin header.

Answered by: Michael Lockhart
11-Jan-17

Q:
I was wondering what exactly needs assembly in this kit/what size screwdrivers are needed?
Asked by: captainwonkish
A:

Hello, the kit would only require a small amount of assembly, the prototype board would need sticking to the plate. The edge connector would need fixing to the plate using the screws and spacers provided. These are the screws that are used, pan-head-m3-machine-screw-pack-of-100

Answered by: Michael Lockhart
22-Aug-16

Q:
is this kit and the microbit suitable for old people ime 67 .
Asked by: richard smith
A:

Hi Richard, There isn’t really an upper age restriction on this product, it would depend on how comfortable you feel dealing with electronics and programming. This product is currently being used in schools mainly in there KS3 years, but can be used for people outside of this bracket.

Answered by: Michael Lockhart
19-Jul-16

Q:
Is it possible to download the step-by-step tutorial book as a pdf or word file?
Asked by: Annelie Chabmers
A:

Hi Annelie, Unfortunately it isn’t possible to download the tutorial book as it is part of the kit and not avaible on its own.

Answered by: Michael Lockhart
12-Jul-16

Q:
Is the Inventor's Kit tutorial kit available online? I'd like to incorporate sections into my lesson PowerPoint.
Asked by: Victoria Wicking
A:

Hi Victoria, Unfortunately the booklet isn’t online due to it being part of the product, we have however placed 3 out fo the 10 tutorials online for examples of what are in the booklet. experiment-2-using-an-ldr-analog-inputs experiment-4-using-a-transistor-to-drive-a-motor experiment-7-wind-power

Answered by: Michael Lockhart
08-Jul-16

Q:
Page33 of Inventors Tutorial book lists Touch Develop script for 'Mapping a Tilt to a Speed.
Can't find 'tilt' function anywhere on iphone 6S command list. Can you help please.
Asked by: Ron McKenzie
A:

We have recently changed this bit of code in the new version of the booklet. I have passed this on for someone to look at for you and they will contact you with further details.

Answered by: Michael Lockhart
16-Jun-16

Q:
how do you get the box with another box in the top right of that on touch develop
Asked by: Harry
A:

Hi Harry, could you just explain a little further what you are trying to do touch develop?

Answered by: Michael Lockhart
14-Jun-16

Ask a question about this product


Payment & Security

American Express Apple Pay Diners Club Google Pay Maestro Mastercard PayPal Shop Pay Visa

Your payment information is processed securely. We do not store credit card details nor have access to your credit card information.

You may also like

Recently viewed