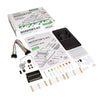
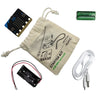
Inventors Kit Experiment 5 - Using The Accelerometer To Control Motor Speed :
The BBC micro:bit has a built-in accelerometer. The accelerometer detects if it is speeding up or slowing down in 3 directions, labelled below as X, Y and Z. Each axis can measure between -4096 and 4096 which correlates with -4 and 4Gs. A G is an acceleration of 9.81 meters per second per second; this is the acceleration that objects under the influence of earth’s gravity experience.Video Walk-Through With Hints & Tips:
Code Downloads:
The code examples below have been individually zipped and can be downloaded by clicking on your preferred option. Once unzipped you can either open the and edit the code in appropriate editor or place the HEX file onto your microbit*.MakeCode Editor & Python Code Downloads:
- This code was created with the MakeCode Editor, download the HEX file here.
- This code was created with the Python Editor, download the HEX file here.
Legacy Editors Code Downloads:
NOTE: The legacy editors will disappear at some undisclosed point in the future. The code can still be placed on a microbit and will run regardless but you won't be able to use an editor. When that happens, switch to using one of the currently supported editors. We've already made the switch as the new editors are better and more fully featured.- This code was created with the Touch Develop Editor, download the HEX file here.
Booklet Errata:
- To add a new variable called 'Tilt' select 'var (new variable)' and change the default name to 'Tilt'.
- To add the input -> acceleration code delete the default '0' and then use the commands within the 'input' command set.
- To use the Tilt variable delete the default value and then select the 'Tilt' variable.

Kitronik Inventors Kit Resources:
| Exp No#. | Experiment Name. | Resource Type. |
|---|---|---|
| 1 | Say Hello to the BBC micro:bit. | Further Help. |
| 2 Pre V1.7 | Using an LDR and analog inputs. | Full Experiment + Further Help. |
| 2 V1.7 | Using a Light Sensor & analog inputs. | Full Experiment + Further Help. |
| 3 | Dimming an LED using a potentiometer. | Further Help. |
| 4 | Using a transistor to drive a motor. | Full Experiment + Further Help. |
| 5 | Using the accelerometer to control motor speed. | Further Help. |
| 6 | Setting the tone with a piezo buzzer. | Further Help. |
| 7 | Wind Power. | Full Experiment + Further Help. |
| 8 | Making a game using the compass. | Further Help. |
| 9 | Capacitor charge circuit. | Further Help. |
| 10 | Using an RGB LED. | Further Help. |
| 11 | Making a pedestrian crossing. | Full Experiment + Further Help. |
| 12 | Making a random dice. | Full Experiment + Further Help. |
©Kitronik Ltd – You may print this page & link to it, but must not copy the page or part thereof without Kitronik's prior written consent.


4 comments
Mark Donnison
Hi Owen, when you click on the Math menu item it will display a list of blocks. Also, when you click on Math in the menu the word 'More' will appear under the work Math in the menu, click on the word More, and you will find the block you are looking for in there. I hope this helps.
Owen
I am trying to code this experiment but when I go in the math section the 'absolute of' block isn't there. If anyone could help me a would really appreciate it Many thanks, Owen
Mark Donnison
Hi Tara, if you were to drop an email to support@kitronik.co.uk one of our customer service team will try to help you.
Tara
Hi there, This is a great kit but the manual disappeared and we are only half way through! Is the manual itself available online anywhere? Many thanks!