As our recently released Bluetooth Amplifier Kit has proved so popular and because the picture of a 3D printed case that we previously designed for it has attracted a lot of inquiries, we decided to offer up the case design as a resource. Either for those that want to design their own case or for those that just want to grab the files and get making straight away.

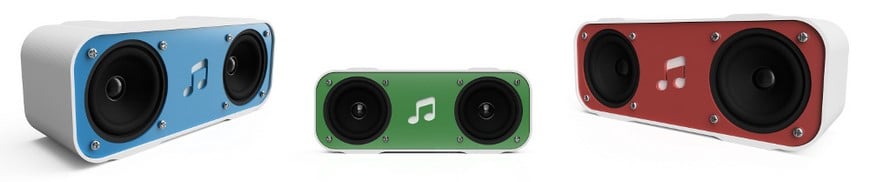
The Kit we used for this 3D printed Bluetooth amplifier case resource was a 2160-A Bluetooth Amplifier Kit with 65mm 4 ohm speakers and the dimensions for this design will only be suitable for these speakers. The face plate of the design has been cut from a perspex sheet and the rest of the design has been 3D printed.

We printed our designs using our Robox 3D printer loaded with White ColorFab nGen printer filament and although we cut our faceplate from perspex, you can use any 3mm laser compatible material. If you want to go the fully 3D printed route we included a file that you can use to print the front plate as opposed to laser cutting it.

3D Printed Bluetooth Amplifier Case Design Aims:
- Quick to design.
- Easy to print, minimal overhangs.
- Easy to assemble.
- To fit the assembled kit without using a remote switch or LED.
- Wall Mountable.
Although it was a straightforward print, there not being any intricate parts, it did take a good 10 hours on draft quality. Also, we went straight from the first design to ‘it’s done’ with no testing.

Had we had more time we would have experimented further for sound quality considerations. Things such as porting and internal separation between the speakers would deliver a better result or at the very least, some acoustic foam between the speakers may help to protect against phasing issues.  The back of our design incorporates two holes, one for the switch and one for the USB charging/power input. On the PCB, between the USB input and the switch is the LED, rather than make another hole we decided to print the case thinner at this point so that the light shines through the case.

The case was designed using Autodesk’s 3D package, Fusion 360, but you can use any 3D design software that you are familiar with. The video below shows the majority of the design process, though it doesn’t show any sketches that were created on a plane, those that were created on a face are shown. It should give you a rough idea of how the case evolved throughout the process.

Importing Into The Printer Software:

We imported our design into Automaker and used the following settings for our print:
- Bed Temperature: 80
- Nozzle Temperature: 225
- Flow Rate: 97
- Infill Amount – 100%
A note about Infill: We went with the maximum for this print as we decided that more density would be better. If we’d had the time to experiment we would have also produced a print with an infill amount of 20-25% to compare the two as it’s possible that our initial assumptions were incorrect. The settings we used for our printer worked well for us and we were able to print it in one go, your printer/filament combination may require different settings. If you’re having problems getting a print that you are happy with you may find this link useful.
Assembly:

Each speaker has four screw holes and as you have probably noticed in the design video above, the case only has four holes in total. So, in our design two of the screws for each speaker are to fix the speaker to the front plate and the remaining two are to fix the front plate to the case.

Download Our Files:
Included in the zip file are the following files;
- Enclosure Back (stl) – The main case.
- Enclosure Front (stl) – A 3D printed version of the front plate.
- Laser Cut Conversion Piece (stl) – If you are using the laser cut front you will need to 3D print this to slot onto the front of the PCB so that it wedges against the front plate.
- Wall Mount (stl) – Only needed if you intend to mount your speaker on a wall or surface.
- Laser Cut Front (dxf) – There are two versions of the front plate, chose the one you prefer and delete the other.
You can download the design files here.