At Kitronik we occasionally have students come for work experience.
Isabelle from The Fernwood School joined us recently for a week, and was tasked with creating a set of Fairground rides to complement the 56101 LAB:Bit.
Her brief was to create some designs that could be made in a KS2 classroom using cardboard, glue and sticky tape.
Here is what she came up with:
Ideas:
- Idea 1- Ferris Wheel
- Idea 2 – Carousel
- Idea 3 – Coconut shy
- Idea 4 – Pirate ship
- Idea 5 – Spinning chair ride
Idea 1 – Ferris wheel
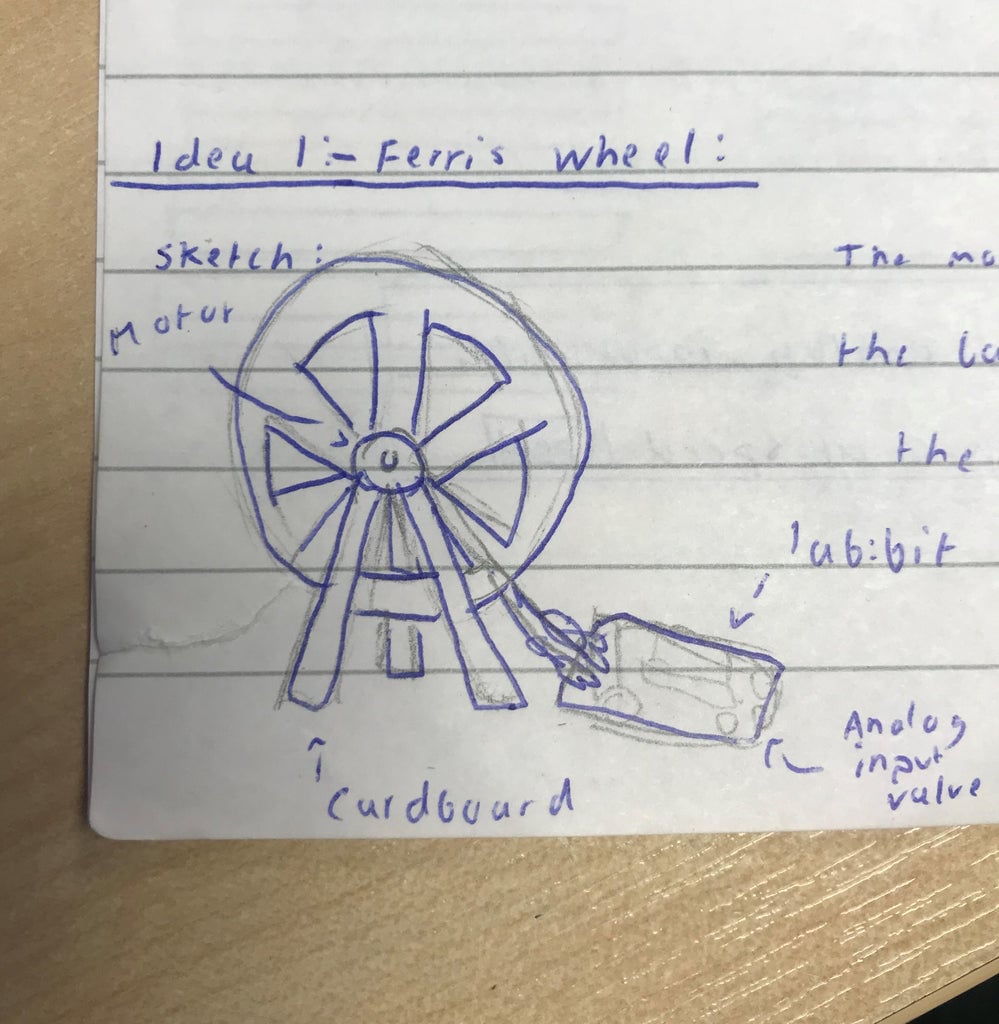
In the centre of the Ferris wheel there is a motor which is connected to the LAB:bt through wires. The speed of the Ferris wheel is controlled through the analogue input value and will turn clockwise faster the more the value of the analogue input is.
Additional things to add:
- Lights that change colour depending on the direction the Ferris wheel is spinning.
- The motor randomly changes direction every two seconds and shows the direction it is turning on the micro:bit using an arrow. The music played could also change when the direction does.
Idea 2 – Carousel
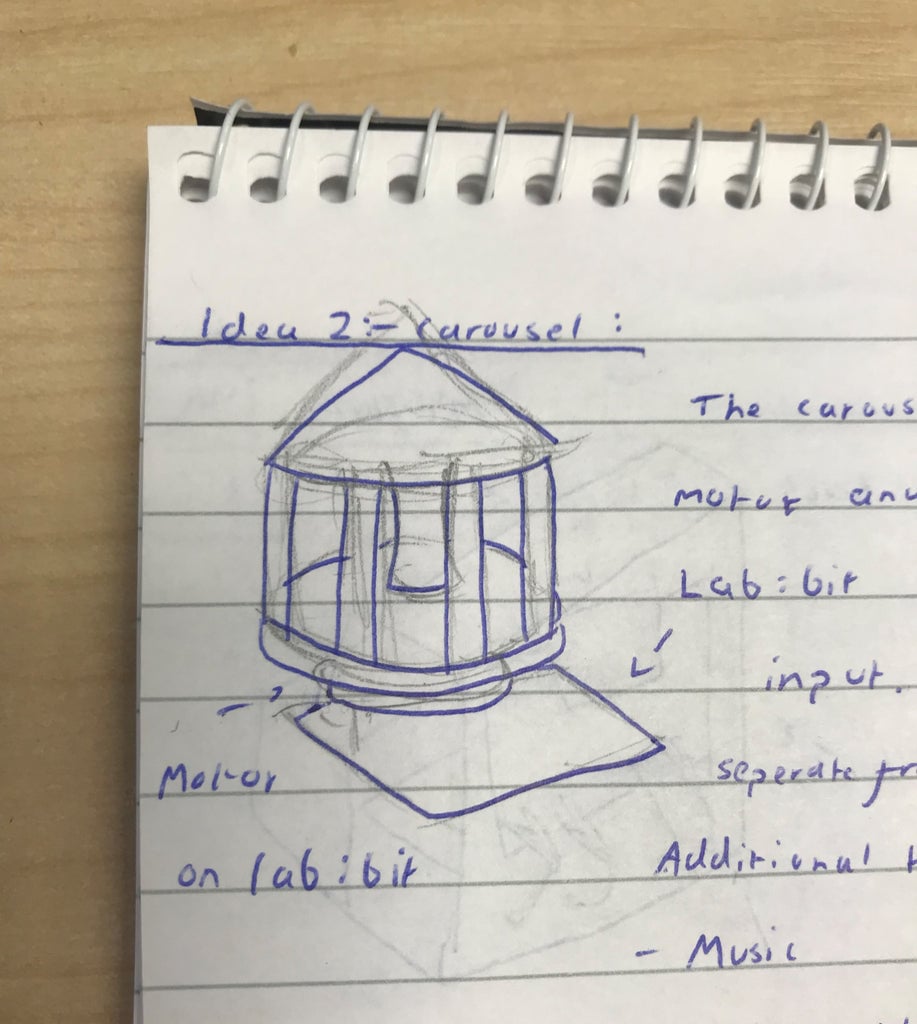
The base of the carousel is attached to the motor on the LAB:bit and the speed is controlled by using the value of the analogue input value. This should make the carousel look like its spinning.
Additional things to add:
- Add in music.
- Make the tempo of the music increase the same as the speed.
- Make the lights show a rainbow and rotate quicker as the speed of the carousel increases.
Idea 3 – Coconut Shy
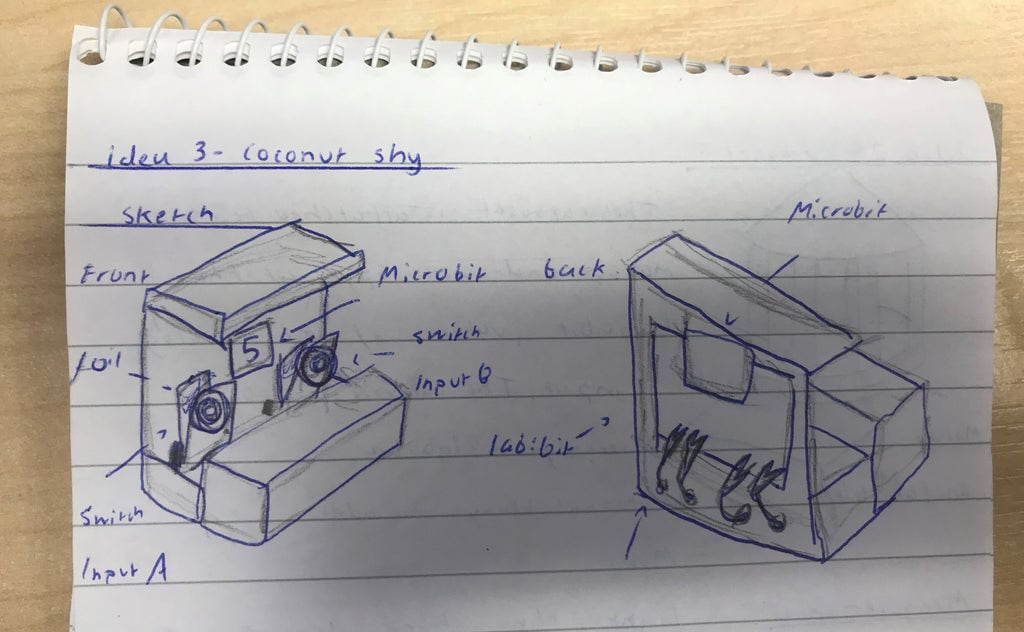
Foil is wrapped around both ends of the cardboard and croc clips are clipped on each side to the either switch input A or B with wires. This creates a switch that will turn on when the foil is touching. Using this idea you can create a scoring system and make it so every time you hit the target (foil wrapped in cardboard) you get a point.
Additional things to add:
- Celebration music when you get a point.
- A score system so the number of points you have are displayed on the micro:bit screen.
- A timer that when it runs out, if the player hasn’t reached the amount of points, it’s game over. This could also include game over music.
- When the timer gets to 3 seconds left, the countdown to 0 is displayed on the screen.
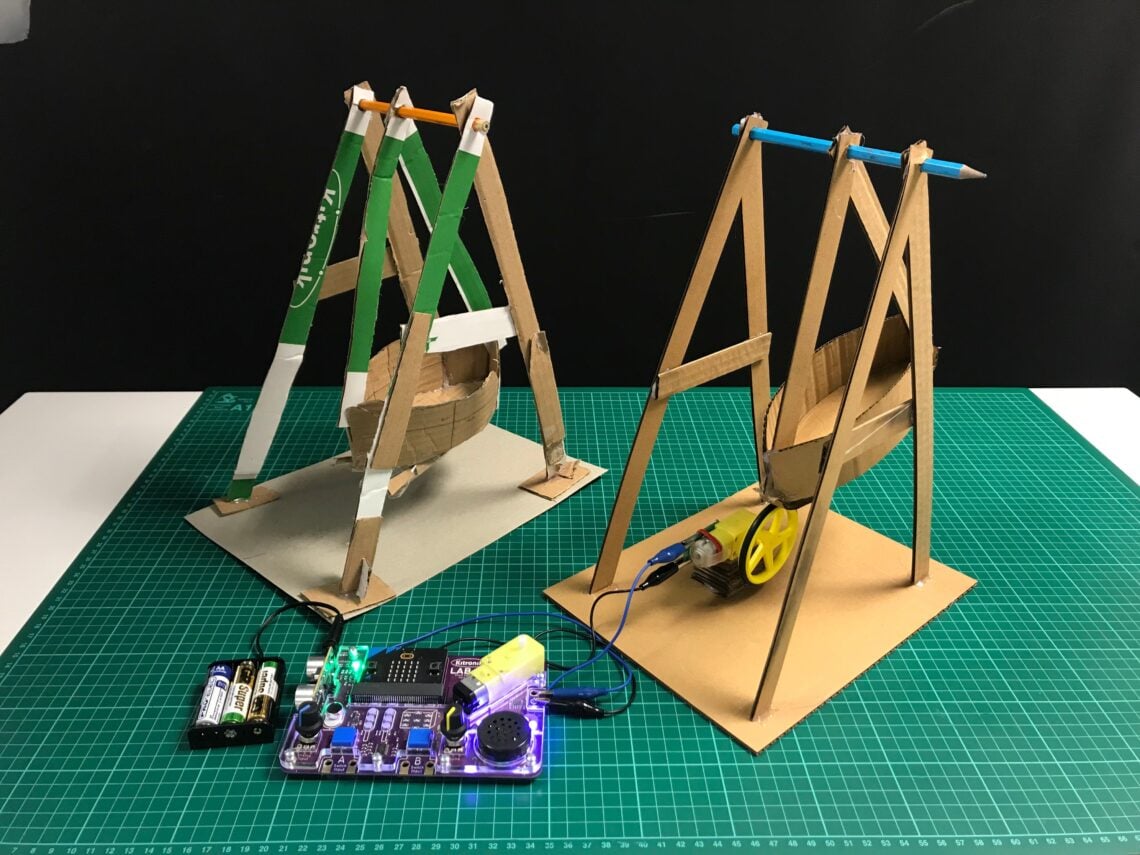
Idea 4 – Pirate ship
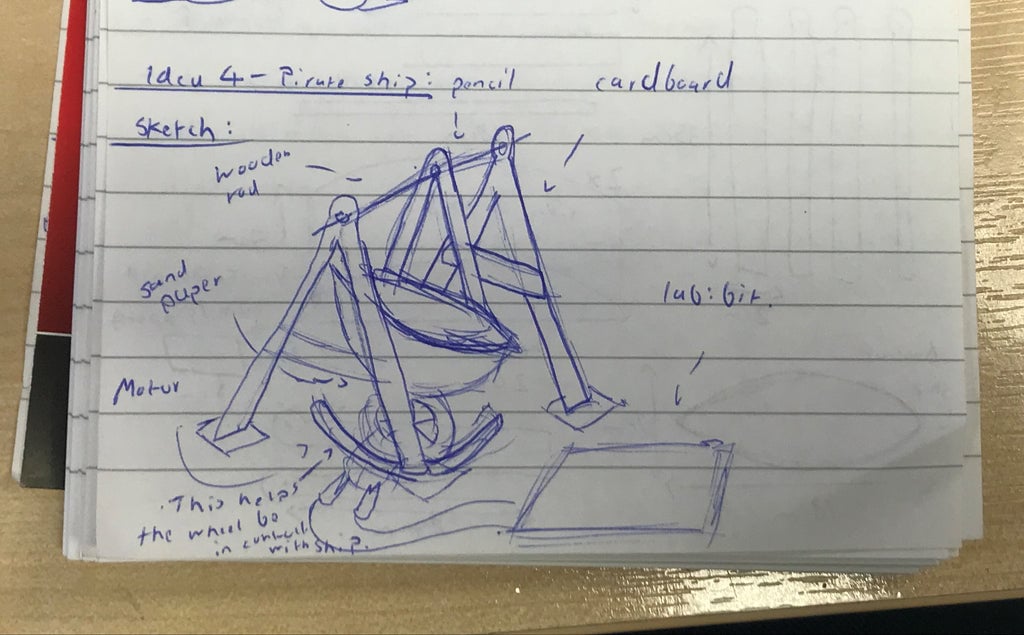
There is a motor at the bottom of the pirate ship which will turn clockwise and after 1.5 seconds it will change direction again. Creating a swinging affect. You can use sand paper at the bottom of your pirate ship and make the swinging smoother and well as a slot where the wheel will stay inside and swing in a straight line.
Additional things to add
- Add music that matches the movement of the pirate ship.
- Lights that change when the ship changes direction.
- To be able to easily control the speed.
- Increase the tempo of the music as the speed increases.
Idea 5 – Spinning chair ride
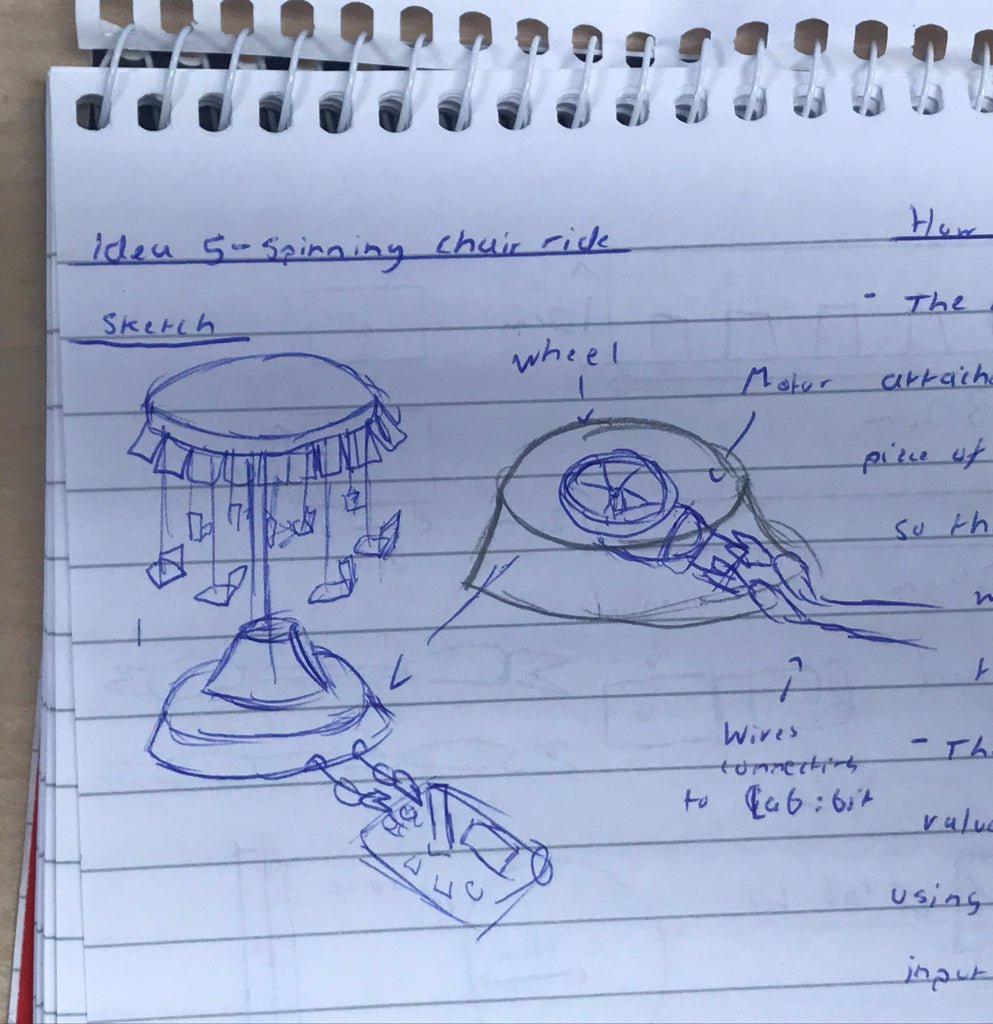
A motor is separately attached from the LAB:bit using croc clips and it is attached to the base of the ride, so the wheel will spin the ride. The speed of the ride is controlled using the analogue input value.
Additional things to add:
- Lights that change depending on the speed of the motor.
- Music to match the movement of the ride.
- Make the LAB:bit motor at the bottom and have another motor spinning at the top part of the ride. (This will make the ride look more fun and move more if you have the top motor tilted a bit.
From these ideas Isabelle worked on the Pirate Ship.
To make this, in addition to cardboard and glue you will need a LAB:Bit, an additional TT Motor, clip wires, and solderless TT adaptor.
The design is available in this DXF file.
The micro:bit code is here.
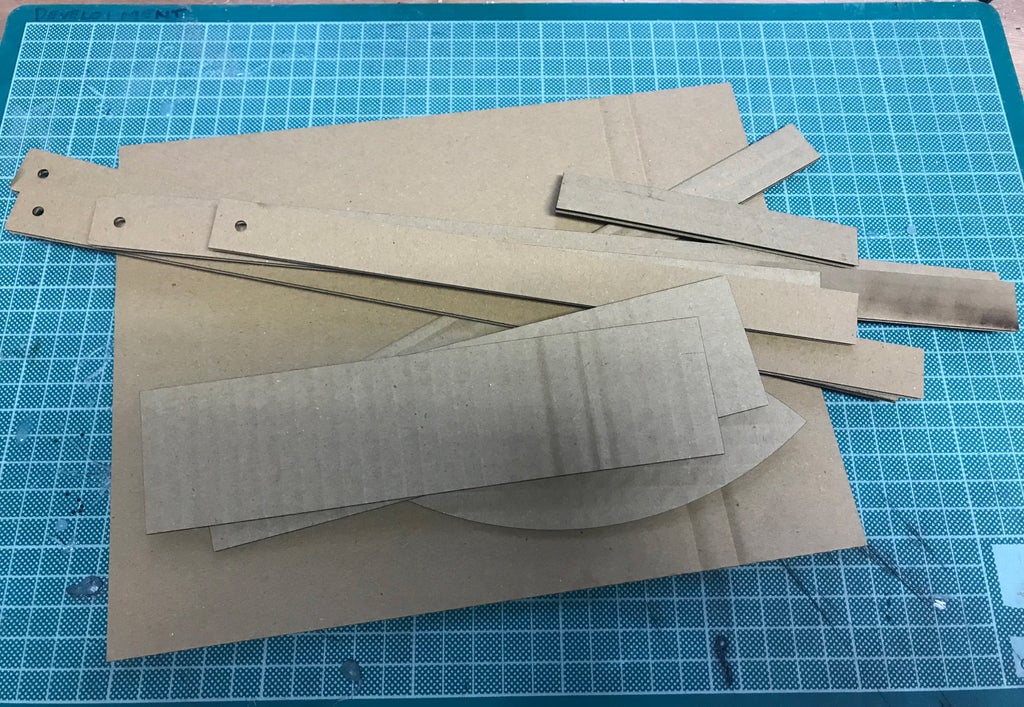
The following pictures show how to build the model:
Firstly cut out the pieces. We used a laser cutter, although scissors would work just as well.
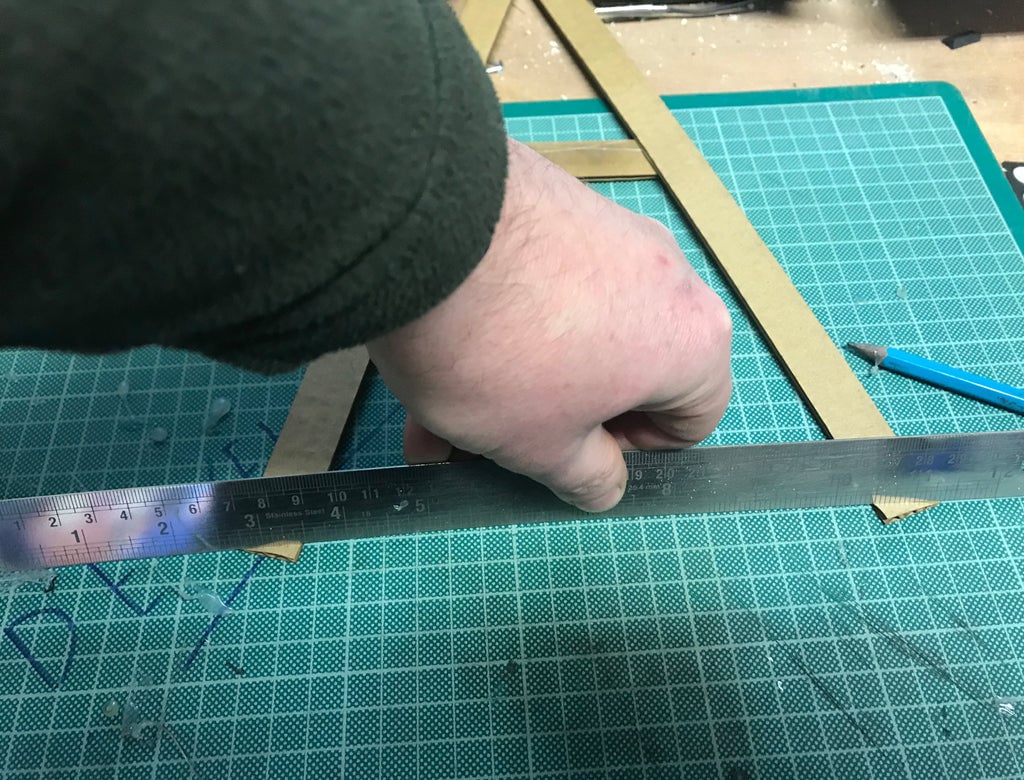
Line up the top of the A Frames and glue them together, including the cross piece.

Then using a ruler to mark them, cut the bottom edges straight, so they will stick to the base plate:

Next assemble the Ship:
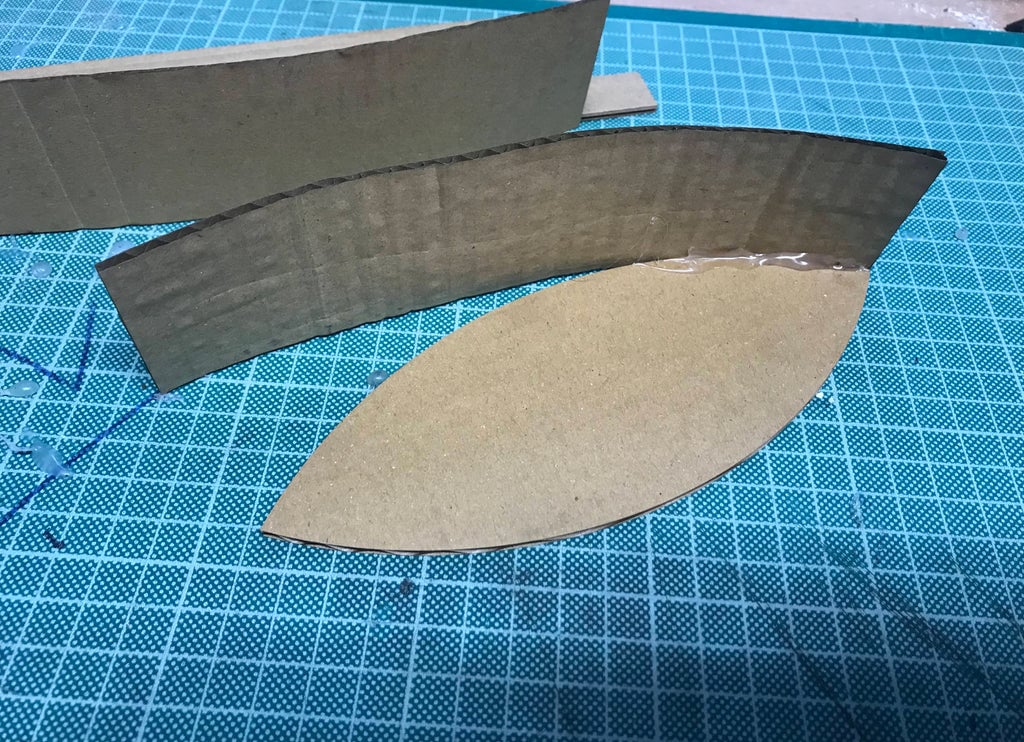
Glue the sides on, followed by the Ship A frame:
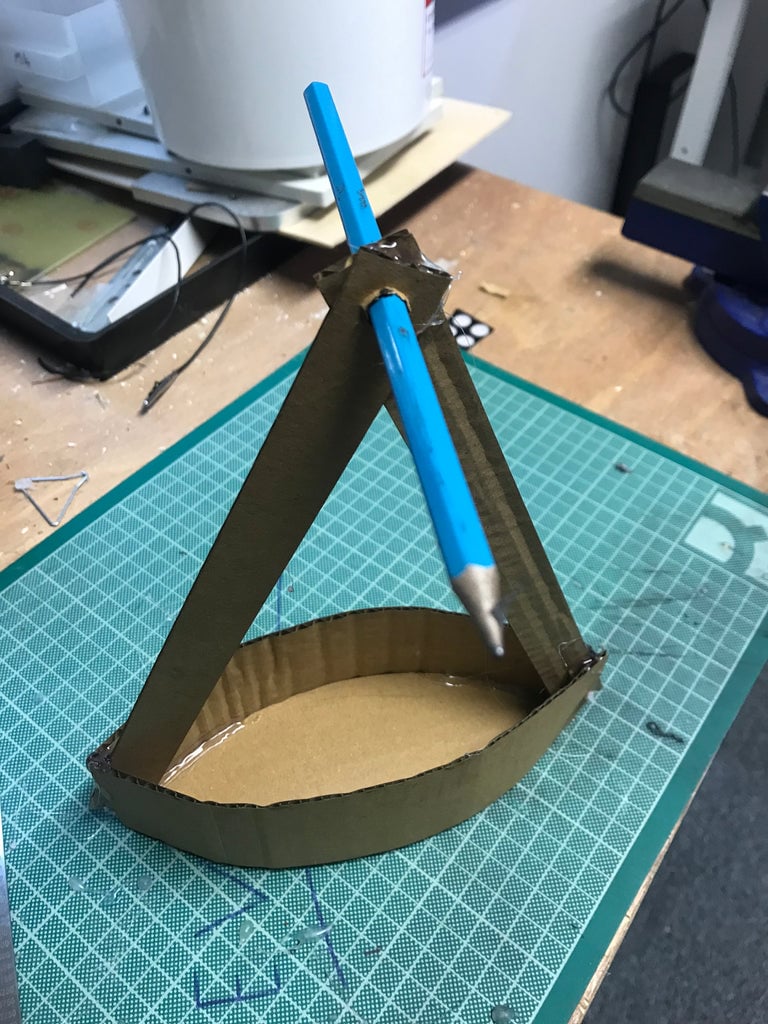
Use a pencil or a skewer to line up the holes.
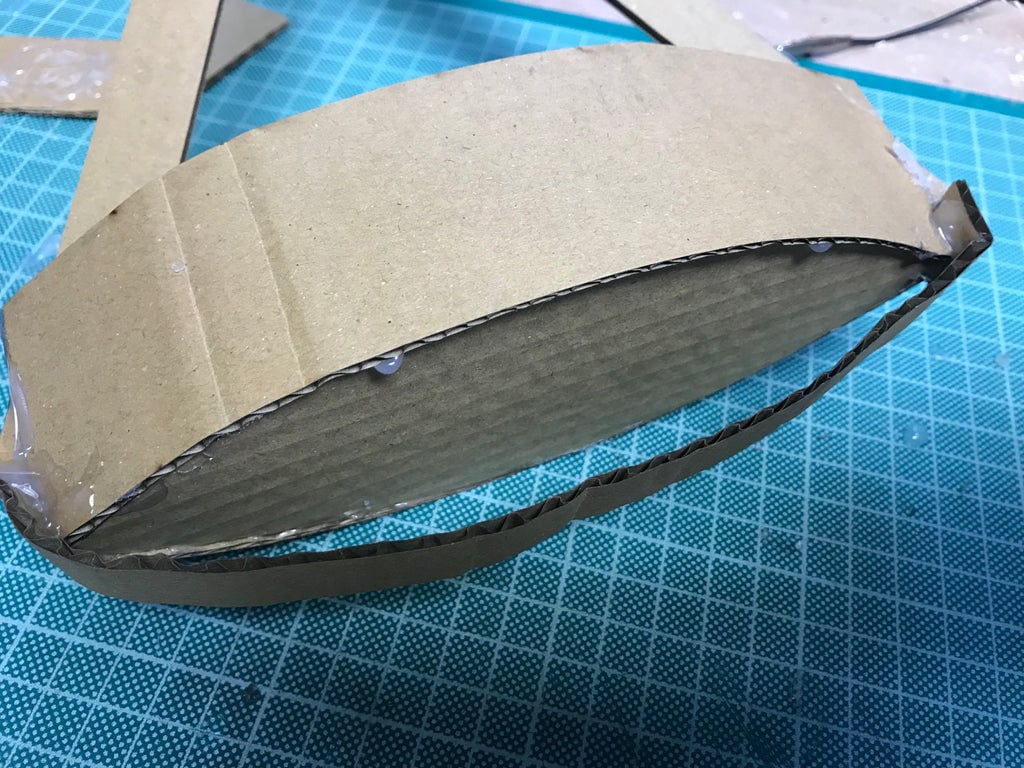
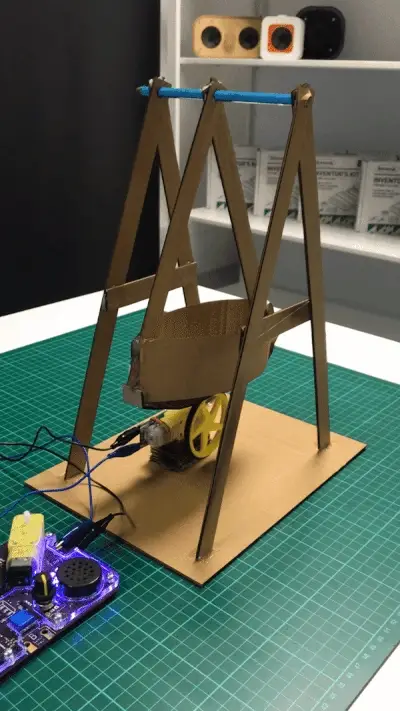
The Keel goes on the bottom of the ship. The wheel from the motor runs on this and pushes the ship forwards and backwards.
The main A Frame is glued to the baseplate, and the ship hangs from it:
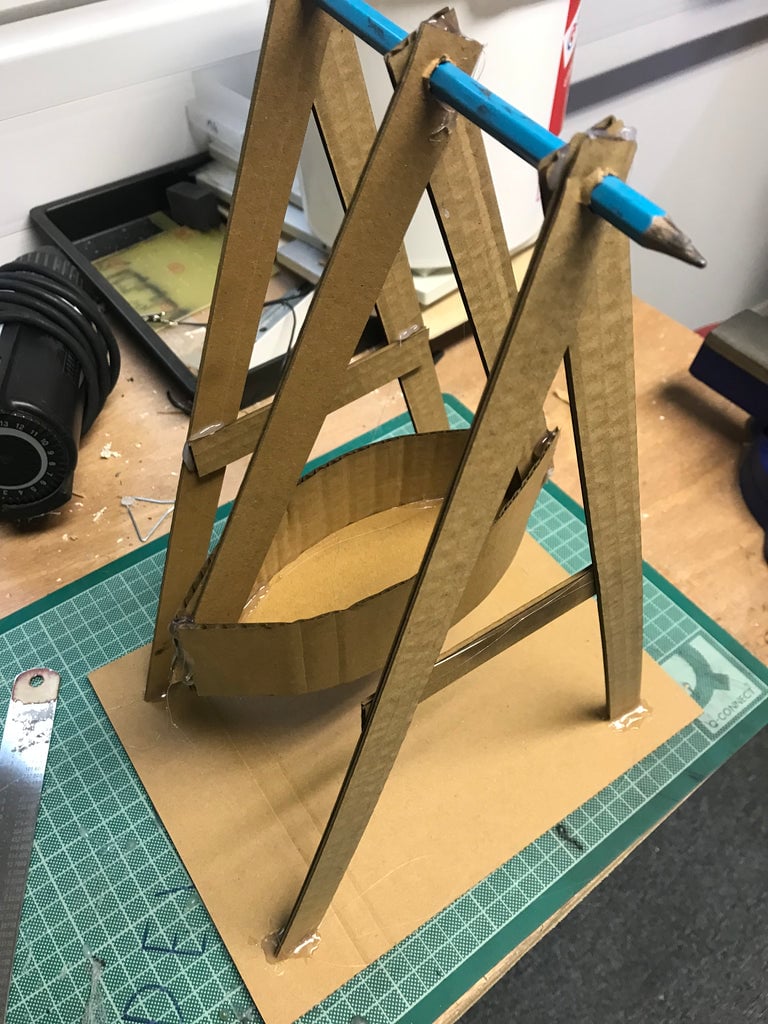
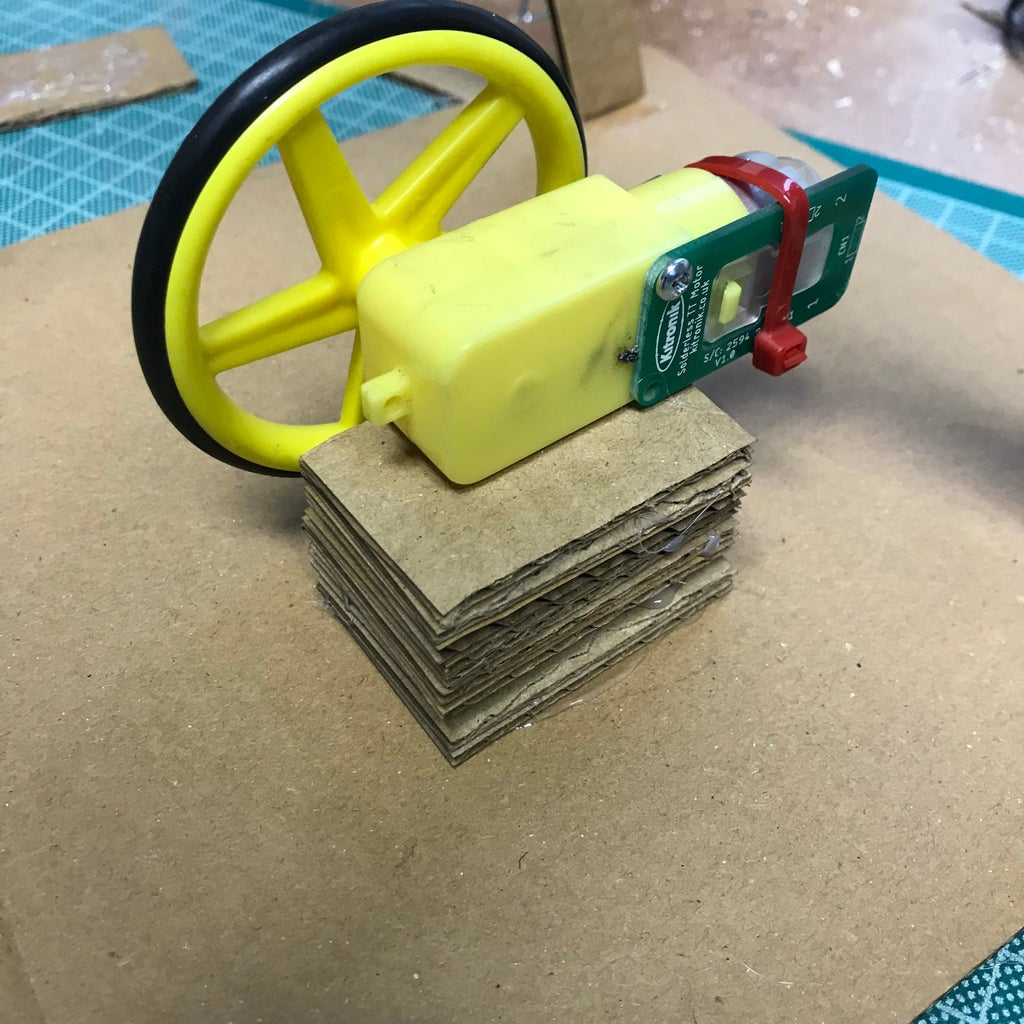
To get the motor wheel to touch the keel it needs a stack of card. How much depends a little on how thick, and how high the ship hangs.
Program the micro:bit with the hex in this zip file, clip on the motor and you should have a swinging pirate ship:
Don’t forget to try the adding:
- Music that matches the movement of the pirate ship.
- Lights that change when the ship changes direction.
- To be able to easily control the speed.
- Increase the tempo of the music as the speed increases.