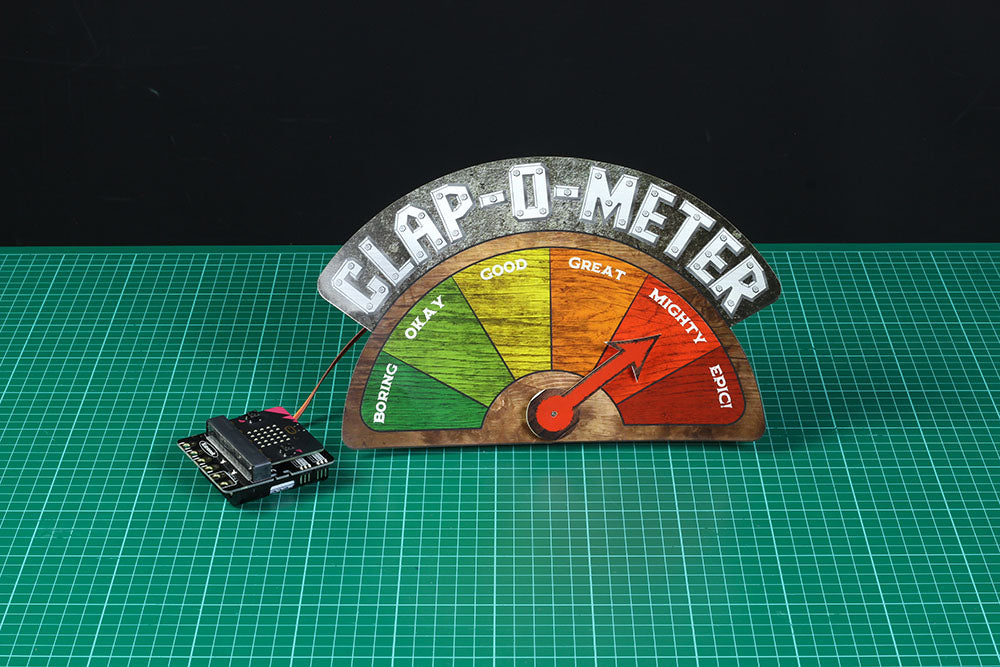
The first in a series of makes for the Simple Servo Kit – a Clap-O-Meter! This simple make reads the sound level using the microphone on the BBC micro:bit V2 and a Kitronik Simple Servos Starter Pack for BBC micro:bit. Different sound levels will trigger different angles on the servo, resulting in the arrow pointing at different places on the Clap-O-Meter gauge.
Follow along as Emma shows you how to make this sound reactive project. Let’s go…
See the other makes in the Simple Servos Starter Pack series:
- Clap-O-Meter.
- Carousel.
- Swingboat.
- Remote Control Car.
We have used:
- Kitronik Simple Servos Starter Pack for BBC micro:bit
- BBC micro:bit V2
- 220gsm White Card
- Glue or Tape
- This PDF & DXF. (The ZIP file contains a DXF, PDF, and HEX file)
Step 1 – Cut it out:
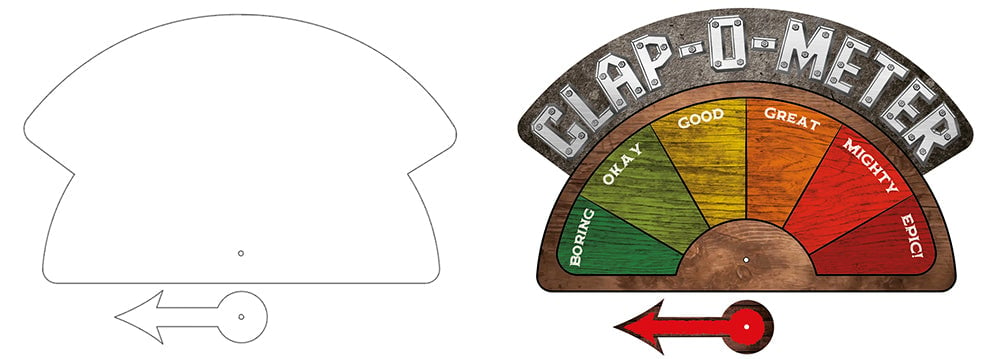
Print out our PDF and cut it out, or cut out the outline provided in the dxf file (you can do this on a laser cutter if you want) and draw or paint your own dial! If you do this, make sure to measure the angles you’ll need to send the servo to for each option on the dial.
Step 2 – Attaching the Servo:
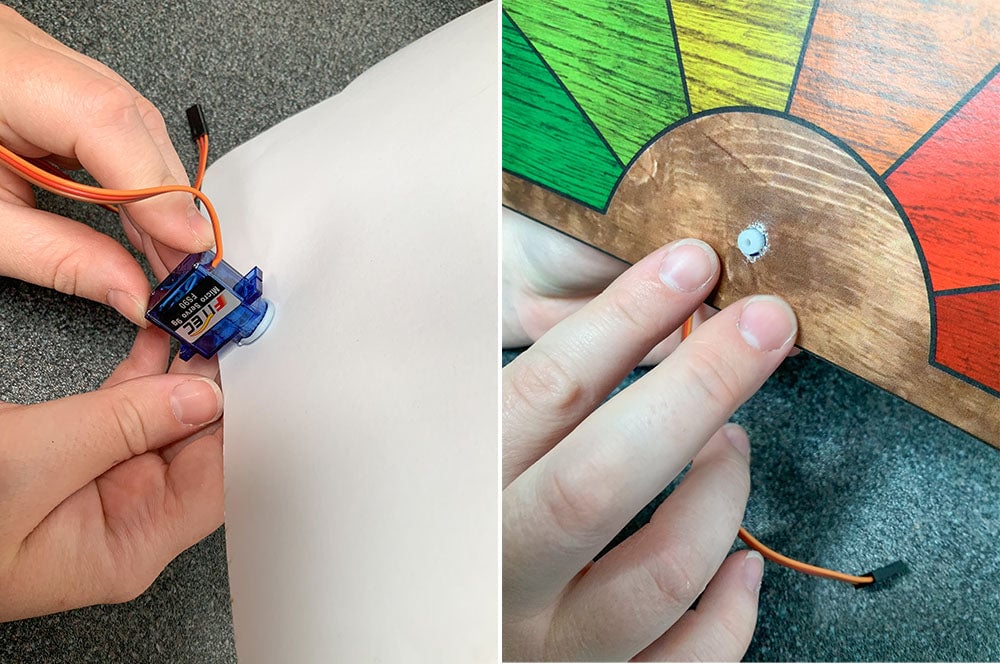
Attach the Servo to the two pieces. Attach the larger piece to the servo with tape or glue of your choice (maybe even a sticky tack) with the hole over the output shaft. Then glue or tape the horn to the indicator arrow, making sure the hole on the arrow is over the hole in the horn.
Step 3 – Attaching the gauge needle (arrow):
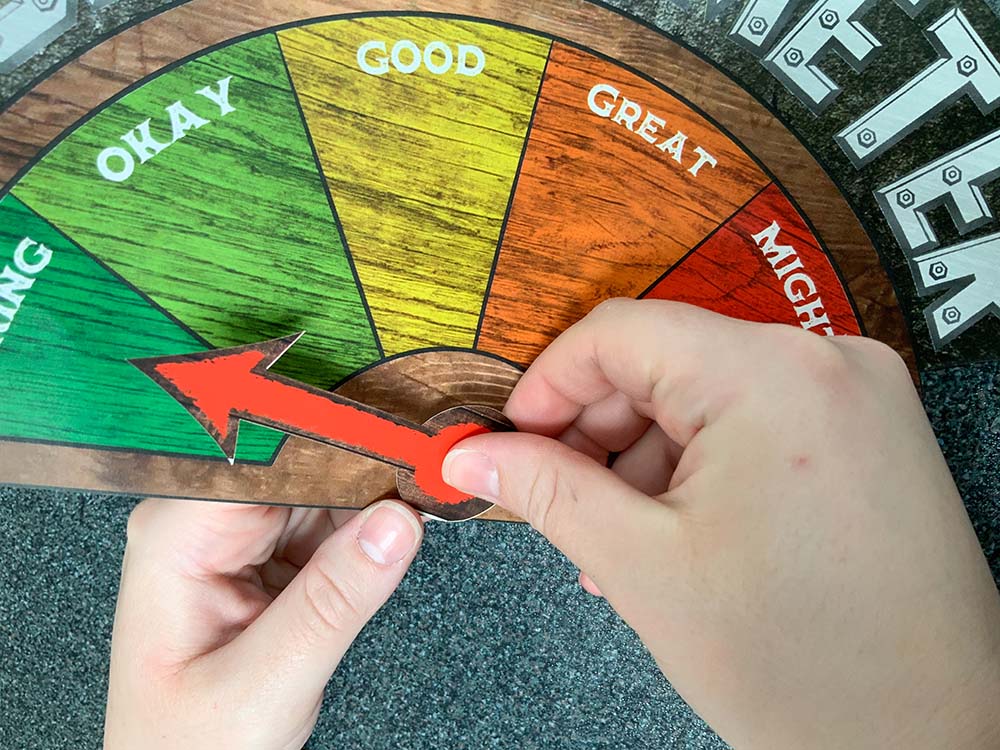
Push the horn onto the servo, making sure the output shaft is spun all the way to the left and then pushing the arrow on so it points at the leftmost option, which in our case is “Boring”. Screw the servo horn onto the output shaft.
Step 4 – The code:
Upload your code onto your micro:bit! This outputs a particular angle on the servo depending on the loudness of the sound detected by the V2 micro:bit.
Step 5 – Finish and test:
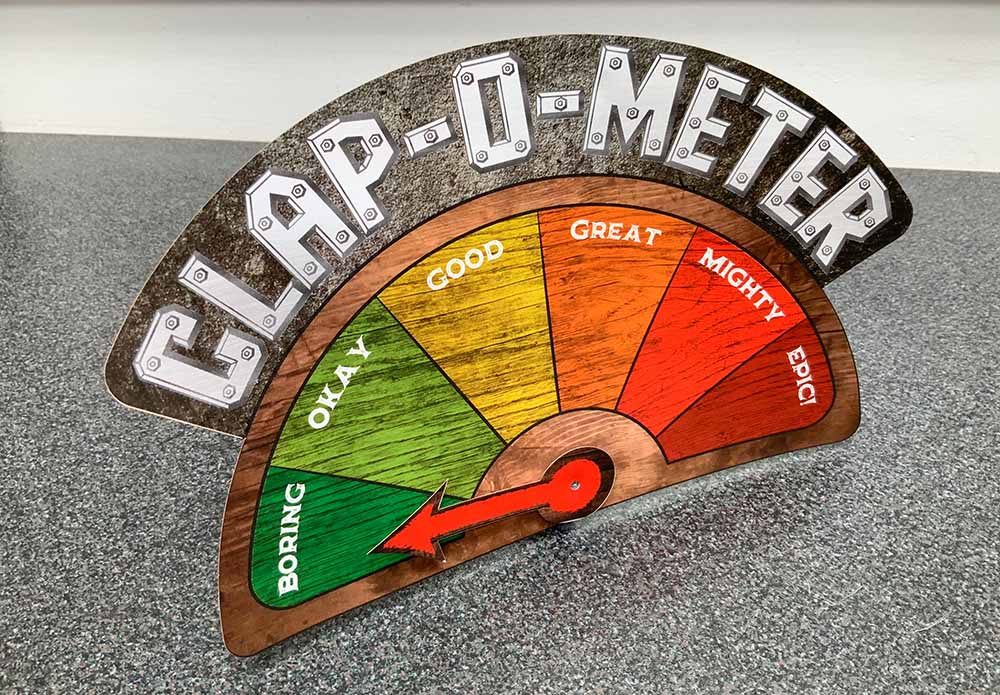
Plug the servo into the Servo 1 output pins on your CREATE Simple Servo Board, plug your BBC micro:bit into the edge connector, pop in some batteries, switch it on and get clapping!
Be first in the queue for all of our new makes and resources by signing up for our newsletter here!

