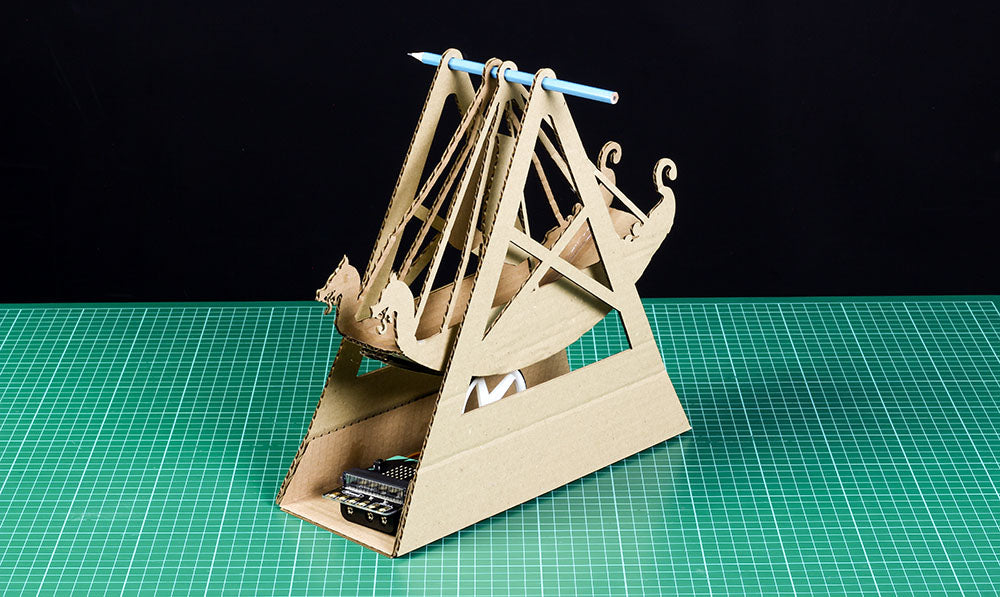
The third make in the Simple Servo Kit makes series, this is a fairground swing boat ride propelled by a wheel which runs along the underside of the boat. It only uses one Servo, and so is still a relatively simple make.
Follow along with Emma and learn how to make your own. We’ve kept ours plain but it’s the perfect platform for a spot of decoration. Let’s get making…
See the other makes in the Simple Servos Starter Pack series:
- Clap-O-Meter.
- Carousel.
- Swingboat.
- Remote Control Car.
We have used:
- Kitronik Simple Servos Starter Pack for BBC micro:bit
- BBC micro:bit
- Cardboard
- A Pencil
- Glue or Tape
- This DXF (The ZIP file contains the DXF & the HEX file)
Step 1 – Cut out the cardboard parts:

Print and/or cut the provided DXF file out of cardboard. Paper will not work, and even a 220gsm card might not be structural enough for this. Corrugated Cardboard is the best for this make.
Step 2 – Assembling the swingboat:
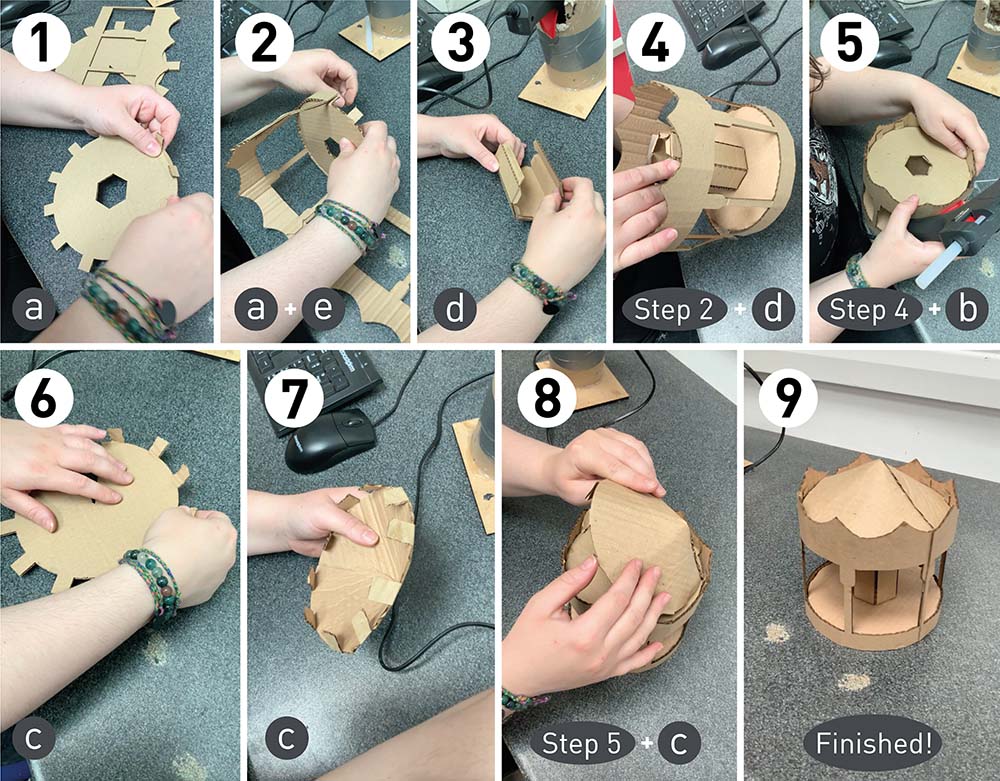
Stick or Glue the Swingboat together, as per the image series above. The steps are as follows;
- Take the three strips of Part A and bend them all to follow the curvature of the bottom of the boat. Then stick the two smaller strips onto the larger strip, forming a channel down the centre as shown in the image.
- Bend Part B to follow the curvature of the bottom of the boat, then stick the assembly from *step 1 *onto the bottom, ensuring it sits down the middle.
- Apply glue to the side of the assembly from *step 2 *and stick it to the curved bottom of Part C.
- As per *step 3*, stick the other side of the boat – Part D – onto the opposite side of the curved boat base.
- The boat is finished! Time to build the
- The frame is formed of a base (Part H) with folding flaps which attach to two side pieces (Parts F and G). As per the image, fold the flaps on Part H up, and then glue the bases of Parts F and G on the inside of the flaps.
- Finally, fold up and glue Part E into a cube. Glue the cube against one of the sides of the frame, making sure it sits in the middle. This will be the mount for the wheel and servo.
Step 3 – Attaching the servo:
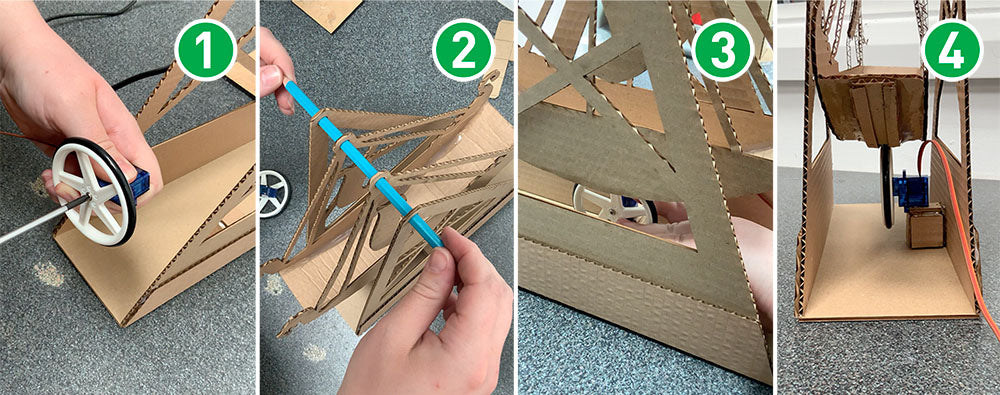
Push the wheel onto the servo, and screw it onto the output shaft. Using a pencil, hang the boat from the frame as shown. Use glue or tape to attach the servo to the small box you made in the last step, using the boat to help with alignment. Make sure the wheel fits snugly into the channel in the bottom of the boat and keeps contact the whole way along.
Step 4 – Attaching the Simple Servo Board:
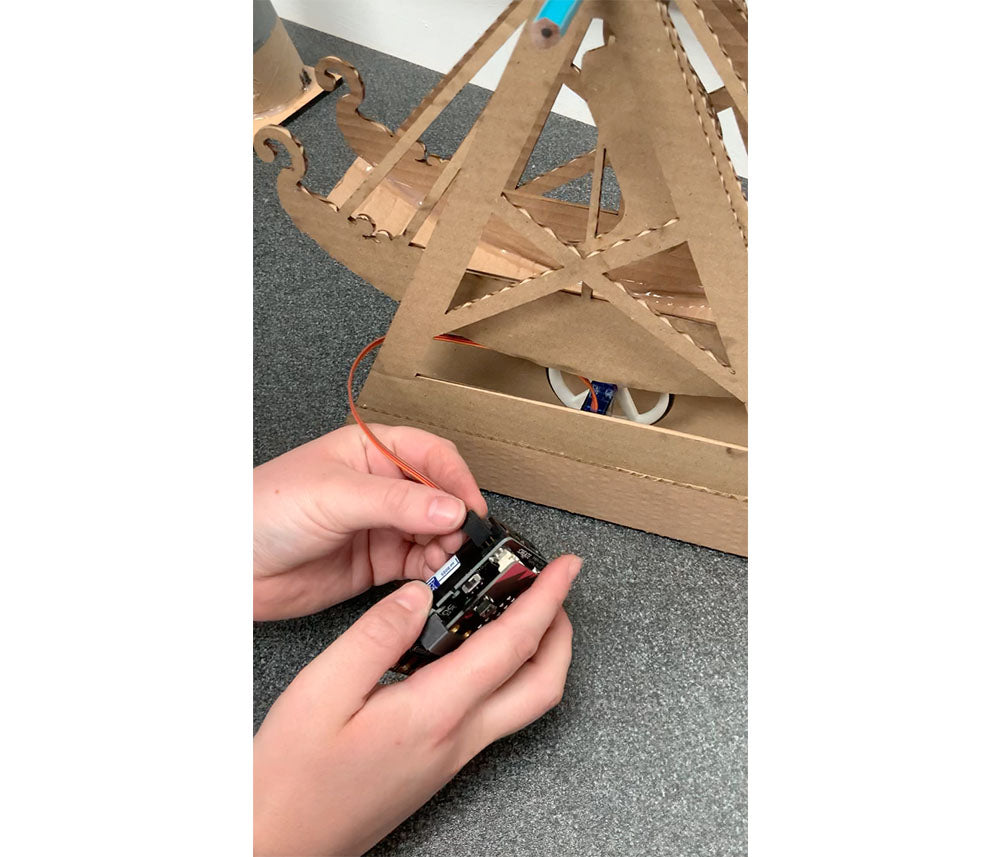
Plug the servo into the servo 1 pins on your :CREATE Simple Servo Board. Make sure you have batteries in the board!
Step 5 – The code:
Code your micro:bit as per the code above. The code will show a flashing arrow pointing to the Button A. Once Button A is pressed the screen will be cleared, and a loop will make the boat rock back and forth 8 times before stopping the servo.
Step 7 – Try it out:
All that’s left to do is to turn it on and try it out! When you press Button A on the micro:bit, the Swingboat will begin to swing, press button B to stop it.
Be first in the queue for all of our new makes and resources by signing up for our newsletter here!