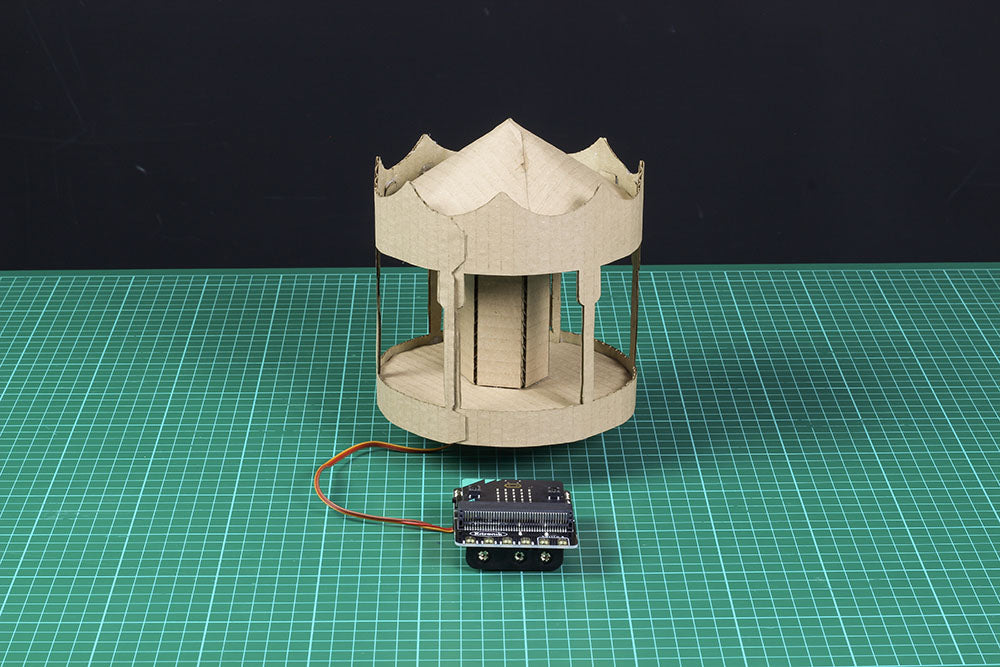
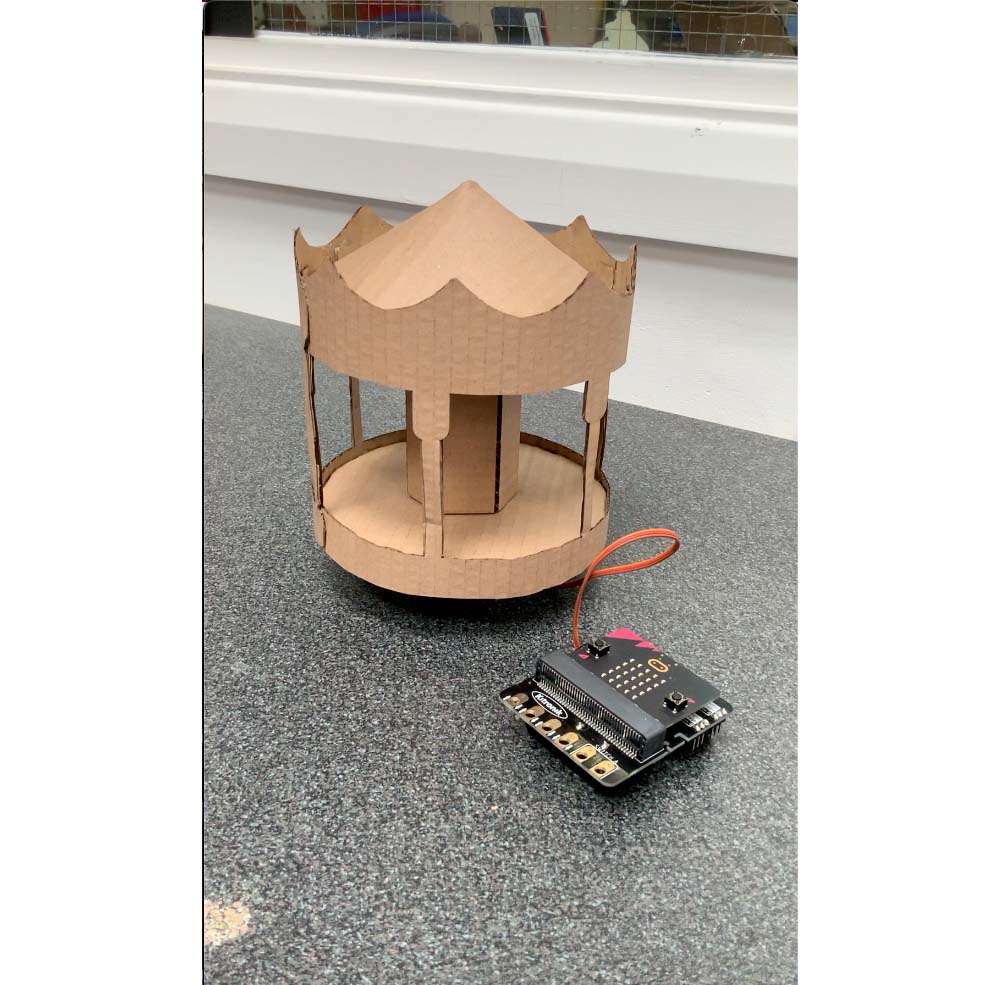
Another instalment in our series of makes for the Kitronik Simple Servos Starter Pack for BBC micro:bit – a Carousel! This is a deceptively easy make, with only some cardboard to stick together and a single servo attached to a wheel.
Follow along with Emma and learn how to make your own. We’ve kept ours plain but it’s the perfect platform for a spot of decoration. Without further ado…
See the other makes in the Simple Servos Starter Pack series:
- Clap-O-Meter.
- Carousel.
- Swingboat.
- Remote Control Car.
We have used:
- Kitronik Simple Servos Starter Pack for BBC micro:bit
- BBC micro:bit
- Cardboard
- Glue or Tape
- This DXF (The ZIP file contains the DXF & the HEX file)
Step 1 – Cutting Out the Parts:
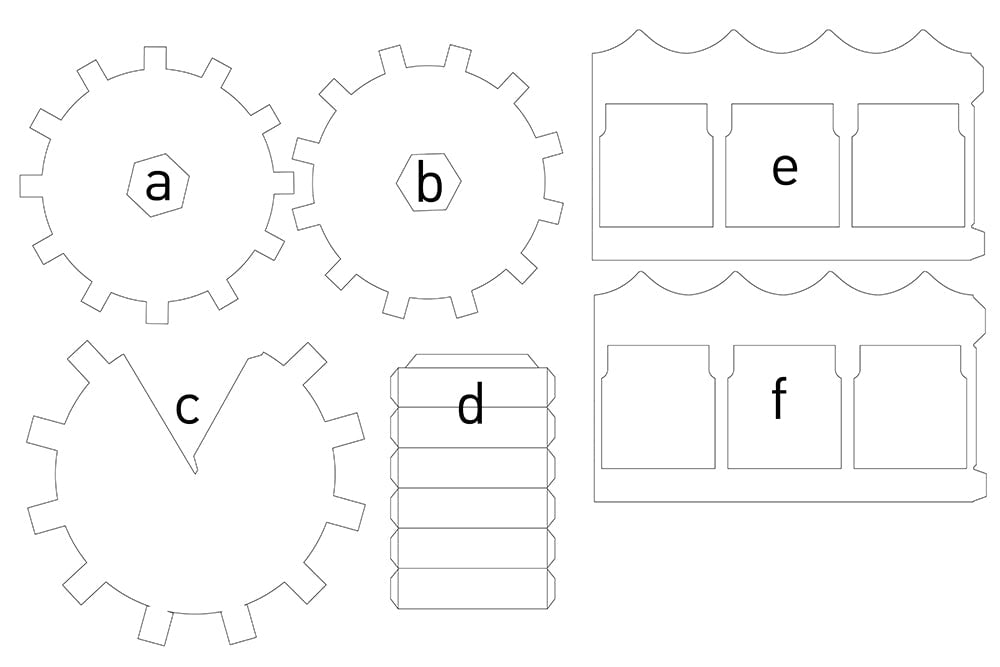
Cut the parts, using the DXF provided, from cardboard. Paper probably wouldn’t provide the structural rigidity needed.
Step 2 – Cardboard assembly:
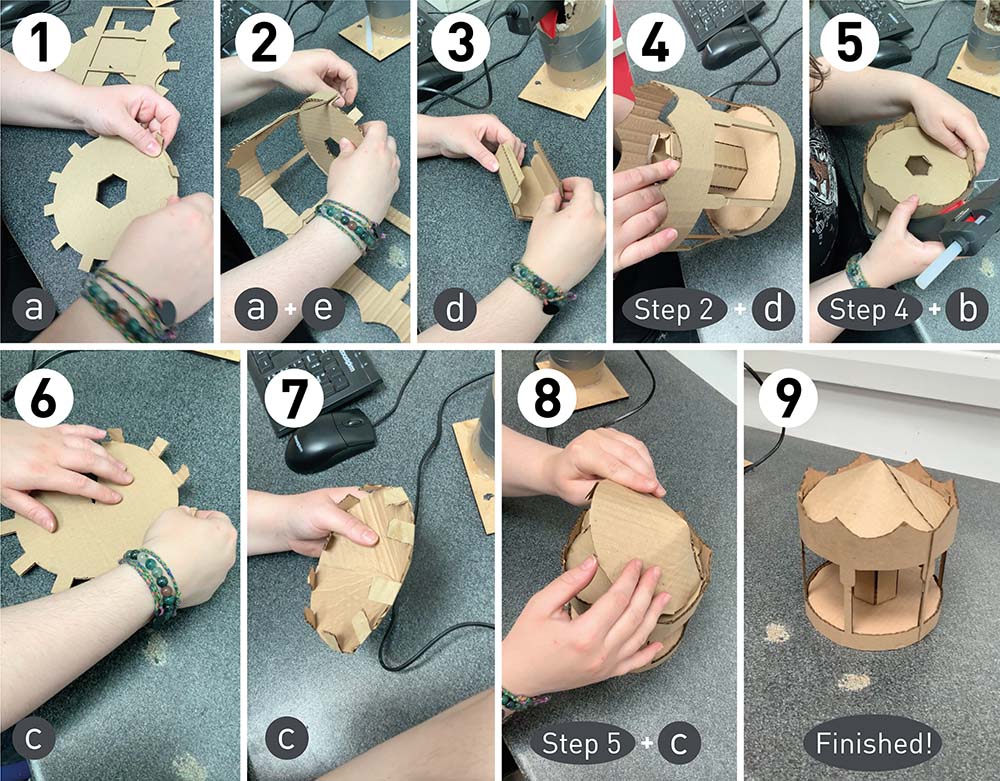
Stick or Glue the Carousel together, as per the image series above. The individual steps are as follows;
- Take Part A and fold all the tabs in one direction.
- Apply glue to all the tabs on Part A, then roll Part E around it, sticking the tabs down as you go.
- Fold Part D into a hexagonal tube, using the tab to glue the tube together. Then fold all the tabs into the centre of the tube.
- Glue Part D into the centre of Part A. Match up the hexagonal hole to the hexagonal tube and use the tabs to glue it in place.
- Once that is done, Part B can be glued in place. First glue it to the cardboard tube formed by Part D, again matching up the hexagons, then glue the folded tabs to the inside of Part E.
- Fold up the tabs on Part C.
- Carefully bend Part C into a cone and glue in place using the large tab.
- Glue Part C onto the top of the carousel using the tabs.
- You’re done.
Step 3 – Fitting the Servo:

Push the wheel onto the servo, and screw it onto the output shaft. Use glue or tape to attach the wheel to the carousel’s underside, ensuring the servo output shaft (centre of the wheel) sits in the exact centre of the bottom of the carousel.
Step 4 – Connecting the Simple Servo Board:
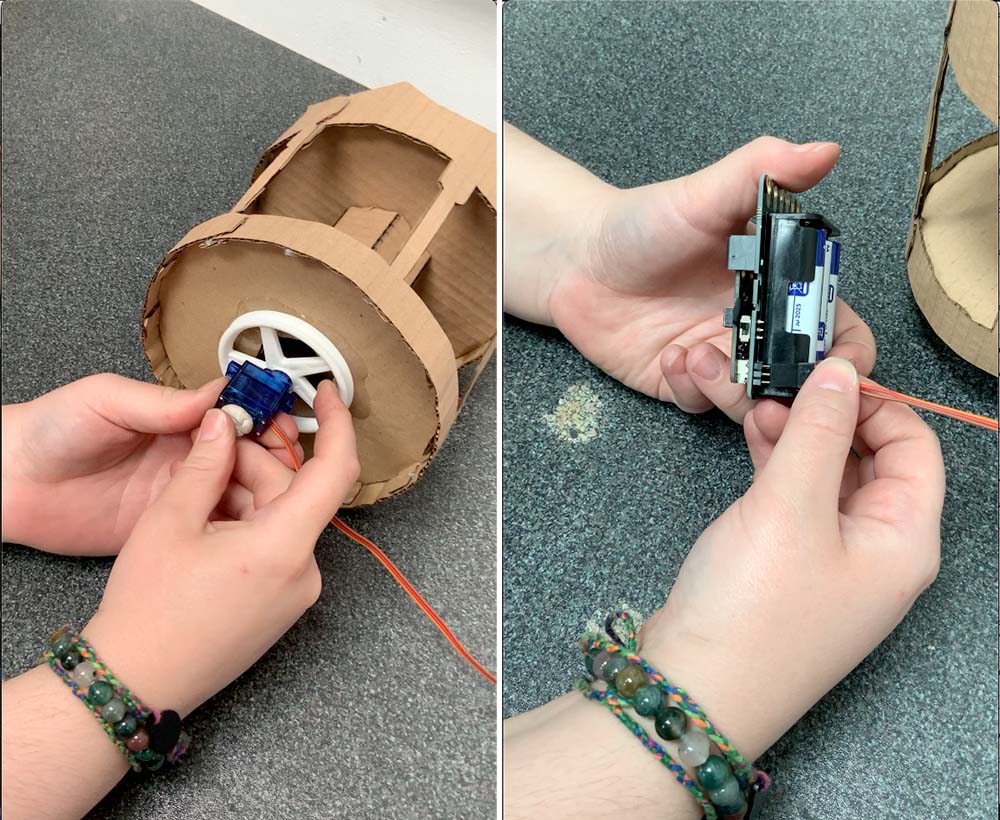
Use something to stabilise your servo and stand the carousel up – we used sticky tack – and plug it in to the servo 1 pins on your :CREATE Simple Servo Board. Make sure you have batteries in the board!
Step 5 – Creating the code:
Code your micro:bit! The below code will turn the Carousel for 10 seconds at a slow (9%) speed when button A is pressed. After 10 seconds the carousel will then stop.
Step 6 – Test drive:
Plug your micro:bit into the edge connector and press button A to start!
Be first in the queue for all of our new makes and resources by signing up for our newsletter here!