
Overview
In this first blog of a series we are going to cover how we can create a drawing robot arm out of cardboard using three servos, a Raspberry Pi Pico and the Kitronik Simply Servos for Pico board. Then we’ll move onto how to use the DrawingRobot Python library we created for the Pico. Finally, we’ll look at how to create a simple image with our drawing robot.
The DrawingRobot library can be found on our GitHub repo.
The blogs in this series are:
- Making a Cardboard Pico Drawing Robot Arm
- Making an Advanced Pico Drawing Robot Arm
- Pico Drawing Robot Arm Code Explanation
What you’ll need:
- 3x 180 Degree Servo
- 1x Raspberry Pi Pico with Pin Headers
- 1x Kitronik Simply Servos Board for Pico
- 1x 4xAA Battery Cage
- 1x PP3 Battery Clip
- 4x AA Batteries
- 1x Hot Glue Gun
- 1x Pen or Pencil
- Cardboard
Create the Cardboard Pico Robot Arm
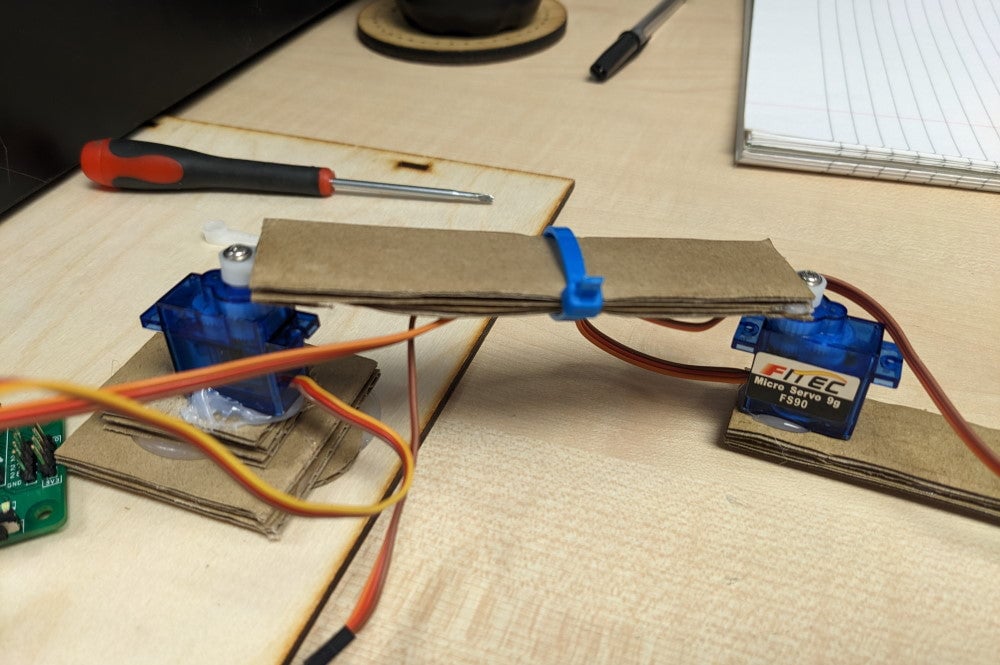
We can start our drawing robot construction by creating two robot arms out of cardboard. We want to have two robot arms of about 15 cm long and 3 cm wide. To make the arms study enough it is best to have two layers of cardboard on each arm. Having two layers also allows us to sandwich the servo fixings between the cardboard and secure them into place using hot glue. For the servo fixings, we want two of them sticking out of both ends on one of the arms. This arm will act as the connector between the robot’s shoulder and elbow servos.
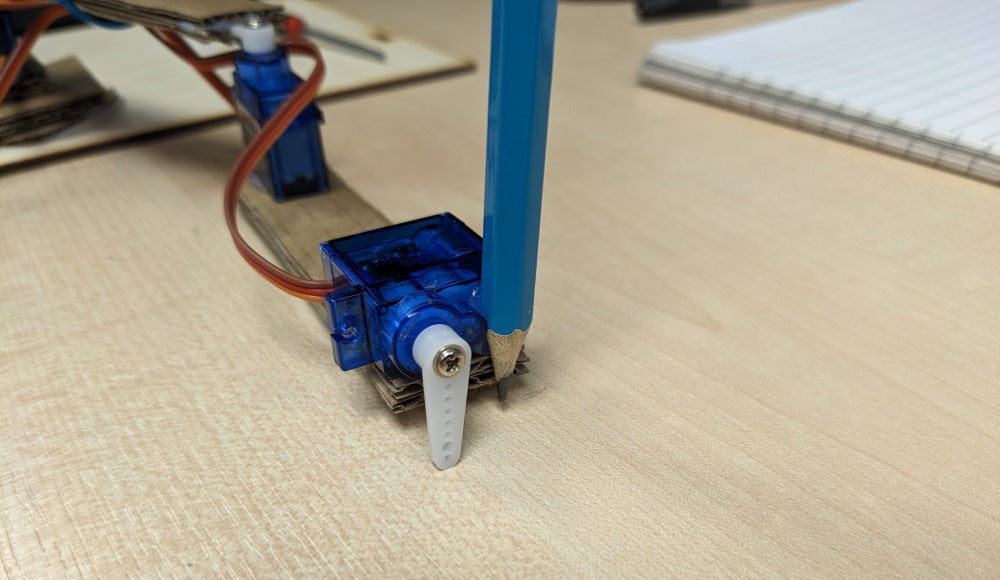
On the second arm we going use hot glue to secure two of the servos onto the top of the arm. On one end we’ll have the servo standing upright with the wires coming out the end of the arm. On the other end we’ll have the servo lay flat with the servo fixing pointing down over the end of the arm. We also want to attach a pen or pencil to this servo, using hot glue to fix it in place. The tip of the pen or pencil should be able to touch the table when the servo fixing is lifted up, but with the pen or pencil not touching the table when the servo fixing is pushed down against the table. This will allow us to lift up the pen and put it down when we are drawing.
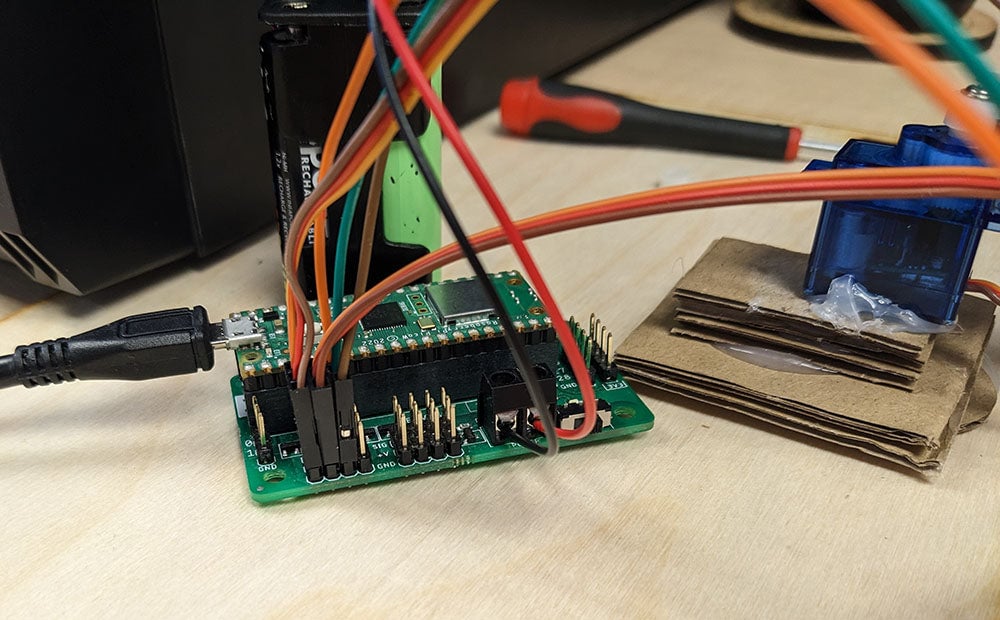
With our drawing robot arm created we can now connect it to our Raspberry Pi Pico and Kitronik Simply Servos for Pico board. Let’s start by slotting the Pico onto the Simply Servos board. Next, we are going to need to power the board using a four AA battery cage. Finally, we can connect our three servos to the board. In the first servo slot we’ll add the servo for the shoulder. In the second servo slot we’ll add the servo for the elbow. Then in the third servo slot we’ll add the servo for the pen mechanism.
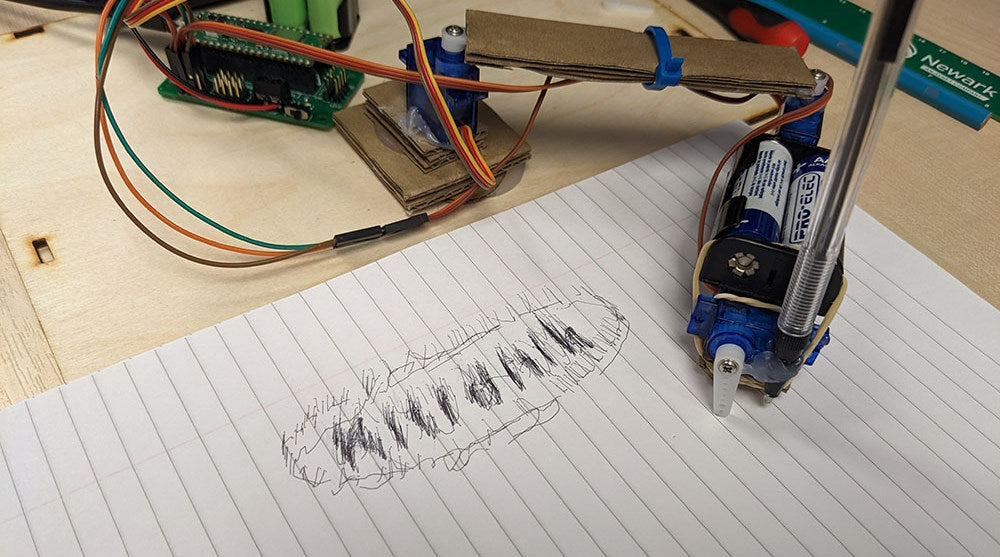
To give the pen enough pressure against the paper it may also be necessary to add some weight to the pen mechanism on the end of the arm. We achieved this by putting a battery cage on the end of the arm and securing it in place with an elastic band.
Code the Pico Drawing Robot Arm
With everything connected up we can being programming our drawing robot arm. Let’s connect our Pico to the computer and open up Thonny. With our Pico connected in Thonny let’s add the KitronikPicoSimplyServos package to our project using the package manager. Next we need to copy the DrawingRobot.py code from our GitHub repo into the project.
Now we have our Pico setup to start using our robot arm. Let’s create another file and save it as main.py on the Pico. Inside main.py we will access the DrawingRobot library to move our robot arm. At the top of main.py we want to import the library, and setup a variable robot to store our DrawingRobot.
from DrawingRobot import DrawingRobot
robot = DrawingRobot(150, 150, 100, 100)
When setting up our robot variable we need to supply four values. The first two tell the DrawingRobot library how long our shoulder and elbow arms are. We want to set these values in millimetres so 150, 150 tells the library our shoulder arm is 15 cm and our elbow arm is 15 cm. The next two values tell the library how much of an offset our x and y values should have. If we don’t set these then our robot will try and draw too close to the base and the drawings won’t look very good. Good values to put here are 100, 100 to set the start of drawing area a 10 cm away from the base.
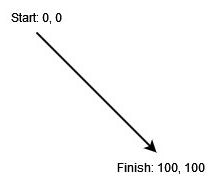
We are now ready to use the robot variable to start drawing with our robot arm. There are two main functions that can be used to manually program the robot arm to draw. These are drawLine and drawRectangle. The *drawLine *function takes four values as its inputs. The first two values are the x and y coordinates that we want the line to start from. The second two values are the x and y coordinates that we want the line to finish at.
The drawRectangle function also takes four values as its inputs. The first two are again the x and y cooridnates for the start of the rectangle. The second two values are the width and height of the rectangle.
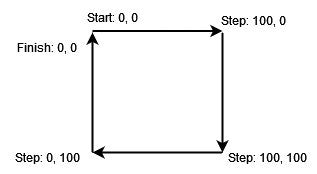
The following code will draw a diagonal line from coordinates 0, 0 to the coordinates 100, 100. Then it will draw a rectangle moving to the following coordinates in this order: 0, 0 to 100, 0 to 100, 100, to 0, 100 then back to 0, 0.
robot.drawLine(0, 0, 100, 100)
robot.drawRectangle(0, 0, 100, 100)
The next blog in this series can be found here.