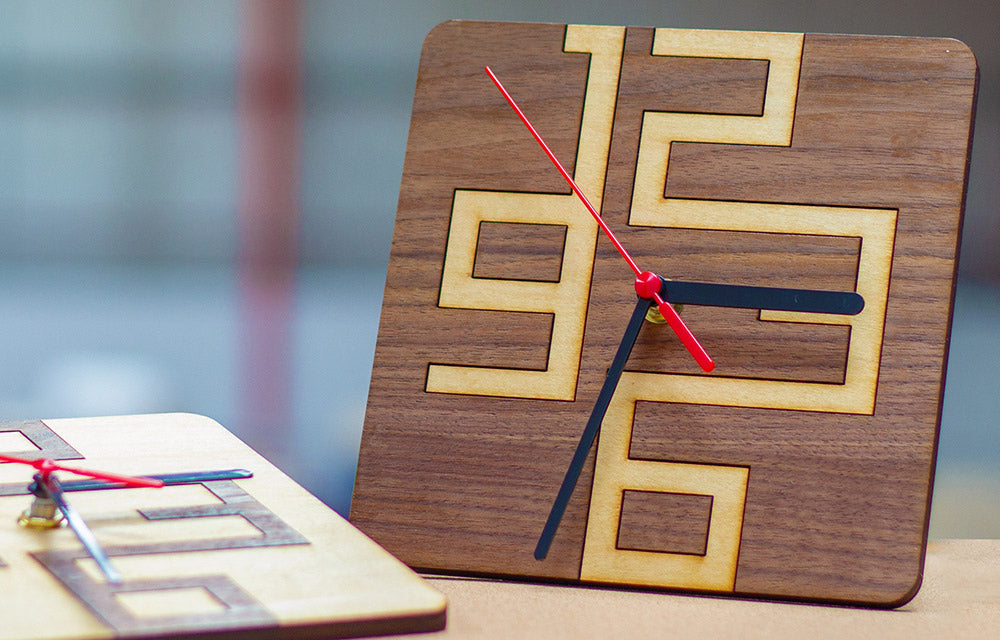
The cover of the Kitronik’s Summer 2019 flyer shows this stylish simple clock design. This is an excellent product to combine a number of natural and man-made materials in an easy and satisfying project.  Although we chose to make ours from MDF, you can improvise with any stiff materials that you may have to hand, such as Perspex or laserply. Also, we used the hands that come as standard with the clock mechanism but you could 3D model your own to personalise the project. As this is a simple project it lends itself perfectly to being a classroom activity.
What we need:
This project requires:
- Two contrasting sheets of our fantastic hardwood veneered laser compatible 4mm MDF
- A sheet of 3mm laser compatible MDF
- A great value clock mechanism
- Some wood glue
- Varnish
- A laser cutter
- The DXF File.
What we do:
Using a laser cutter and two contrasting wood finishes means that you can make two clocks for the price of one with this tutorial. The first step we assume that you have the knowledge to set up your own laser cutter software. The design file is provided as a .dxf and should work with most machines. We also assume you will know your machine’s cutting power and speed. We use a 60W machine, where the tube is not new, and require 65% power and 12mm per second to cut through the 4mm hardwood veneered MDF. Cut out the main clock design twice. Once on your darker veneer and once on your lighter veneer. Cut two of the blank square designs using the 3mm MDF. This will be used as a backing for the clock faces. The four cut pieces are shown below.  The cut parts need to be cleaned after removing from the laser cutter.
Cleaning
Once cut you will need to clean the veneered faces. This can be done with water and a damp cloth. A little pressure will help remove the brown marking around the cut lines. Work methodically across the piece making sure to clean each edge. Rinsing the cleaning cloth part way through the job will minimise staining on the lighter wood. Here we used American Maple Veneered MDF.  A damp cloth and a little pressure takes off the brown scorched edges from the American Maple Veneer.
Repeat this process with the MDF pieces and the darker contrast wood. Below we’ve used Black Walnut Veneered MDF for maximum contrast.  Cleaning the American Walnut starts to bring out the colour in the wood that you’ll see later in the build.
Once both the sets of clock parts are cleaned you can arrange them ready for sticking down. The process is simple, but we’ve shown it step by step in the image below.  Alternate the contrasting colours to make two complete clock sets. Arrange these before glueing to avoid mistakes.
Glueing
 Grab your glue and get sticking.
Next, apply PVA wood glue to the MDF backing plates in preparation for the cut parts. Apply evenly.  Evenly apply wood glue to the MDF parts.
Start to place the cut pieces onto the MDF back panel, alternating the colours as you practised in the previous step. Push each part down firmly, keeping the edges in line with the backing plate and wiping off excess PVA glue with a damp cloth as you work. Glue the laser-cut hardwood veneers to the laser compatible MDF Base.
Continue sticking down parts until both sets of parts are completed. Try to wipe off excess PVA as you work, using a damp cloth. Check that the parts are square to the edges and let the glue dry while the work is stored flat in a place where it won’t be disturbed.
Varnishing
Once the glue has dried and the veneer is dry after cleaning you can finish the work with some varnish. Instructions will vary depending on your product. Since these are real wood veneers they can also be waxed and oiled.  Varnish brings out the deep colours of the natural woods and adds a great finish to the work
Assembly
Once the varnish is dry you can add the clock mechanisms. Simply push these through the holes in the centre and secure with the washers and nut provided. An AA battery and set the time from your nearest sundial and you are ready to look for a nail on which to hang your latest (and greatest) creations.
What we made:
 The final clocks are simple and stylish