 An important part of 3D printing is proper calibration of the printer. Fortunately, the AutoMaker software for Robox simplifies this by guiding the User through three software lead calibration processes. Before starting your first print, it is a good idea to run through these processes. From the ‘Home Page’ in AutoMaker, you will see a spanner icon labelled ‘Calibration’. Clicking this icon will bring up the Calibration Menu where you can choose s calibration option for the Robox to perform. We reccomend working through working through them in order. The Robox uses needle valves to control the flow of material through the nozzles. For best results, the printer needs to know exactly how far to open the valves to allow material to flow through. It also uses this process check the nozzles close properly when required to.
Step 1


After selecting ‘Nozzle Opening’ calibration option and clicking the ‘Start’ arrow at the bottom right of the screen, the head will move to the centre of the printer and begin heating to a working temperature.

Step 2

Once the nozzles are heated, the screen will change and ask you if any material is leaking from the nozzles. If everything is working properly, the answer should be ‘No’. If material is leaking, then click ‘Yes’ and you will be directed to the support website to lodge a ticket.
Step 3


For the next step, the printer tests the nozzles open properly and that they aren’t blocked. Check that material is coming out of the left nozzle like in the photograph. If it looks OK then click ‘Yes’.
Step 4


This process is then repeated for the tight nozzle. On our photograph, the material has curled upwards, this isn’t a problem so don’t worry if this happens to you.
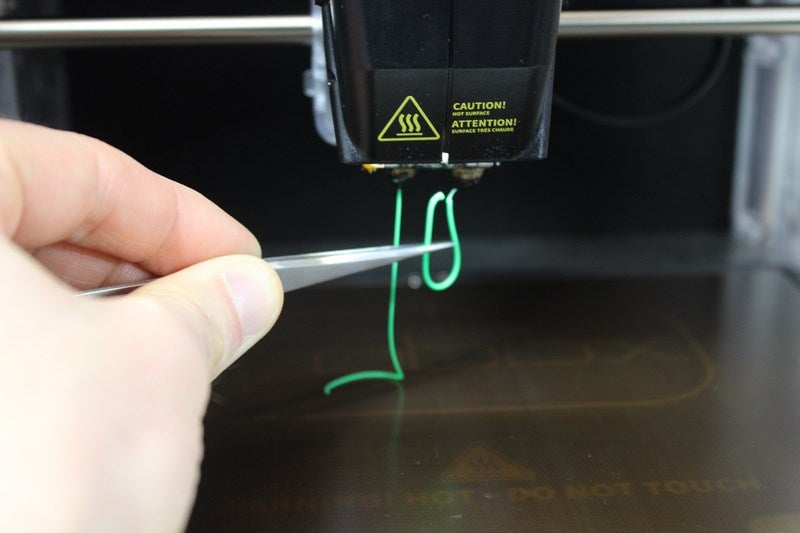
Step 5
The next step is to remove the extruded material. This is best done with the tweezers included with the Robox. Take care not to touch the nozzles as they are extremely hot!


Step 6
Now that the basic functionality of the nozzle valves has been checked, it’s time to calibrate the exact opening point of the nozzles. To do this, check that no material is coming out of the nozzle then press ‘Not Present’, wait a few seconds to confirm then press ‘Not Present’ again. The moment you see any material at all begin to come out of the nozzle, click the ‘Present’ button instead. Usually for the left hand side nozzle the number in the white box is somewhere between 0.30 and 0.55 when this happens. So don’t panic if you don’t see anything for the first few presses.


Step 7
After pressing ‘Present’ on Step 6, the same process will repeat for the other nozzle. Follow the same procedure as before, taking care to wait a few seconds after each press of ‘Not Present’ to check for material coming out of the nozzle.
