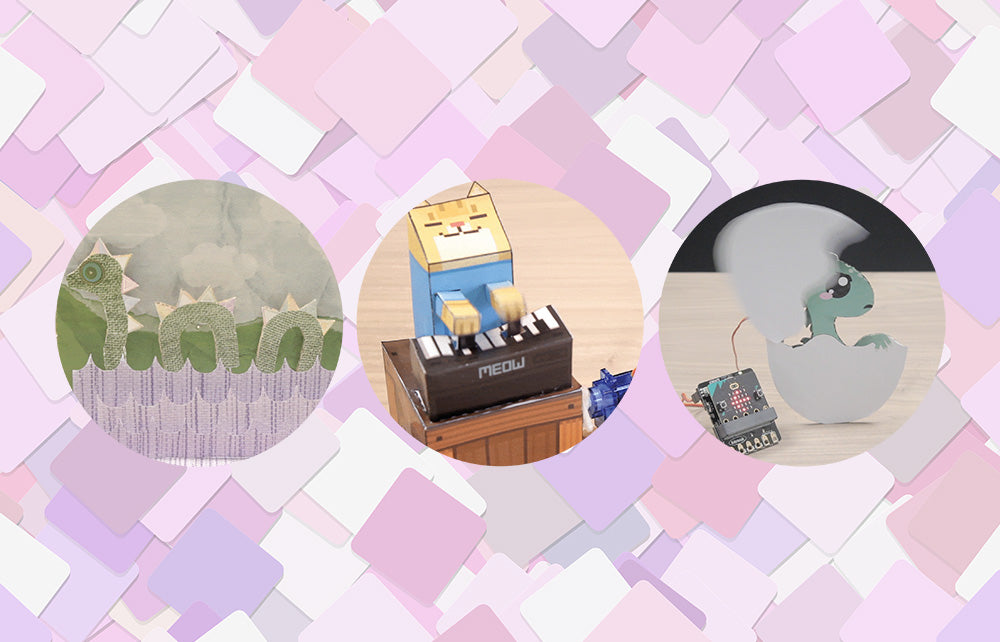
We recently launched the Kitronik Simple Servo Control Board for BBC micro:bit, and Emma wasted no time in putting together three great resources for it. We’ve included all three resources below, with all of the files needed and step by step instructions for each.
You may be pleased to note that all of the featured projects are cut out from paper/card, so no laser cutter required for these! Scissors and glue!
What are Paper Automata?
A Paper Automaton is a paper model which, through the use of simple mechanisms, can be made to move. These will be very basic movements, such as making a few parts raise and lower, rotate or move side to side. The parts made can include cams, axles and levers. We’re taking a different route with these three projects, using our brand new :CREATE Simple Servo Board to provide the motion.
What is the :CREATE Simple Servo Board?
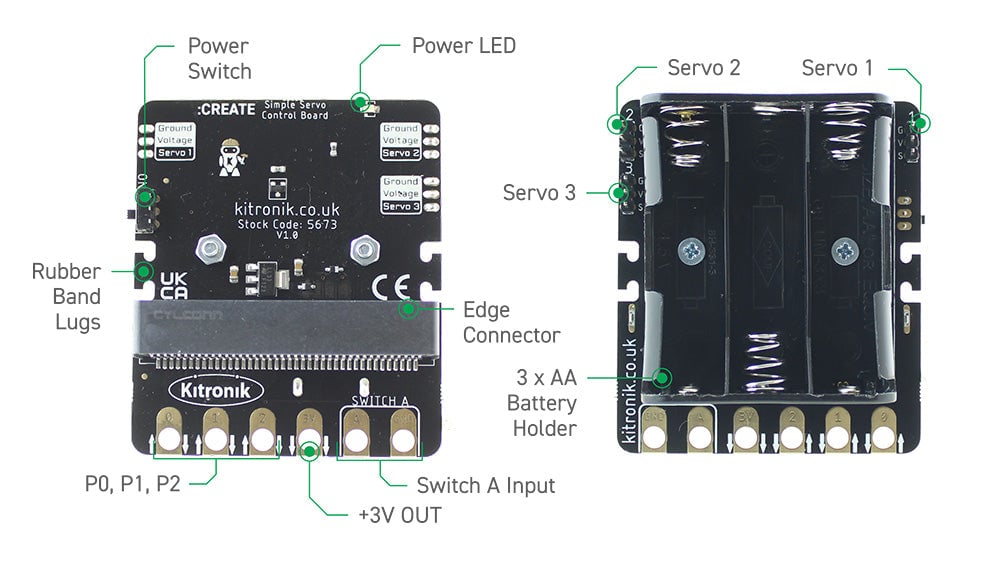
We have made a board that pares back robotics to its simplest form. An uncluttered board capable of controlling 3 servos at once and with 6 croc-clippable pads for adding additional devices.
The Projects:
- Project 1 – The Dino Egg. [Jump]
- Project 2 – Tubbypaws’ Keyboard Cat. [Jump]
- Project 3 – Nessie Automation. [Jump]
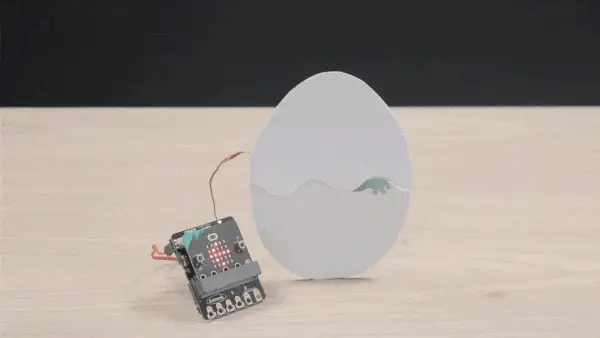
First Project – Dino Egg:
You will Need:
- This PDF
- A printer
- Scissors
- Card or Cardboard
- Your choice of adhesive (e.g. tape or glue)
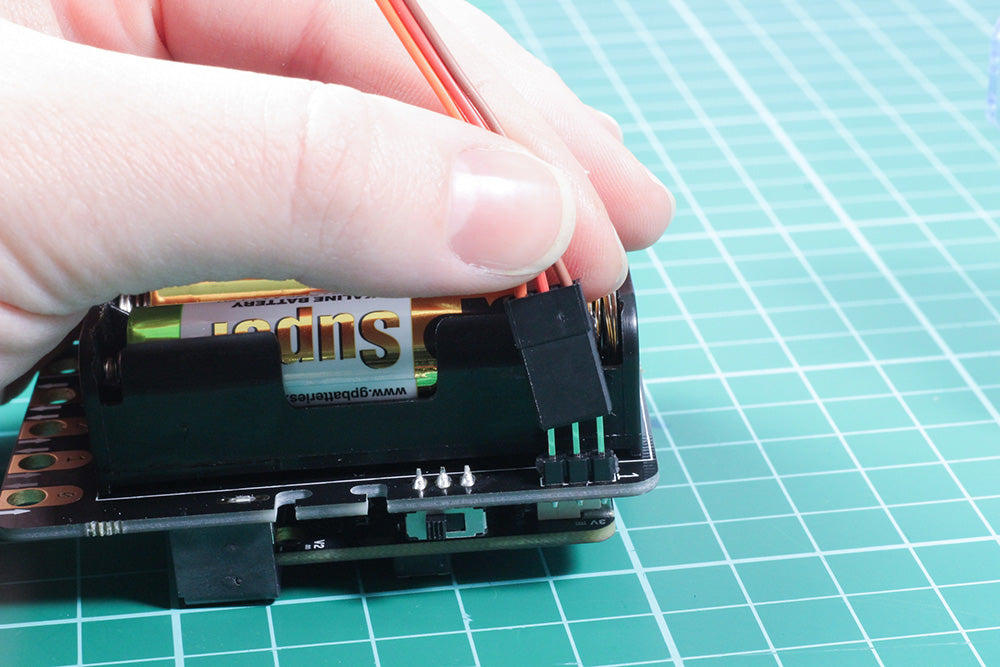
- The :CREATE Simple Servo Board with 3 AA Batteries
- A micro:bit
- One 180 Degree Servo
- This HEX file.
Step 1: Print the PDF
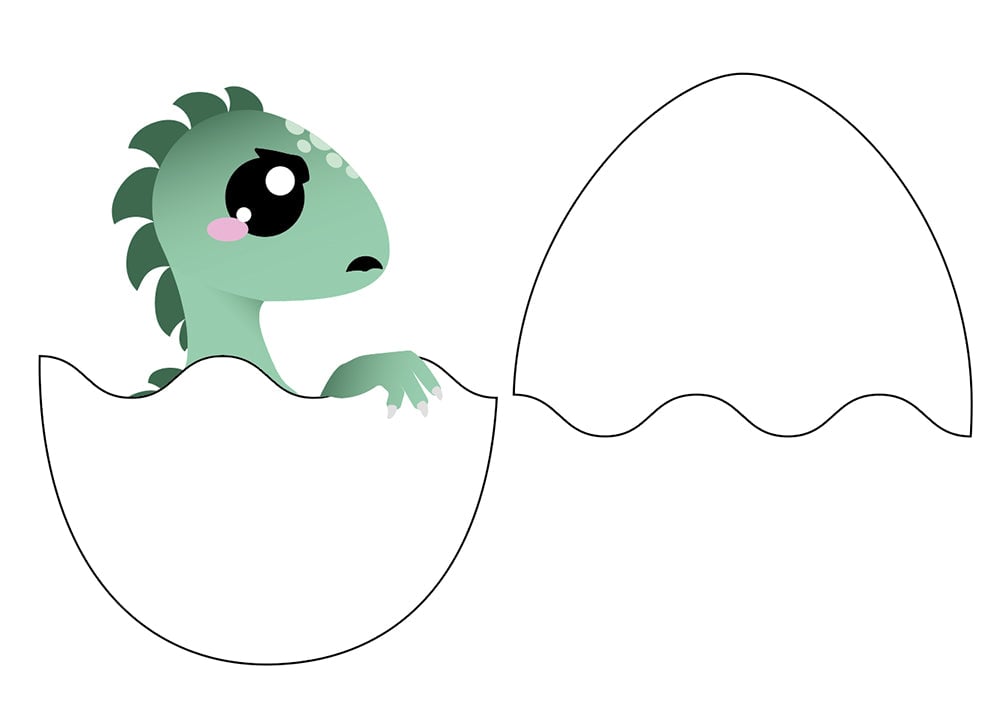
Print our design out on either paper or thin cardboard (only do this if your printer is capable!)
Step 2: Cutting it out
If your print is on paper rather than card, make sure to mount the paper on card or cardboard. Then cut it out!
Step 3: Adding a servo
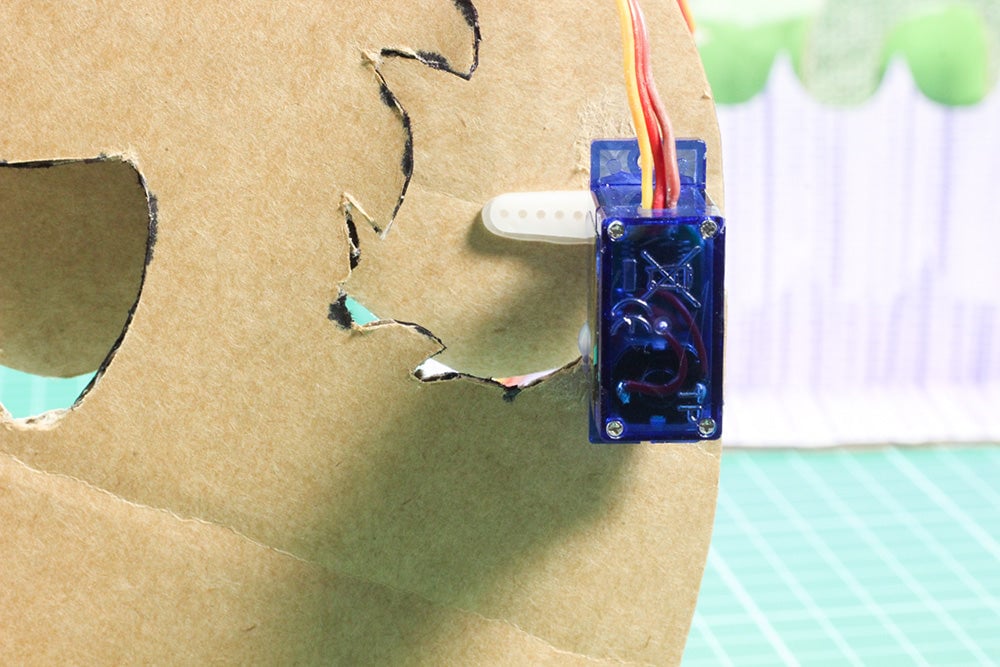
Taking a 180 Degree Servo, attach the bottom part of the egg to the servo itself, and the servo arm to the top part of the egg. Use tape, glue, sticky tack, whatever you want! Plug your servo into the :CREATE Simple Servo Board.
Step 4: Coding
Code your micro:bit! We’ve provided a hex file for you to drag and drop onto your micro:bit, you can also grab the code from the embedded editor above. Make sure you change the servo number in the code to the number on the pins you have attached it to.
Plug in your micro:bit, switch on your :CREATE Simple Servo Board, and try it out!
Second Project – Tubbypaws’ Keyboard Cat:
You will Need:
- This image from Tubbypaws’ blog
- Scissors
- Card or Cardboard
- Your choice of adhesive (e.g. tape or glue)
- The :CREATE Simple Servo Board with 3 AA Batteries
- A micro:bit
- One 360 Degree Servo
- This HEX file.
Step 1: Get the design
This make is a demonstration of a traditional paper automaton with hacked-in electronic elements. This will first involve putting together the beautiful Keyboard Cat paper automaton by Tubbypaws on blogspot, and the Youtube user Tiny Craft World has put together a step-by-step tutorial on its construction!
Get Tubbtpaws’ Design here.
Step 2: Tiny Craft World’s Video Tutorial
Once you’ve printed off all of the parts, the video below will show you to put it together. Once you’ve done that we can then move onto hacking it for servo control.
Step 3: Keyboard cat automaton
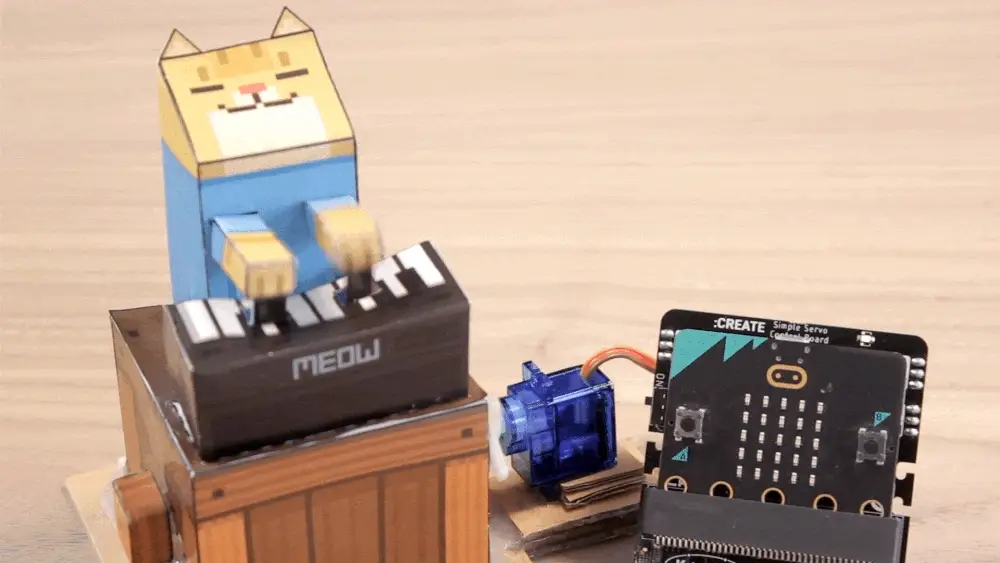
Make the Keyboard cat automaton! This is so much fun – it involves an axle, lever and two cams and is a moderately challenging model to make. Leave the lever off of the model though – and replace it with a servo arm – we used the cross-shaped one, attached with hot glue, but you can use any adhesive you like. Push the servo on to the servo arm. Attach the servo and keyboard cat automaton to a solid base such as cardboard, ensuring stability.
Step 4: Plugging it in
Plug the servo into your :CREATE Simple Servo Board.
Step 5: Coding
Code your micro:bit! We have again provided a hex file you can use, and we’ve also provided an embedded editor above. Make sure you change the servo number in the code to the number on the pins you have attached it to.
NOTE: We are only showing the code for rotating the servo forever, and not the Keyboard Cat music which we sequenced in MakeCode. This is included in the hex file, but we encourage you to make your own!
Plug in your micro:bit, and switch on your :CREATE Simple Servo Board!
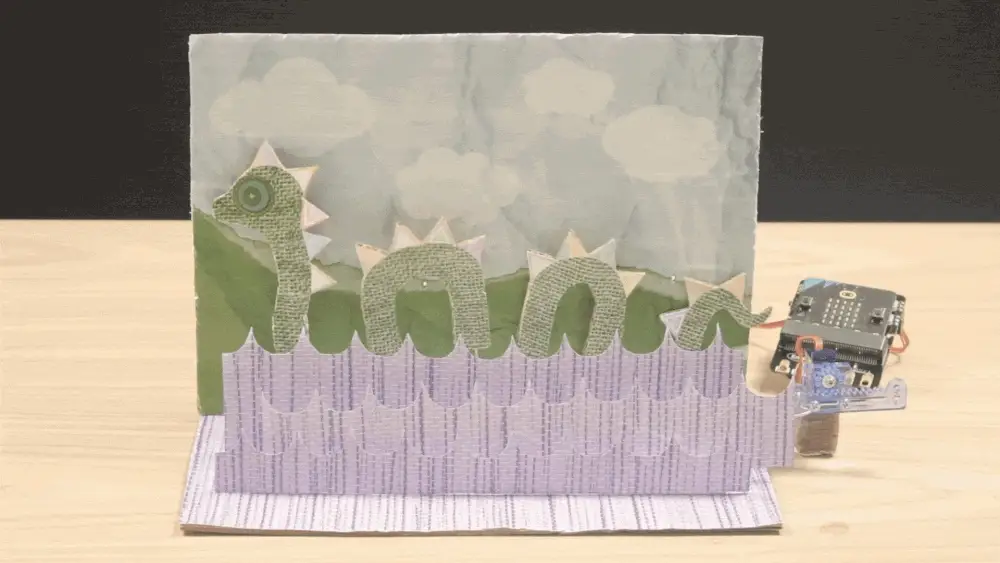
Third Project – Nessie Automation:
You will Need:
- This PDF.
- Scissors.
- Card or Cardboard.
- Sturdy wire and wire bending and cutting tools.
- Your choice of adhesive (e.g. tape or glue, we used hot glue and stick glue).
- The :CREATE Simple Servo Board with 3 AA Batteries
- A micro:bit
- Two 360 Degree Servos
- A Linear Actuator.
- This HEX file
Step 1: Print the design
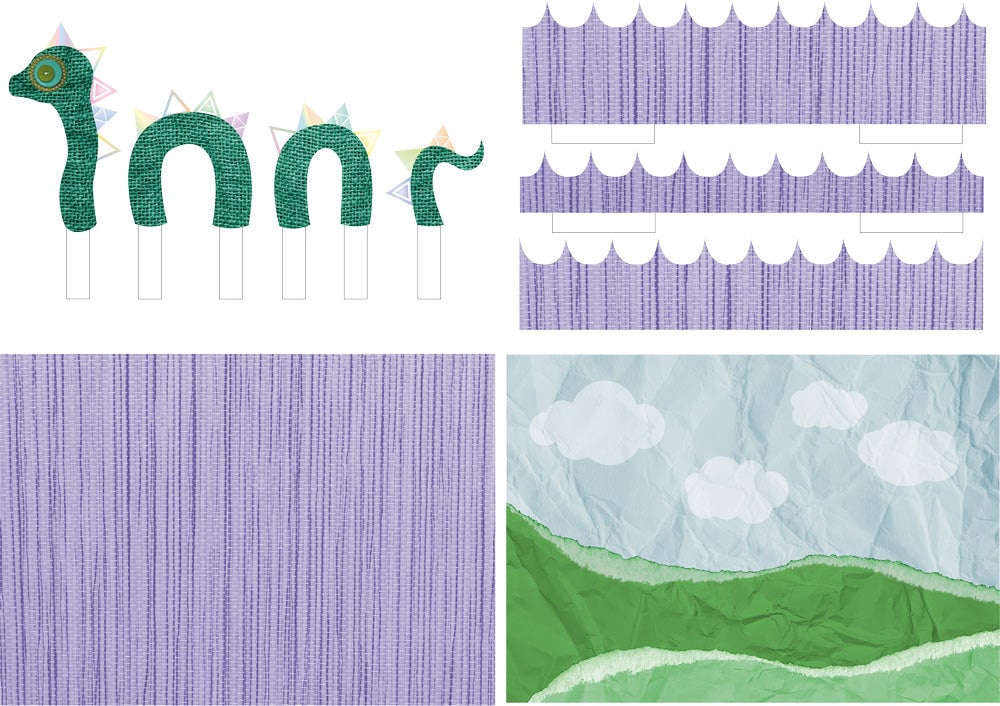
Print out our PDF, either on paper or thin card (only if your printer can handle card). If you printed on paper, make sure to mount on card or cardboard.
Step 2: Cutting out
Cut out the pieces! The two full-page designs (landscape and water) need minimal work, but you will need to separate the individual wave pieces and all four parts of Nessie herself. Make sure to keep the tabs!
Step 3: Assembly
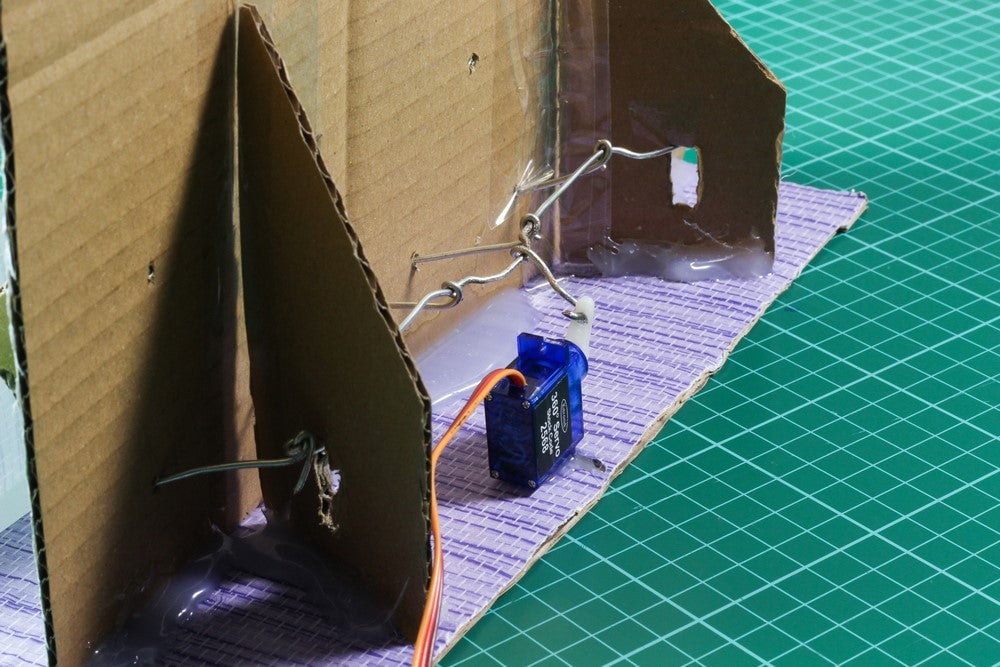
Construct the scene, including setting up the landscape and sticking down the waves using the tabs. We used wedges to hold the landscape piece up, cutting rectangular holes in the wedges through which the wire will feed later. Make the wire structure. One structure will attach to the back of the central wave piece, and the other will form axles which will move Nessie up and down as though she’s swimming.
Step 4: Pulling it together
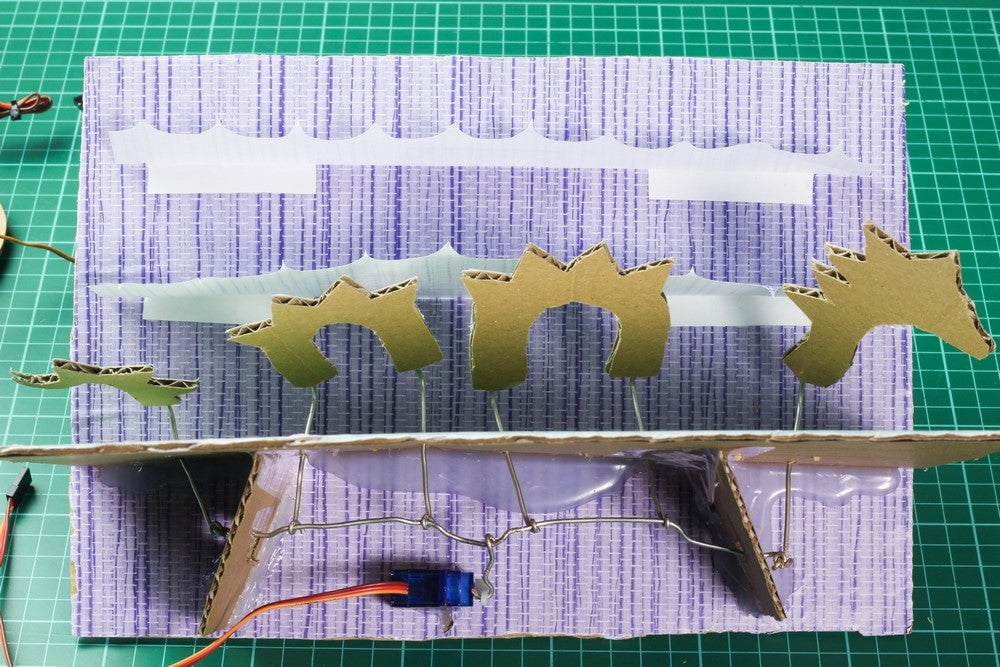
Attach the wire structures. We have taped on the wiggly piece to the back of our wave. Puncture holes in the landscape scene where you want the four parts of Nessie to sit, and move a spare piece of wire up and down within the hole to elongate it and ensure the wire will have proper range of movement (this is especially important with thicker cardboard). Then set it all in place, making sure that the horizontal piece fits through the slots you cut from the support wedges.
Step 5: Adding Nessie
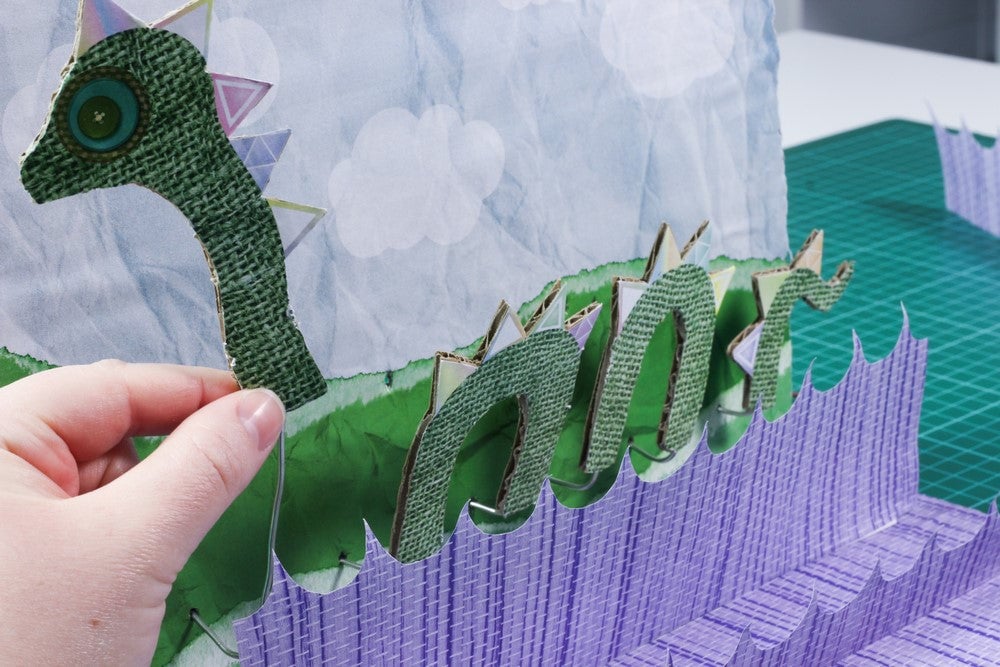
Attach Nessie to the wire! We used fluted cardboard, which meant we could bend the wire up 90 degrees and slide it down one of the channels in the cardboard. You can do it however you want though!
Step 6: Adding Servos
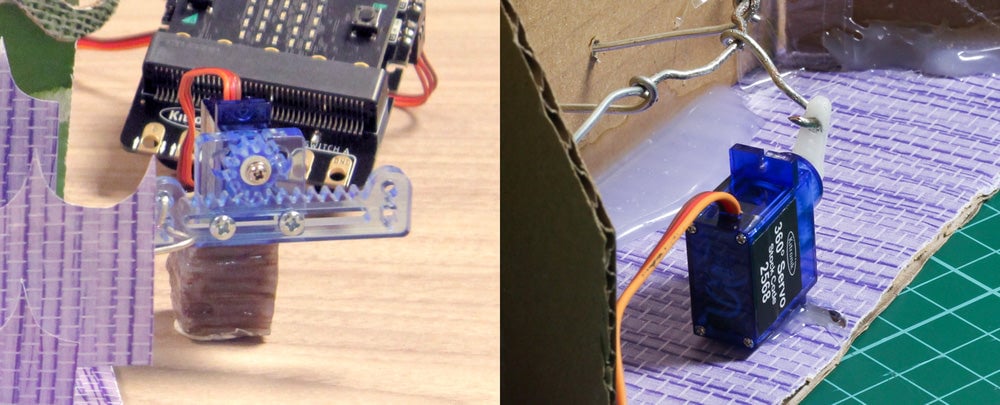
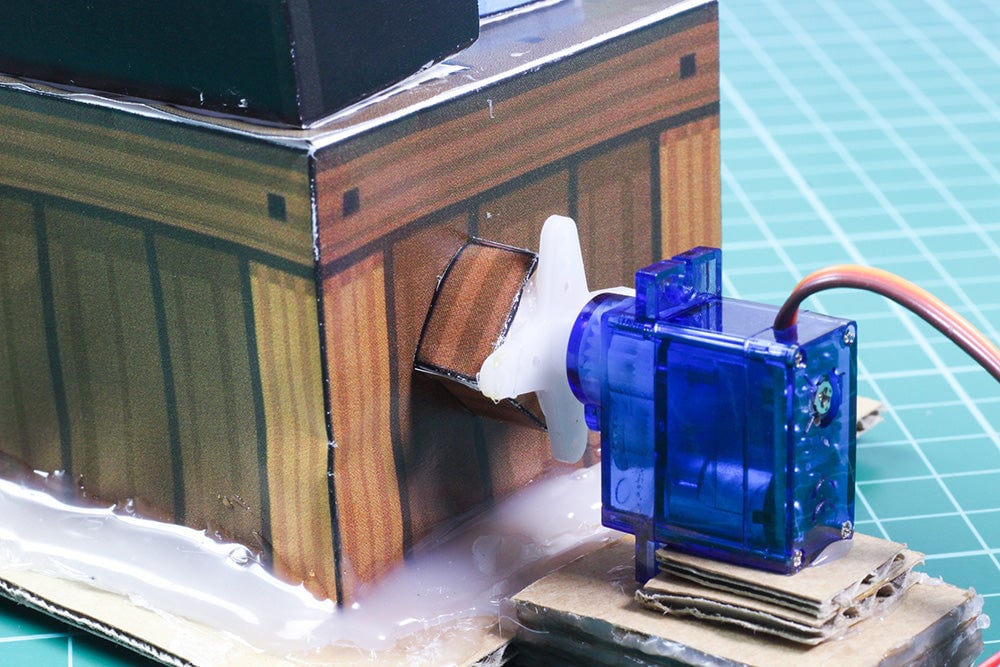
Add the servos. We drilled a slightly bigger hole in the servo arm to fit the wire through in one case, and to make the side-to-side movement necessary for the wave, we converted the rotational movement to a linear one using one of our Linear Actuators. Use the photos for guidance.
Step 7: Pulling it all in and connecting it together
Place it all together! We constructed a cardboard and hot glue pedestal to keep the wave servo at height, and then plug them in to the :CREATE Simple Servo Board.
Step 8: Coding
Code your micro:bit! We’ve provided a .hex file for you, but you can also grab the code from the embedded editor above. Don’t forget to change the servo number to the number indicated on the pins when editing your code.
Plug in your micro:bit once it contains the code, turn on the :CREATE Simple Servo Board, and watch Nessie swim!
We hope you’ve enjoyed making these Automata and we can’t wait to see your makes!
One of the best sources of new Kitronik information is our Newsletter. To make sure you always know what’s going on, sign up for our newsletter here!