 Purging is the name given to the process where the Robox pushes new filament through the nozzles with the goal of cleaning out any old material left inside the nozzle that may have become an obstruction. It is ESSENTIAL to run a purge if you change from PLA to ABS or from ABS to PLA. The software should prompt you to do this when it detects that you are attempting to print with a different material. Sometimes it is a good idea to manually tell the Robox to perform a purge. It is a good idea to run a purge if:
- You have just set up your brand new Robox.
- You have changed the colour of filament you are printing with.
- You have been printing for several hours.
- You notice the quality of your prints getting worse.
Follow the step by step instructions below to perform a purge.
Step 1
First, expand the side bar in Robox AutoMaker. To do this, click on the image of the three white dots near the left hand side of the screen.

Step 2
From the tabs at the top of the expanded menu select ‘Maintenance’.

Step 3
Find the button called ‘Purge Material’ and click on it.

Step 4
The main section of the screen will change to a page titled ‘Purge Material’. Click the arrow at the bottom right of the screen.

Step 5
The purge temperature will be shown on the screen. Here you can alter the purge temperature, but we recommend using the temperature that AutoMaker suggests.

Step 6
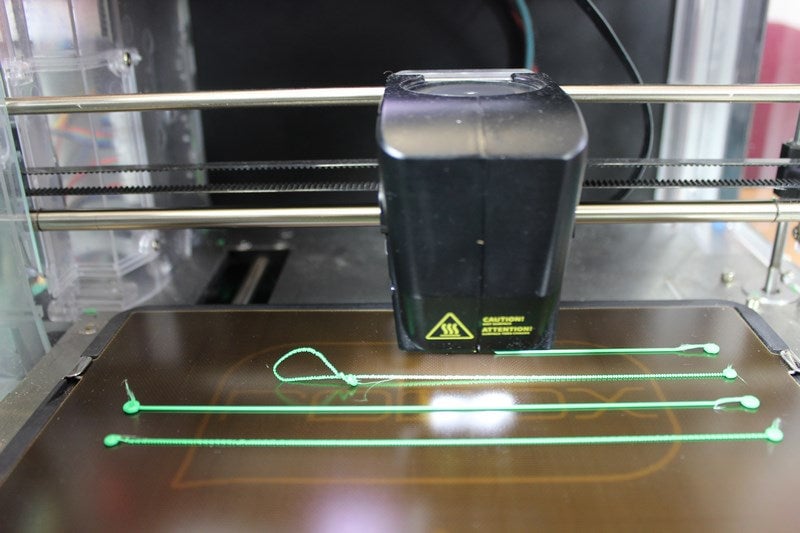
The printer will now begin to heat the bed, once the bed is at temperature the nozzle will heat to a working temperature then the purge process will begin. Several lines of material will be printed with the printer alternating between using the fine and thicker nozzle. The thin lines should have a ‘curly’ shape and the thicker lines should be smooth and flat, as pictured below.

When the purge is complete the printer will begin the cooling process and after a few minutes the bed will move to the front of the printer and the door will unlock. Take a look at the printed lines, if any of the last two lines printed has any differently coloured material or debris in it then you should clear the purged material from the print bed and purge again until the lines are clear. If the last two lines look OK then the purge was successful.