


The Kitronik Inventor’s Kit for the Raspberry Pi Pico provides a fantastic way of learning how to construct and control electronic circuits with the Pico and MicroPython.
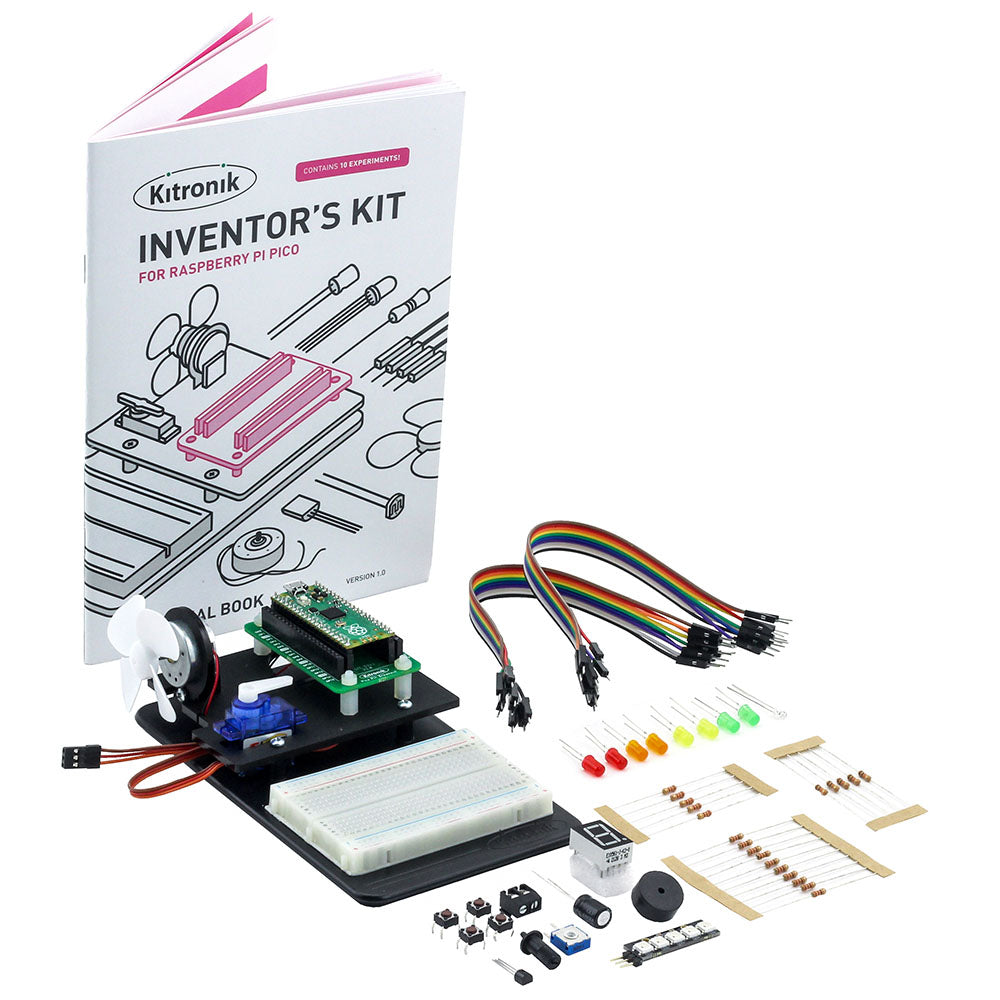
The Kitronik Inventor’s Kit for the Raspberry Pi Pico offers the perfect introduction to physical computing with the Pico. This Inventor’s Kit contains everything you need to complete 10 exciting experiments and the included booklet walks you through every step of each. Note: The Pico is not supplied with this kit, a pre-soldered one can be obtained separately here.
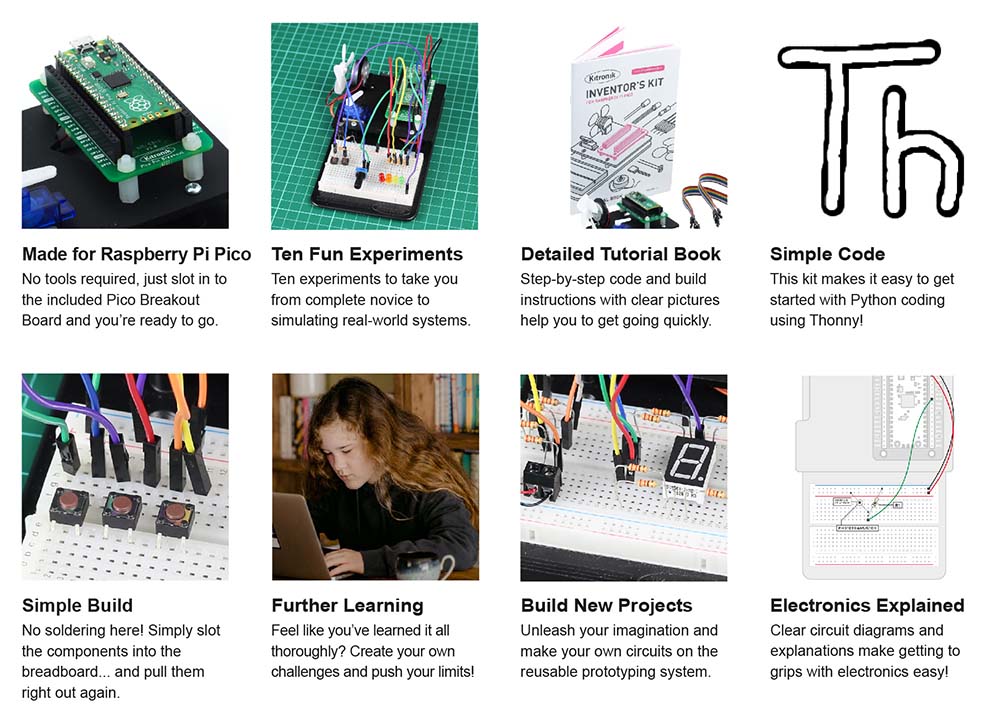
The possibilities for the kit are endless and the booklet is intended to get you off to a flying start. Before moving on to the experiments, it introduces you to the Raspberry Pi Pico and guides you in getting it ready for use. There is also an introduction to coding, how to run Python code on the Pico, guidance on using Breadboards, and also a detailed assembly guide for the kit.
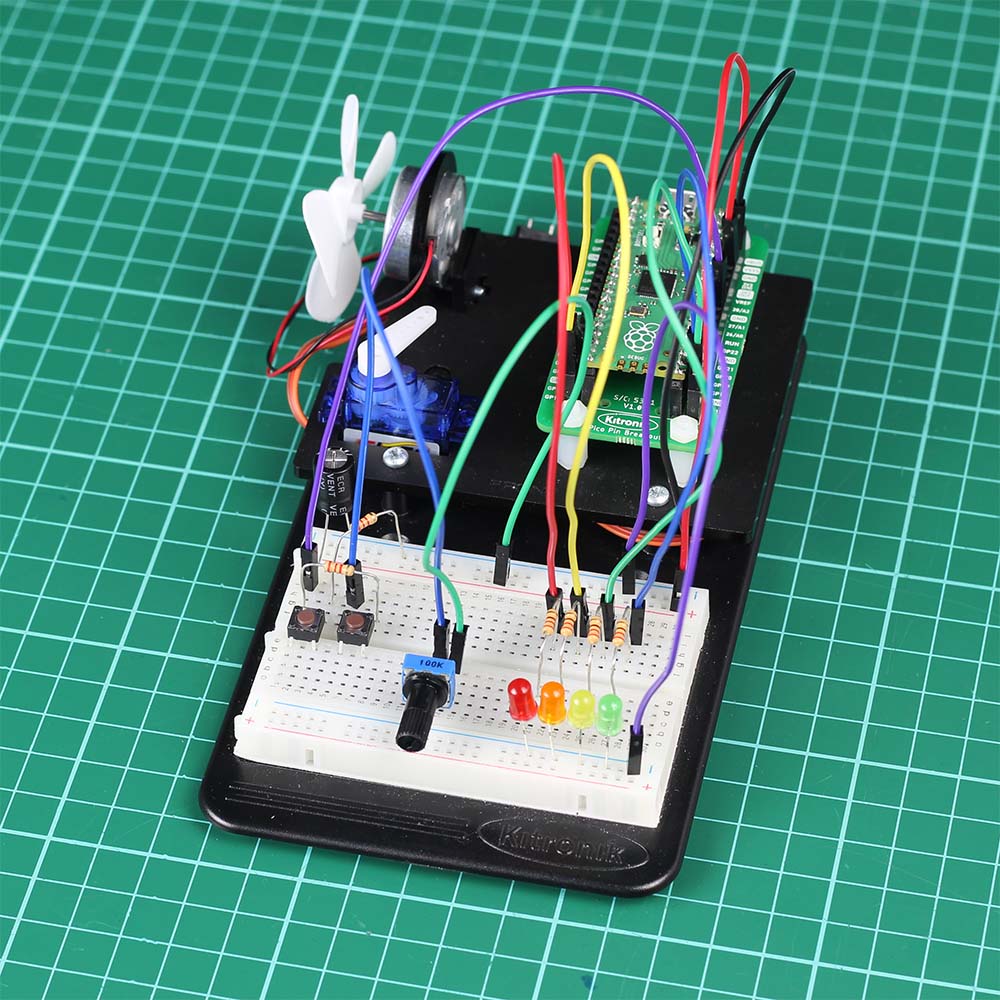
Each experiment is then explained in full in a clear and concise manner. The full-colour booklet details the parts you need, the code used, a breadboard wiring diagram, a circuit diagram, and a full description of what is happening and why. The 10 experiments start simple and get more difficult as you progress through them.
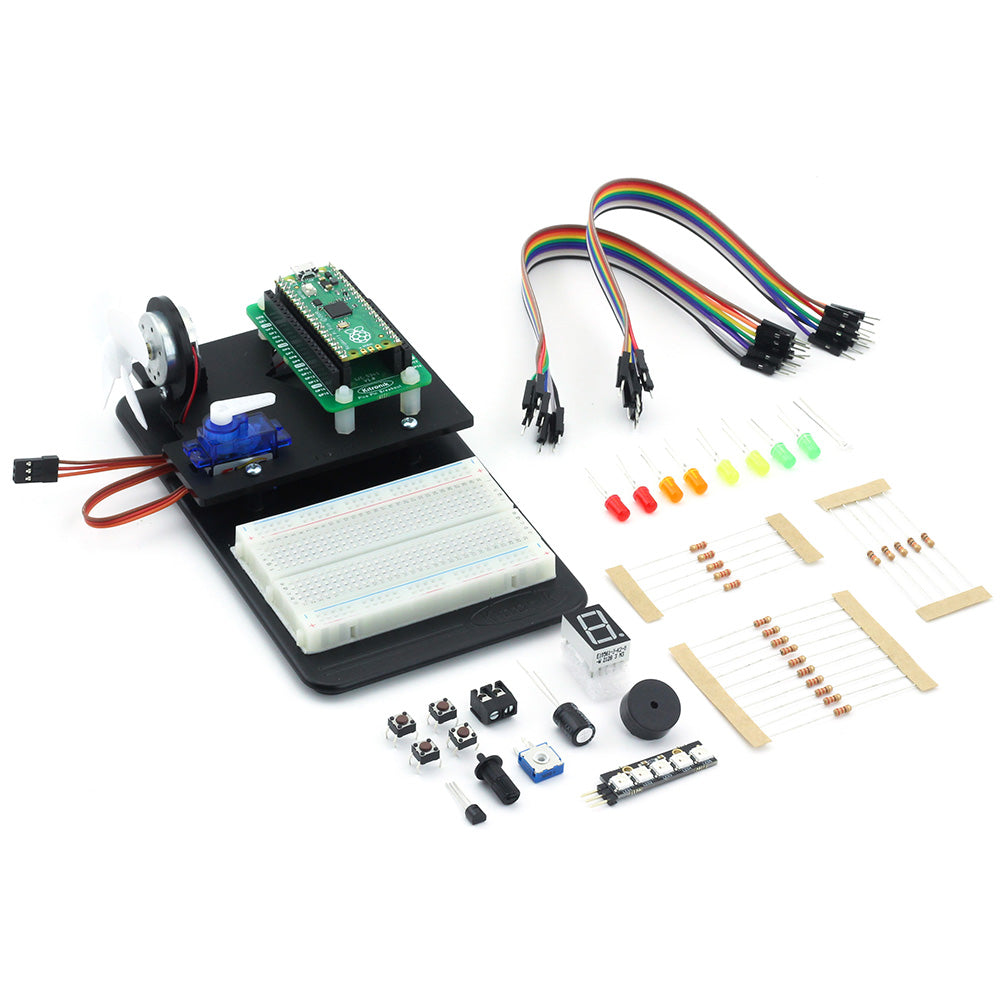
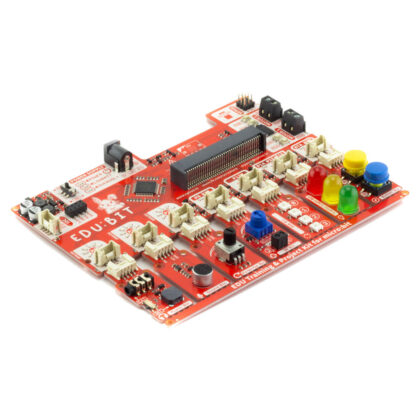
Much like our Inventor’s Kit for micro:bit and Inventors Kit for Arduino, this kit is built around our Inventor’s prototyping system. It comprises an injection moulded base plate, onto which the breadboard is affixed, and the included laser cut plate is mounted. The laser-cut plate has mounting points for the included motor, servo, and Pinout board for Raspberry Pi Pico. There are also more than 60 components and connectors in the kit, such as; LEDs, switches, motors, transistors, resistors, and more! Please see the contents section below for a full list.
Errata – Use of PicoW
The PicoW was launched after the printing of the booklet in this kit had occurred. As a result if you are using a PicoW with this kit then the following code modifications are needed:
Where the onboard LED is used the booklet refers to Pin 25. On a PicoW Pin 25 is now replaced with the alias “LED” instead of the number 25.
Example code:
- As written in the booklet (if using a Pico):
- LED = machine.Pin(25, machine.Pin.OUT)
- If using a PicoW:
- LED = machine.Pin(“LED”, machine.Pin.OUT)
Note:
- There is no soldering required for this kit.
- The kit does involve some mechanical assembly.
- The Pico is not supplied with this kit, a pre-soldered one can be obtained separately here.

Features:
- The Kitronik Inventor’s Kit for the Raspberry Pi Pico provides a fantastic way of learning how to construct and control electronic circuits with the Pico and MicroPython.
- No soldering is required, build your first circuit in minutes.
- Work through the 10 included experiments, following the detailed full-colour guide booklet.
- The kit includes the Kitronik Inventors prototyping system, also found in the Inventor’s Kit for micro:bit and Inventors Kit for Arduino.
Contents:
- 1 x Full-colour instruction booklet.
- 1 x Kitronik injection moulded Inventor’s prototyping mounting plate.
- 1 x Laser cut Pico mounting plate and fixings.
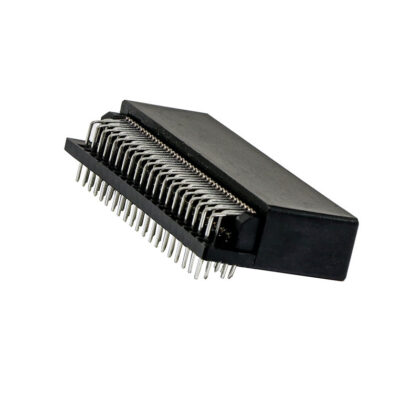
- 1 x Pico Pin Breakout Board.
- 1 x Kitronik 5 LED ZIP stick with pins.
- 1 x Mini 180 Degree Resin Gear Servo SG90.
- 1 x 7 segment display.
- 4 x Push switch.
- 2 x Red 5mm LED.
- 2 x Green 5mm LED.
- 2 x Yellow 5mm LED.
- 2 x Orange 5mm LED.
- 10 x 220Ω resistor.
- 5 x 2.2kΩ resistor.
- 5 x 10kΩ resistor.
- 1 x 3mm Phototransistor.
- 1 x Transistor (NPN BC337).
- 1 x Fan blade.
- 1 x Motor.
- 1 x Piezo element buzzer.
- 20 x MM jumper wires.
- 1 x 470uF electrolytic capacitor.
- 1 x Terminal connector.
- 1 x Potentiometer & finger adjust spindle.
Video:
Requires:
- 1 x Raspberry Pi Pico with pre-soldered headers.
- 1 x Phillips Screwdriver.
- 1 x Terminal Block Screwdriver.
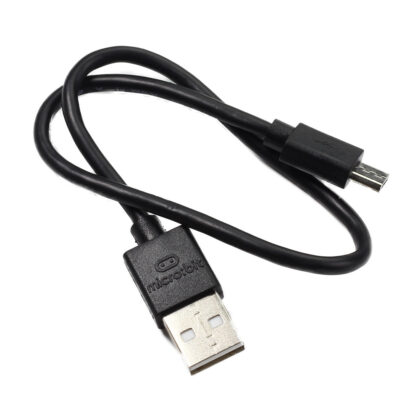
- 1 x Micro USB Cable.
- Thonny editor.
Resources:
The table below contains additional resources for each of the included experiments. This includes; Video walk-throughs for each and code that can be copied and then pasted into an editor, such as Thonny.
Buy British:
 This product is designed and manufactured in the UK by Kitronik.

Reviews
There are no reviews yet.