
Our Air Freshener Kit is one of the most featured kits in our Student Gallery, and for good reason! It requires a good amount of design thinking, but the enclosure itself can be quite abstract or take on a great number of forms.
Read on to find out how to make a basic enclosure, and use Emma’s design as a base for your design.

We Have Used:
- Air Freshener Kit.
- Black Painted MDF.
- PVA Glue.
- Super Glue.
- 2 x AA Batteries.
- 12 x M3 6mm Pan-Head Screws.
- 8 x 8mm M3 Spacers.
- This DXF design.
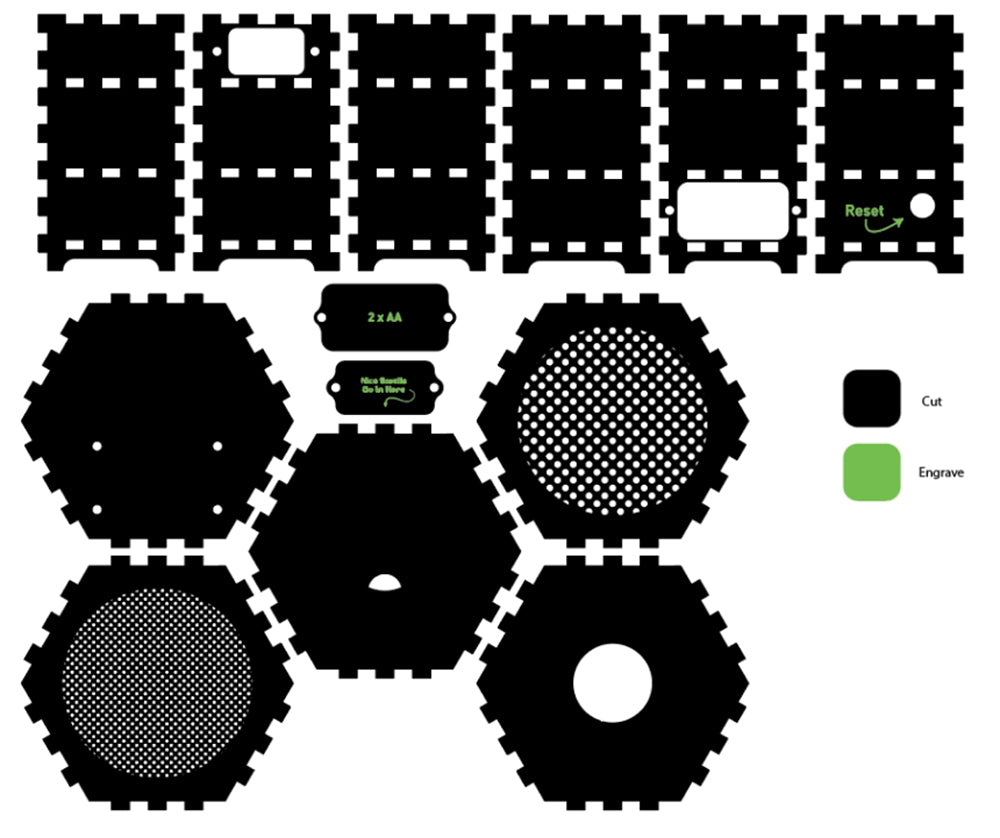
Check out the dxf:
The file will appear as the image below does, though it will only be outlines and not filled in. Make a note of the small pieces of engraving – you don’t need to include these if you don’t want to.
Cut & Engrave:
Cut and engrave as per the diagram in step 1.
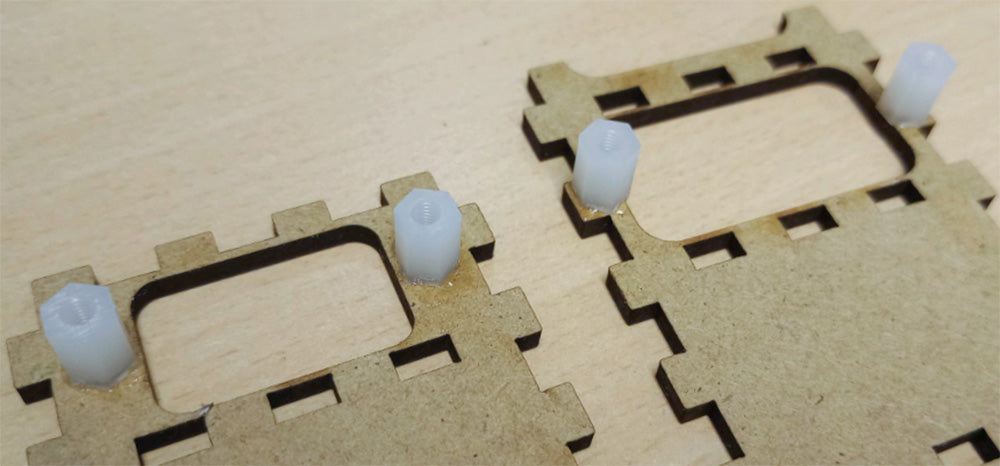
Glue Spacers to the back of the screw holes:
These will help you attach the service panel and the scent insert panel later on using your pan head screws.
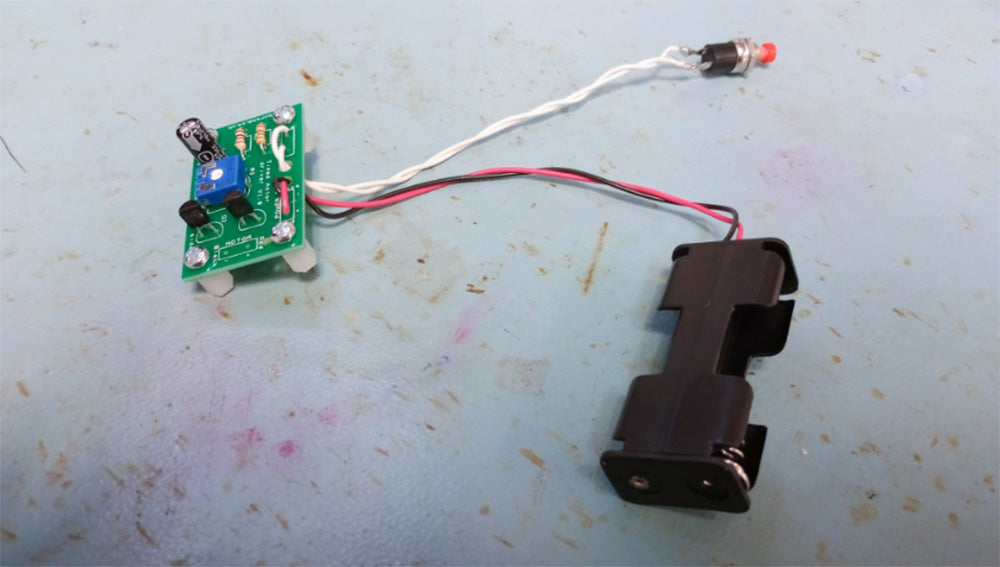
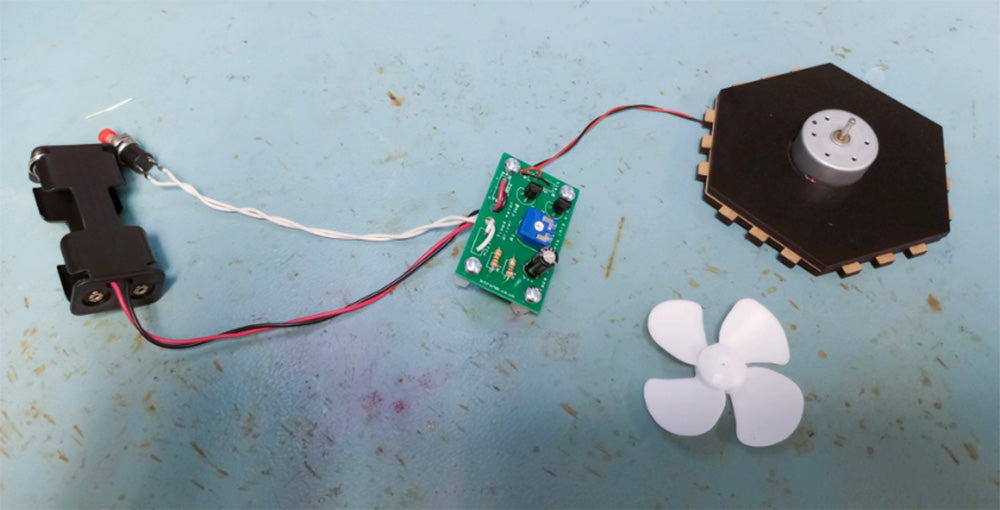
Solder the kit together, except from the fan:
Follow the instructions in this document to solder your kit together. You’ll be soldering the fan on in step 6 so leave it apart from the PCB for now.
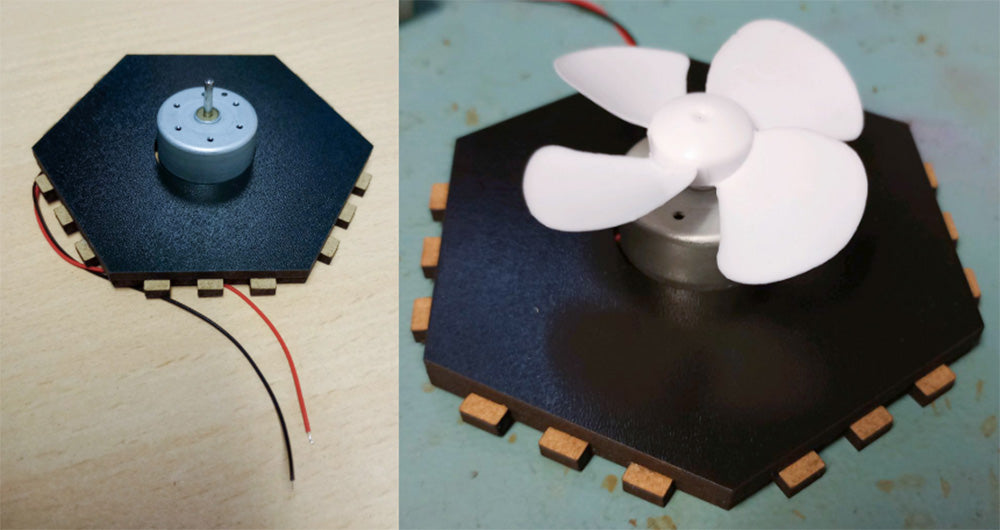
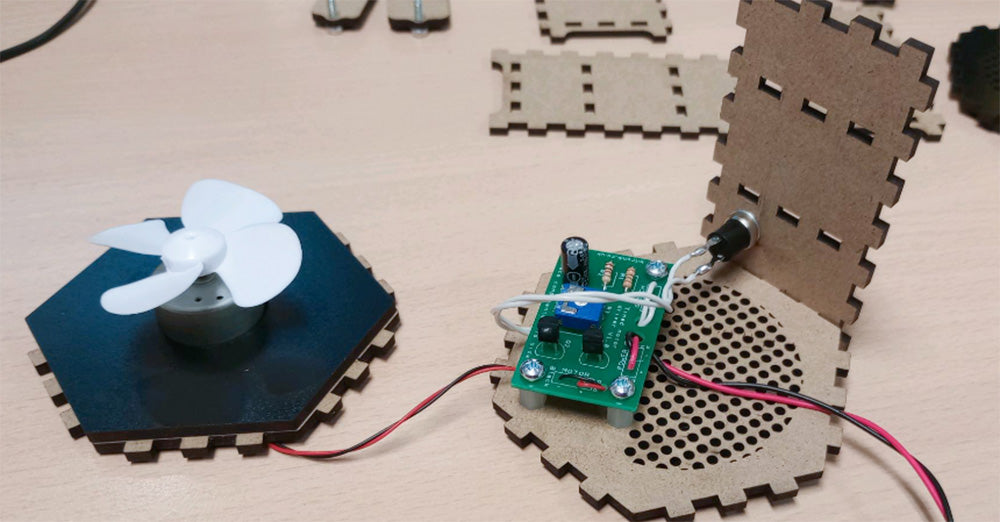
Assemble the fan mount panel and the fan:
Glue the two panels shown together using PVA glue. Once the glue is dry, thread the motor wires through the small hole, then push the motor into the circular hole. Finally, push the fan onto the motor.
Solder the fan to the PCB:
Solder the fan, which is now assembled and mounted, onto the PCB as shown.
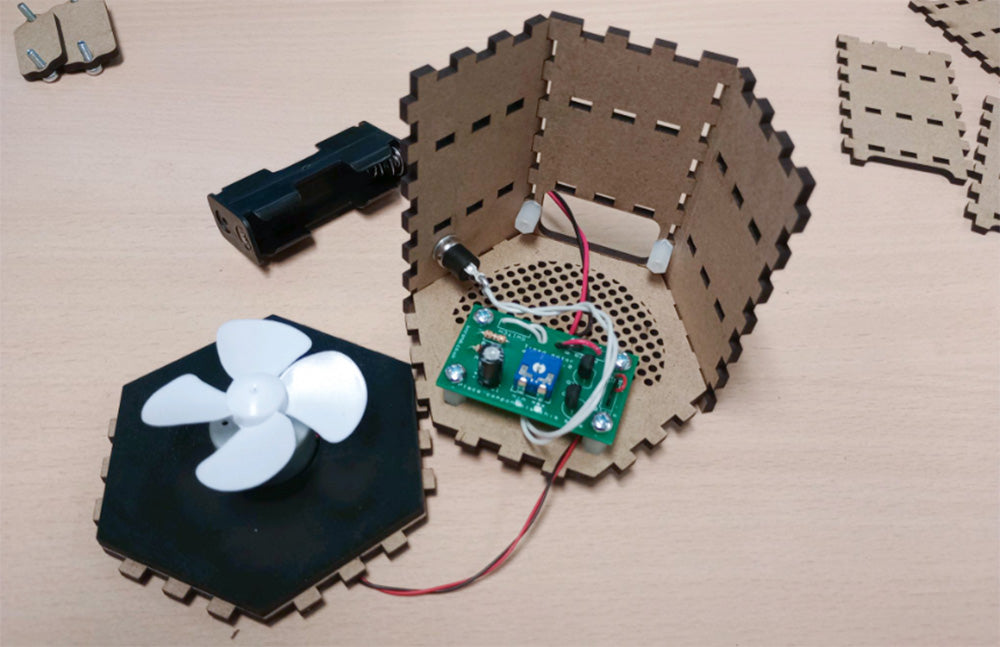
Mount the PCB and reset switch:
Mount the PCB to the bottom hexagonal panel as shown using the four 8mm spacers and eight 6mm pan-head screws. For each mounting hole, there will be one screw on either side – one through the PCB at the top, and one through the hexagonal panel at the bottom.
Assemble three sides of the enclosure:
Three sides can now be pushed onto the bottom hexagonal panel. Use PVA glue to secure the finger joints in place.
Attach the fan mount:
The next hexagonal panel to be affixed will be the fan mount panel. Again, secure the finger joints with PVA.
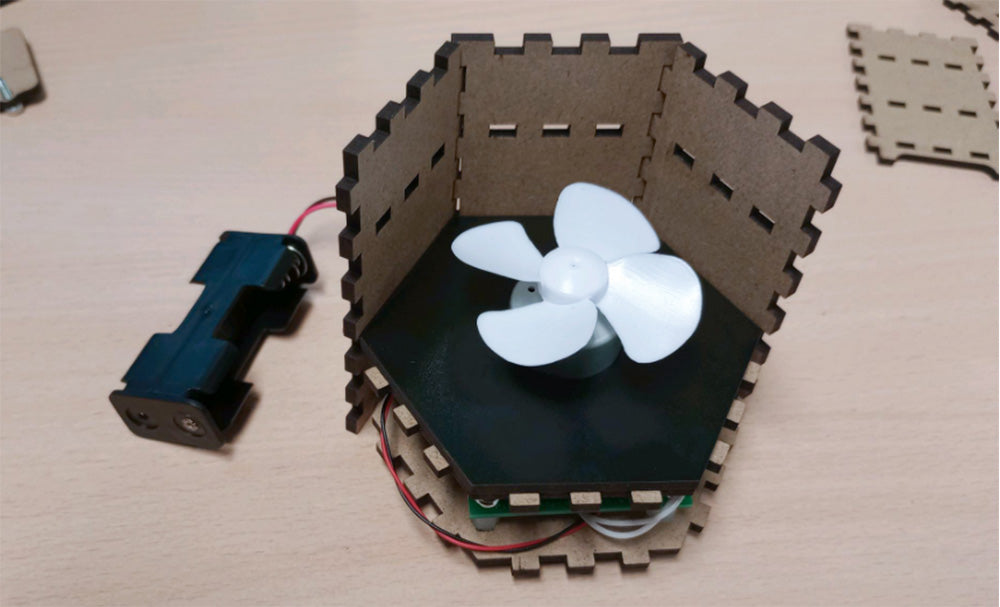
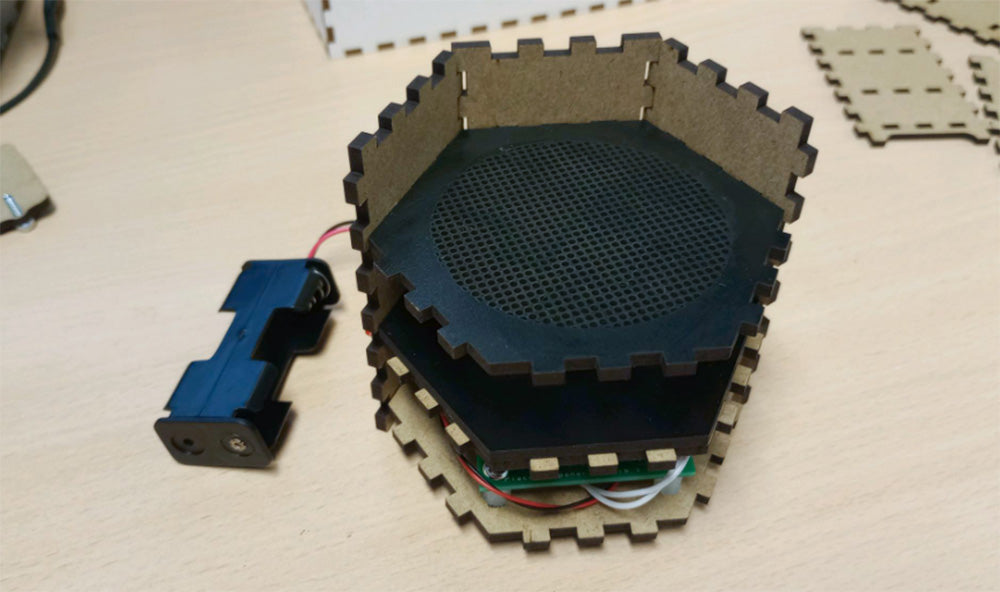
Mount the mesh panel:
The panel with smaller holes will sit directly above the fan. You may need to push the fan down onto the motor in order to avoid the fan scraping against the panel.
Attach the three last side panels:
Now that the internal parts are all in place, you can close the enclosure up on the last three sides, securing the finger joints with PVA glue.

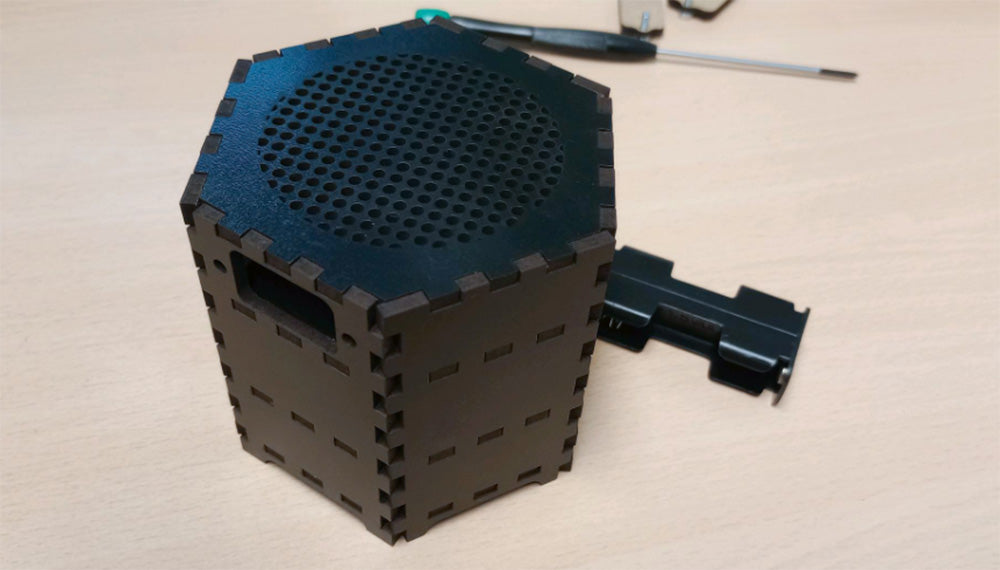
Attach the top panel:
Now you can attach the top panel! Again, use PVA glue to secure the finger joints.
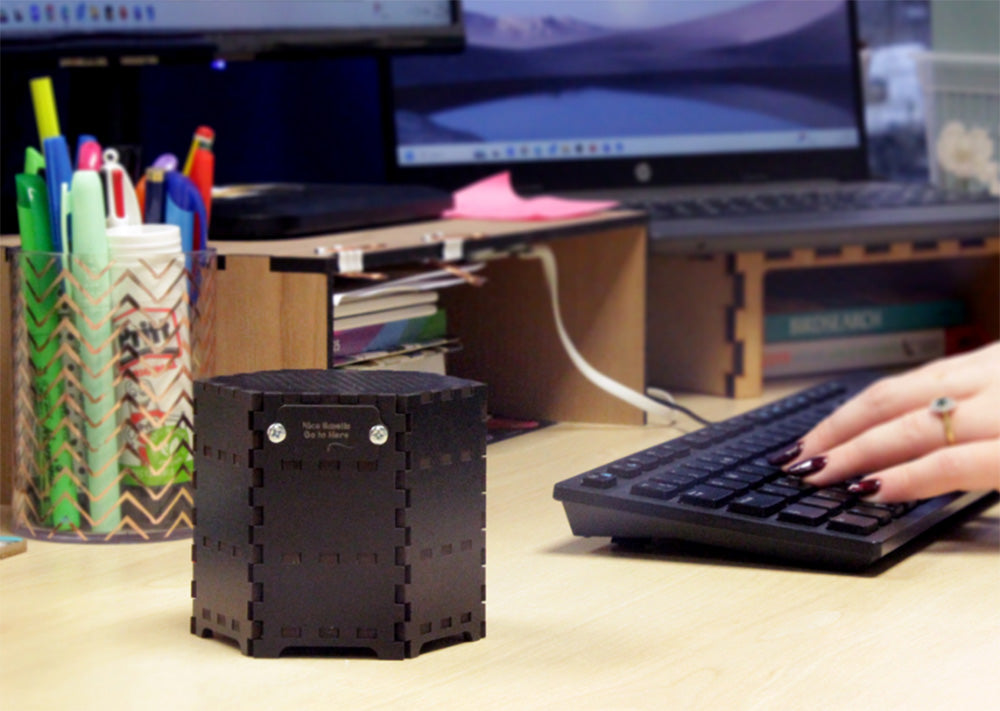
Screw on the two panels:
The topmost panel will allow access to the compartment where the scent-carrying material is placed, and the lower panel will allow access to the PCB and battery box. You’re Finished!

Pop some potpourri into the top section – or another pleasant scent-diffusing material (perhaps some lavender) and your fan will diffuse the scent up and out of the air freshener!
Other Projects in this series:
- Simple Air Freshener.
- Dice Tower.
- Steady Hand Surgery Game.