
This make is a good example of using a kit which looks like it has only one particular purpose in an entirely new way. What was designed as a Steady Hand Game, in which a loop is passed around a wire maze, is here being used as the circuitry for a surgery-themed game instead!
Follow along with Emma’s instructions below to learn how you can make this too.

We Have Used:
- Steady Hand Game Kit.
- Matte Black Value Acrylic.
- Blue on White Laser Laminate.
- Purple HIPS.
- Super Glue.
- 3 x AA Batteries.
- 1 x Croc-clip Lead.
- Electrical tape.
- Copper Tape.
- 2 x Counter-Sunk 6mm M3 Screws.
- 6 x M3 Hex Nuts.
- 4 x 8mm Plastic Spacers.
- 4 x M3 Pan-Head 12mm Screws.
- This DXF design.
Check out the dxf:
The diagram below is labelled to show you which parts to cut and which to engrave, and what materials we used.
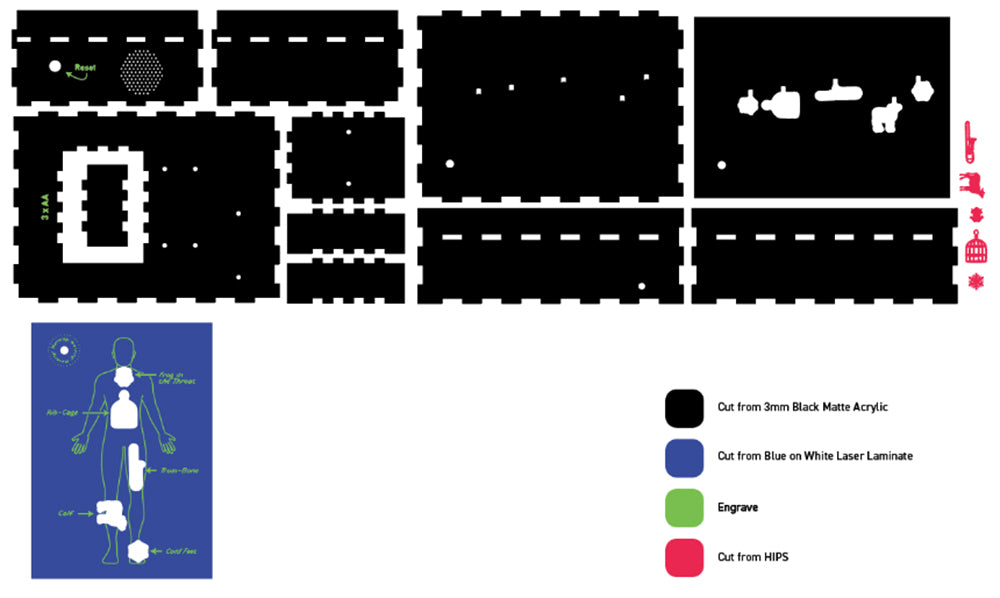
Cut & Engrave:
Cut and engrave as per the diagram in step 1.
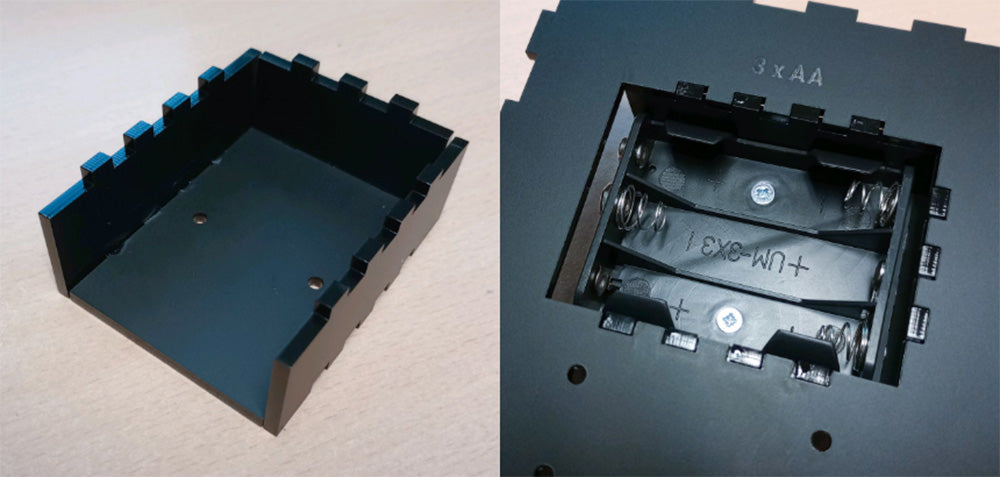
Construct the battery box compartment:
As shown, the battery box comprises three walls and a base piece. Superglue the box together to leave one side open, and then glue it into place on the base plate of the main enclosure. Attach the battery box using your two counter-sunk screws and hex nuts, with the battery terminal facing the open side.
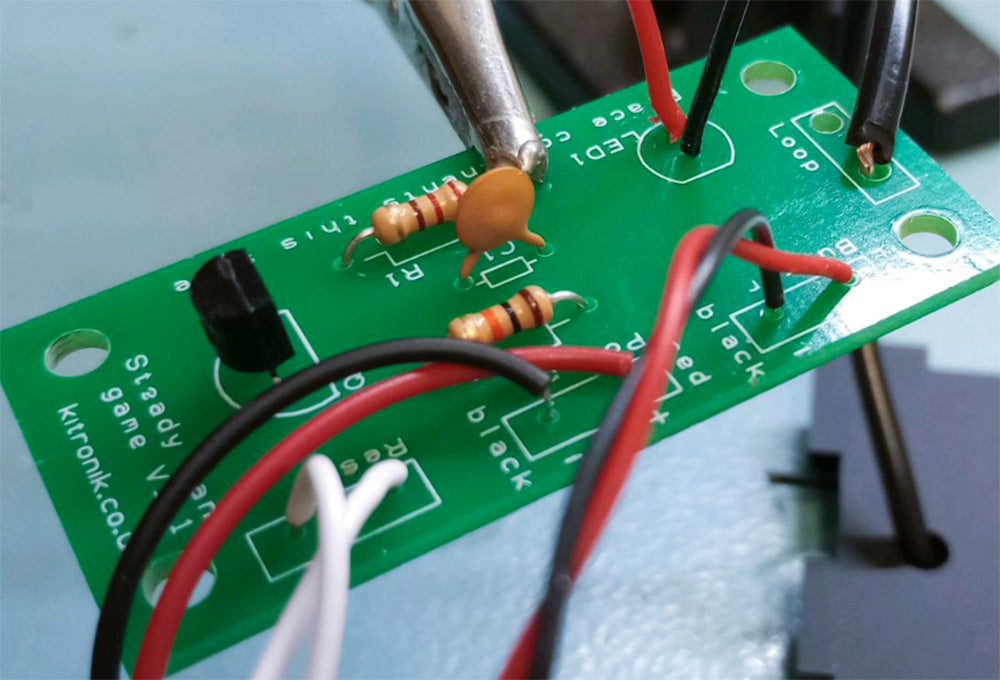
Solder the kit together, with some differences:
Please note that you will be attaching the LED differently, and making an addition to the loop instructions. Follow the instructions in this document to solder your kit together, keeping the loop and LED for last.
For the loop, you want to cut a good amount of the thick wire to use for connecting the PCB to the copper tape in the game surface. Solder this short length, and the longer length of the thick wire, to the “loop” pads.
Then, for the LED, solder a red wire to the positive pad, and a black wire to the negative. this will allow you to extend the LED beyond the board and mount it under the game surface.
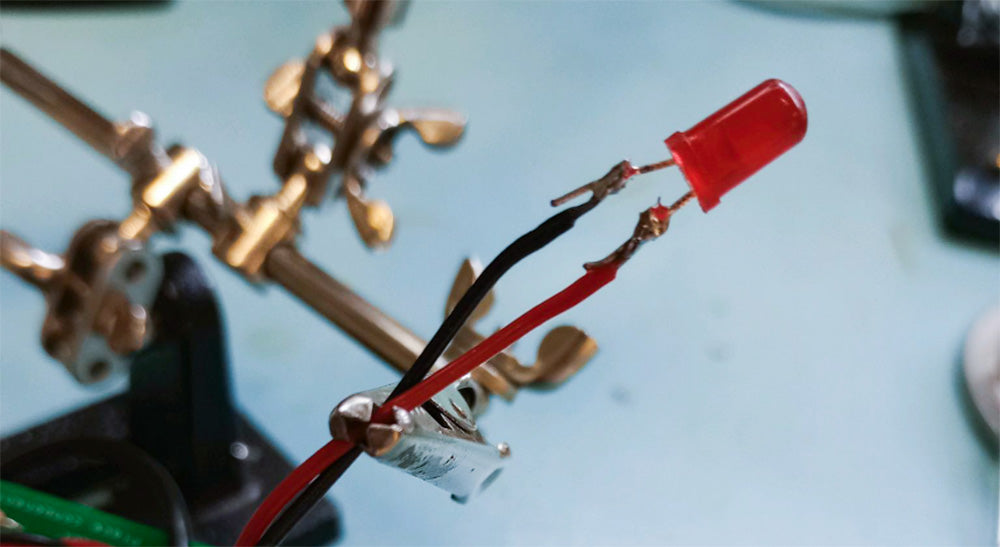
Solder the LED onto the additional wires:
We’ve used red to indicate positive and black to indicate negative, in order to make sure we solder the LED the correct way around.
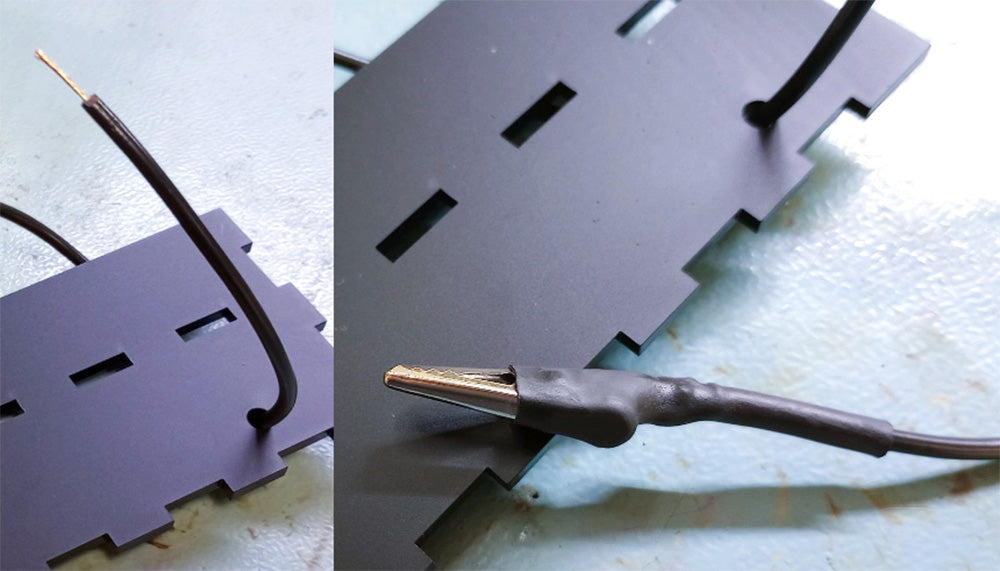
Attach the Crocodile Clip to the loop wire:
Strip the crocodile clip from the end of a croc clip wire, and solder it to the end of the loop wire. Heat shrink from the steady hand game kit can be used to insulate this connection.
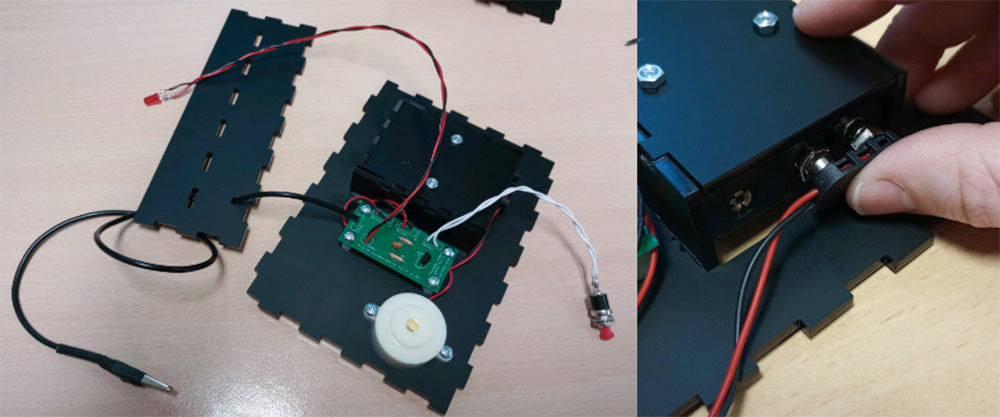
Mount the PCB and buzzer on the base plate:
Use the hex nuts, spacers and pan head screws to mount the PCB and buzzer onto the base plate through the mounting holes. Push the battery lead onto the terminals on the battery box.
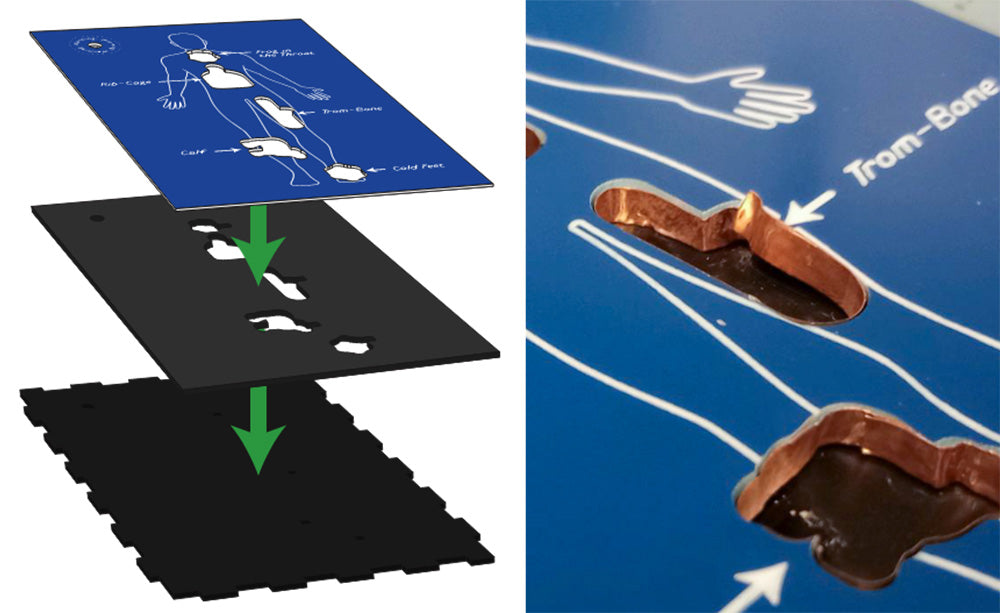
Assemble the game surface:
Layer the two pieces of black acrylic and blue laser laminate together and glue them together. Then, use copper tape to line the inside wall of each hole in the game surface and trail the copper tape out through the hole in the bottom of the game surface.
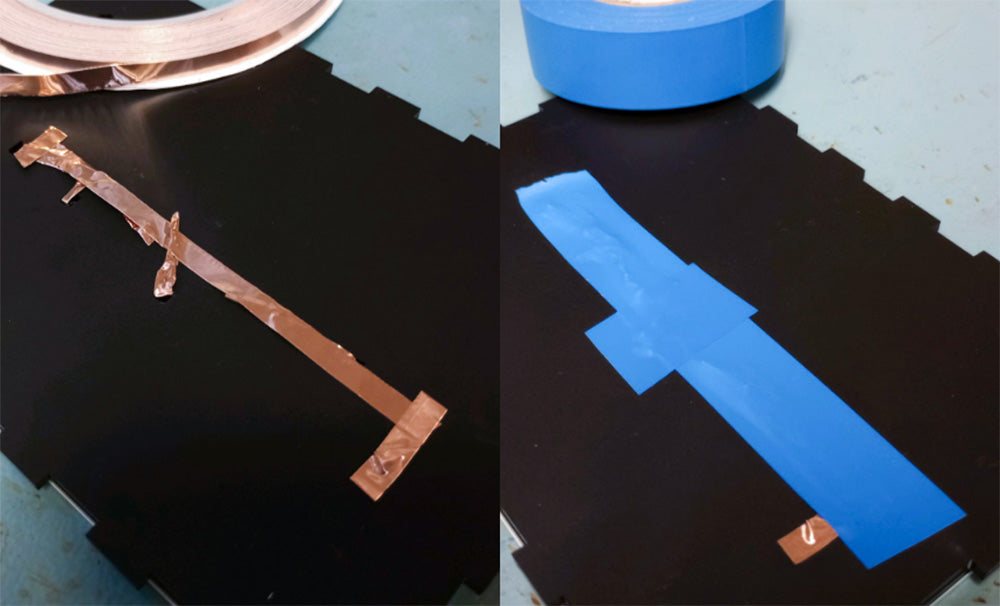
Once the tape is in place, connect it together on the back with more tape. From here, test the conductivity. If you find it isn’t adequate just using the copper tape, you can strengthen the connection in the copper tape by running solder along the length on the back of the game surface.
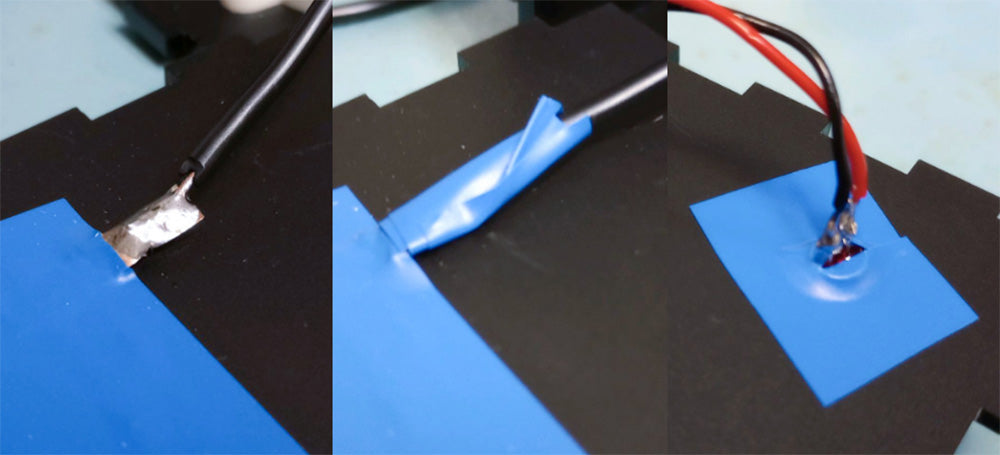
After this, insulate the copper tape as shown, using the electrician’s tape.
Connect the game surface to the PCB:
Solder the short length of loop wire to the copper tape, and then insulate it with electrician tape. Use the same tape to secure the LED into the hole in the game surface from the back.
Assemble the walls of the game:
Now that the electronics are all in place, assemble the walls around the base plate and game surface. Use superglue to secure the finger joints. As you put the front panel on (the one with the speaker and reset holes) do not forget to use the included nut to mount the reset switch in place.
Attach the crocodile clip to metal tweezers:
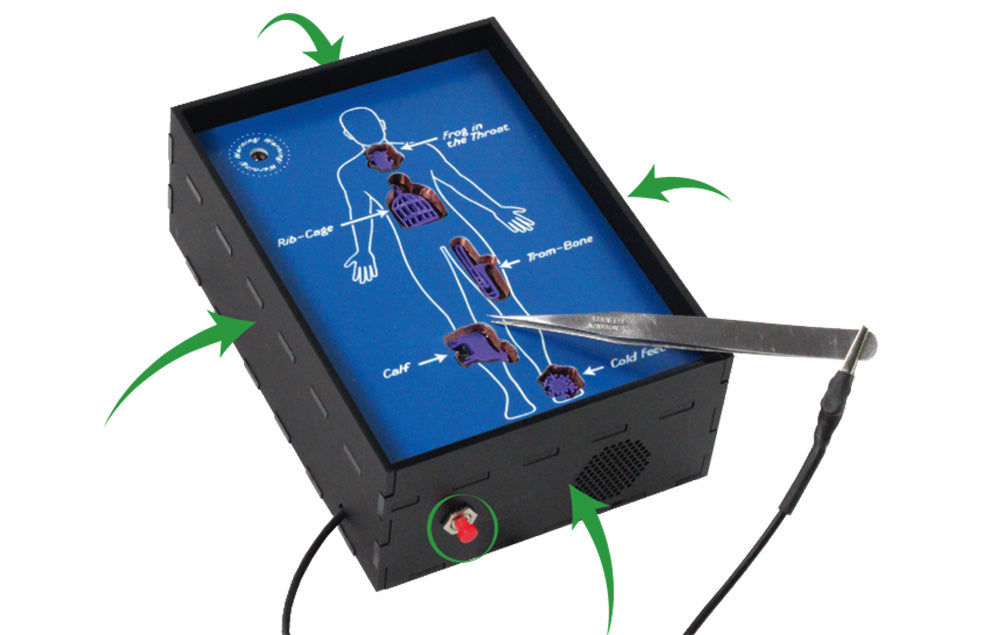
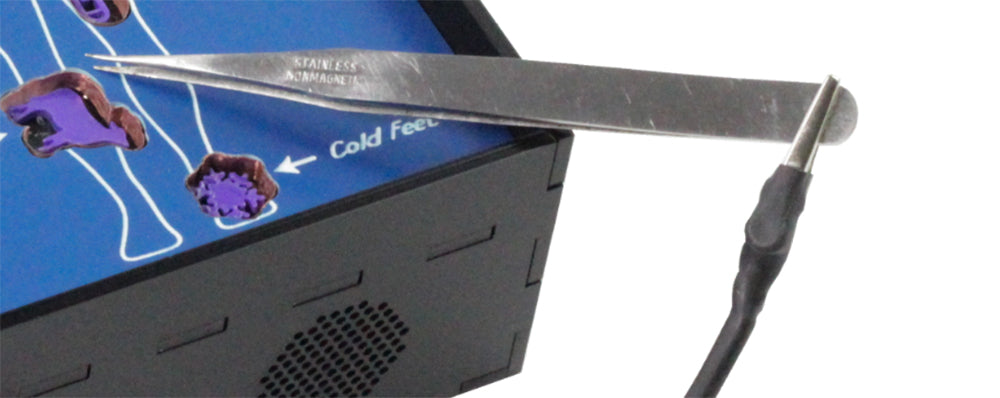
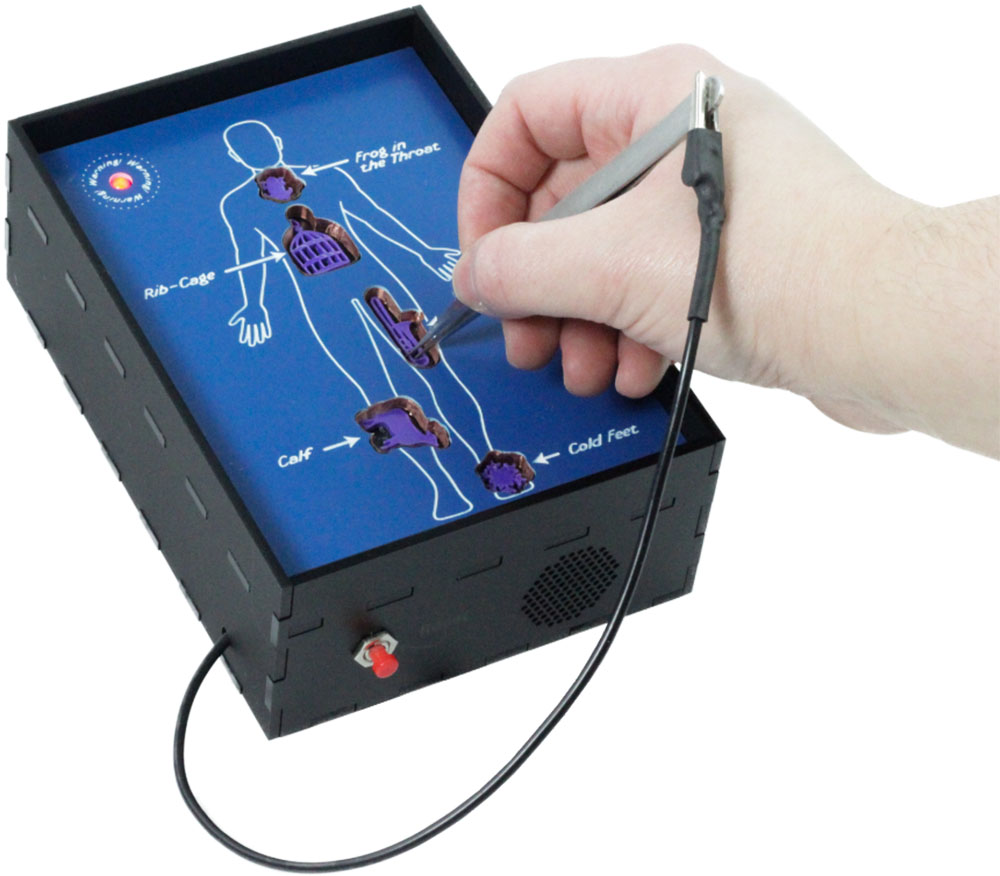
Finally, use any metal tweezers to form the last part of the “loop”, by clipping the croc clip to them. These will be used to carefully pull the game pieces from the game surface.
You’re Finished!
Place the game pieces into the game surface and you’re ready to play your own version of this classic surgery game!
Other Projects in this series:
- Simple Air Freshener.
- Dice Tower.
- Steady Hand Surgery Game.