If you are new to the Pico, and Python development, check out Raspberry Pi’s guide to get you started
Kitronik have also written a First Steps Tutorial to get you started using the Pico with the Thonny Editor.
Getting the Autonomous Robotics Code
Kitronik have written a module to use with the Autonomous Robotics Platform which is available, along with sample programs, in the Kitronik GitHub.
If the words “Clone the repo” mean nothing then check out our guide to git
If you are new to using modules with the Pico, there is a helpful guide providing practical examples and explanations on how to do so.
Clone or download the repository and then copy / save the PicoAutonomousRobotics.py file to your Pico.
Using the Input Button

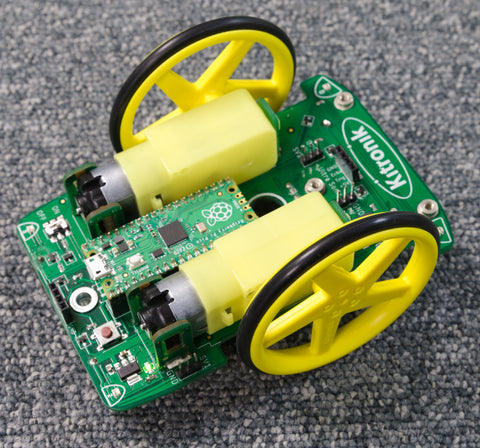
The Autonomous Robotics Platform (ARP) has a user input button on its PCB. This is different to the BOOTSEL button on the Pico. In this tutorial this will be used to start and stop your robot, but first we will use the button to trigger the onboard LED – this helps to prove the setup is good. Ensure that your Pico is mounted on your ARP, and the Pico is connected with a USB lead. This will power up the Pico without powering up the ARP motors.
Create and run following code:
from PicoAutonomousRobotics import KitronikPicoRobotBuggy
from time import sleep
buggy = KitronikPicoRobotBuggy()
import machine
LED = machine.Pin(25,machine.Pin.OUT) #Setup the onboard LED Pin as an output
while True:
    LED.value(buggy.button.value())
    sleep(0.05)
Press the button and the Pico’s onboard LED should light up. This is very similar to the Pico Discovery Kit first experiment.
If your LED doesn’t light up check the Thonny shell for error messages.
Driving the Motors
The next piece of code will drive the motors. Be careful not to drive your robot off the desk as this could damage it.
It is a good idea to switch off the ARP when you are programming it, or remove the wheels.
Create the following code:
from PicoAutonomousRobotics import KitronikPicoRobotBuggy
from time import sleep
from machine import Timer
buggy = KitronikPicoRobotBuggy()
run = False
buttonState = 0
def checkButton(p):
    global buttonState
    global run
    buttonState = buttonState <<1 | buggy.button.value() |0xE000
    buttonState &=0xFFFF
    if buttonState == 0xEFFF: #button has been pressed and passes the debouncing test
        if run == True:
            run = False
        else:
            run = True
debounceTimer = Timer(-1)
debounceTimer.init(period=2, mode=Timer.PERIODIC, callback=checkButton)
while True:
    if(run):
        buggy.motorOn("l","f",100)
        buggy.motorOn("r","f",100)
    else:
        buggy.motorOff("r")
        buggy.motorOff("l")
Save this as main.py on your Pico. Then disconnect the USB, place the ARP on the floor, turn it on and press the button.
Your ARP should drive forwards. Pressing the button again will turn off the motors. We are monitoring the button using a background timer. This lets us debounce the button input. When mechanical devices switch they often have a little spingyness, which makes them switch on and off rapidly until they settle into the new state. The timer is called every 2 mS and only registers the press after a number of times when the button input has been the same. You could also use an interrupt to handle an external event – such as the pressing of a button. Interrupts are explained in more detail in the Buzzer, Buttons and ZIP LEDs tutorial.
Going Straight.
There is a good chance that whilst your ARP drives forwards, it is not in a straight line.
The main problem you encounter when utilising pairs of motors in your robots is that it is almost impossible to get pairs of motors that spin at exactly the same speed. As a result, one wheel on the ARP will be traveling faster than the other, causing the requested straight line to be a bit wobbly.
This can be resolved by tuning the motors so that they turn at the same speed. For instance, if the ARP is curving to the left then the right motor is running slightly faster than the left motor.
To do this alter the value in the motorOn command for the right motor to be slightly less than the value for the left motor. A good starting point is a difference of 5. This will slow down the motor and your ARP should go in a straighter line.
Tuning the motors like this is an iterative process, and it may also change as the batteries become flat.
The motorOn() command uses values from 0-100 for power to the motor. This value instructs the driver to supply between 0 and 100% of the available power. Most motors won’t actually turn at very low powers (such as 10%), but if you listen you will hear a whining sound. Typically the motors on the ARP need to be around 70% for the input power to overcome the friction in the gearbox and start the wheels turning.
Using Functions
To make the code more modular we will now start to use functions – the first function will be to drive forwards.
Modify the code to:
from PicoAutonomousRobotics import KitronikPicoRobotBuggy
from time import sleep
from machine import Timer
buggy = KitronikPicoRobotBuggy()
run = False
buttonState = 0
def checkButton(p):
    global buttonState
    global run
    buttonState = buttonState <<1 | buggy.button.value() |0xE000
    buttonState &=0xFFFF
    if buttonState == 0xEFFF: #button has been pressed and passes the debouncing test
        if run == True:
            run = False
        else:
            run = True
debounceTimer = Timer(-1)
debounceTimer.init(period=2, mode=Timer.PERIODIC, callback=checkButton)
def Forwards():
        buggy.motorOn("l","f",100)
        buggy.motorOn("r","f",100)
def Stop():
        buggy.motorOff("r")
        buggy.motorOff("l")


while True:
    if(run):
        Forwards()
    else:
        Stop()
This code does the same as the previous code, but the Forwards and Stop are in their own functions.
The code can now be expanded by writing other functions for other directions. For instance a reverse function:
def Reverse():
        buggy.motorOn("l","r",100)
        buggy.motorOn("r","r",100)
Drawing Patterns
To draw patterns requires the ability to turn as well as move forwards and backwards.
The ARP does not have encoders on the motors, so to control how far the ARP turns requires using a knowledge of how fast the ARP will spin when one motor is running forwards and one backwards.
Add the following function:
def Spin():
        buggy.motorOn("l","f",80)
        buggy.motorOn("r","r",80)
and alter the main loop to:
while True:
    if(run):
        sleep(5) # this lets us get our hand out of the way before the robot starts to move
        Spin()
        sleep(5)
        run = False
    else:
        Stop()
The button press is supposed to stop the motors, but now that there are some sleep(5) in the main loop it might not action the button press for several seconds. To ensure the motors stop when we press the button add a Stop() to the checkButton function:
def checkButton(p):
    global buttonState
    global run
    buttonState = buttonState <<1 | buggy.button.value() |0xE000
    buttonState &=0xFFFF
    if buttonState == 0xEFFF: #button has been pressed and passes the debouncing test
        if run == True:
            run = False
            Stop() #there might be a sleep in the main loop so stop the motors *now*
        else:
            run = True
Your code should now look like:
from PicoAutonomousRobotics import KitronikPicoRobotBuggy
from time import sleep
from machine import Timer
buggy = KitronikPicoRobotBuggy()
run = False
buttonState = 0
def checkButton(p):
    global buttonState
    global run
    buttonState = buttonState <<1 | buggy.button.value() |0xE000
    buttonState &=0xFFFF
    if buttonState == 0xEFFF: #button has been pressed and passes the debouncing test
        if run == True:
            run = False
            Stop() #there might be a sleep in the main loop so stop the motors *now*
        else:
            run = True
debounceTimer = Timer(-1)
debounceTimer.init(period=2, mode=Timer.PERIODIC, callback=checkButton)
def Forwards():
   buggy.motorOn("l","f",100)
   buggy.motorOn("r","f",100)
def Reverse():
   buggy.motorOn("l","r",100)
   buggy.motorOn("r","r",100)
def Stop():
   buggy.motorOff("r")
   buggy.motorOff("l")
def Spin():
   buggy.motorOn("l","f",80)
   buggy.motorOn("r","r",80)
while True:
   if(run):
      sleep(5)
      Spin()
      sleep(5)
      run = False
   else:
      Stop()
Place the ARP on the floor, press the button and count the number of turns the buggy does. The Kitronik test ARP did 6 turns – just over 1 turn per second. With some simple maths it is possible to calculate how long a turn of a number of degrees will take:
(Number of degrees we want to turn / Number of turns per second) x 360
For the Kitronik test ARP the denominator is:
(6/5) x 360
It is possible to use the number of degrees per second as a constant to create a function to turn left:
DegreesPerSecond = (6/5)*360From this creating a function to turn a number of degrees is straightforward:
def TurnLeft(HowFar):
    buggy.motorOn("l","r",80)
    buggy.motorOn("r","f",80)
    sleep(HowFar/DegreesPerSecond)
    Stop()
Replace the Spin() in the main loop with a call to TurnLeft(90).
Download and run the code. Check that your buggy:
- Turns left
- Turns through 90 degrees.
Your main loop should look like:
while True:
    if(run):
        sleep(5)
        TurnLeft(90)
        sleep(5)
        run = False
    else:
        Stop()
If your buggy does not turn through 90 degrees there are a few things which could be tuned:
- If the buggy turns less than 90 degrees it could be that the wheels are slipping, in which case reducing the speed of the turn may help. That would then require re running the spin code to determine the degrees per second number.
- It could also be that the buggy is moving slower than expected, in which case the number of turns per second needs to be reduced
- If your buggy turns more than 90 degrees then the buggy is moving faster than expected, so the number of turns per second needs to be increased.
Drawing Shapes
Create a function for turn right – it should be very similar to TurnLeft().
The code should look like:
from PicoAutonomousRobotics import KitronikPicoRobotBuggy
from time import sleep
from machine import Timer
buggy = KitronikPicoRobotBuggy()
run = False
#constant for the speed of turning
DegreesPerSecond = (6/5)*360
buttonState = 0
def checkButton(p):
    global buttonState
    global run
    buttonState = buttonState <<1 | buggy.button.value() |0xE000
    buttonState &=0xFFFF
    if buttonState == 0xEFFF: #button has been pressed and passes the debouncing test
        if run == True:
            run = False
            Stop() #there might be a sleep in the main loop so stop the motors *now*
        else:
            run = True
debounceTimer = Timer(-1)
debounceTimer.init(period=2, mode=Timer.PERIODIC, callback=checkButton)

def Forwards():
        buggy.motorOn("l","f",100)
        buggy.motorOn("r","f",100)

def Reverse():
        buggy.motorOn("l","r",100)
        buggy.motorOn("r","r",100)
def Stop():
        buggy.motorOff("r")
        buggy.motorOff("l")
def Spin():
        buggy.motorOn("l","f",80)
        buggy.motorOn("r","r",80)
def TurnLeft(HowFar):
    buggy.motorOn("l","r",80)
    buggy.motorOn("r","f",80)
    sleep(HowFar/DegreesPerSecond)
    Stop()
def TurnRight(HowFar):
    buggy.motorOn("l","f",80)
    buggy.motorOn("r","r",80)
    sleep(HowFar/DegreesPerSecond)
    Stop()
while True:
    if(run):
        sleep(5)
        TurnLeft(90)
        sleep(5)
        run = False
    else:
        Stop()
Now all the required functionality is available for drawing shapes.
Try to draw a square. A square has 4 sides of equal length, and 90 degree corners. It is possible to write the code to use a loop, where each time round the loop a side and corner are drawn.
My main loop for a square looks like:
while True:
if(run):
sleep(5) # wait so we can get the hand clear after pressing start.
for x in range (0,4):
Forwards()
sleep(0.5)
TurnLeft(90)
run = False
else:
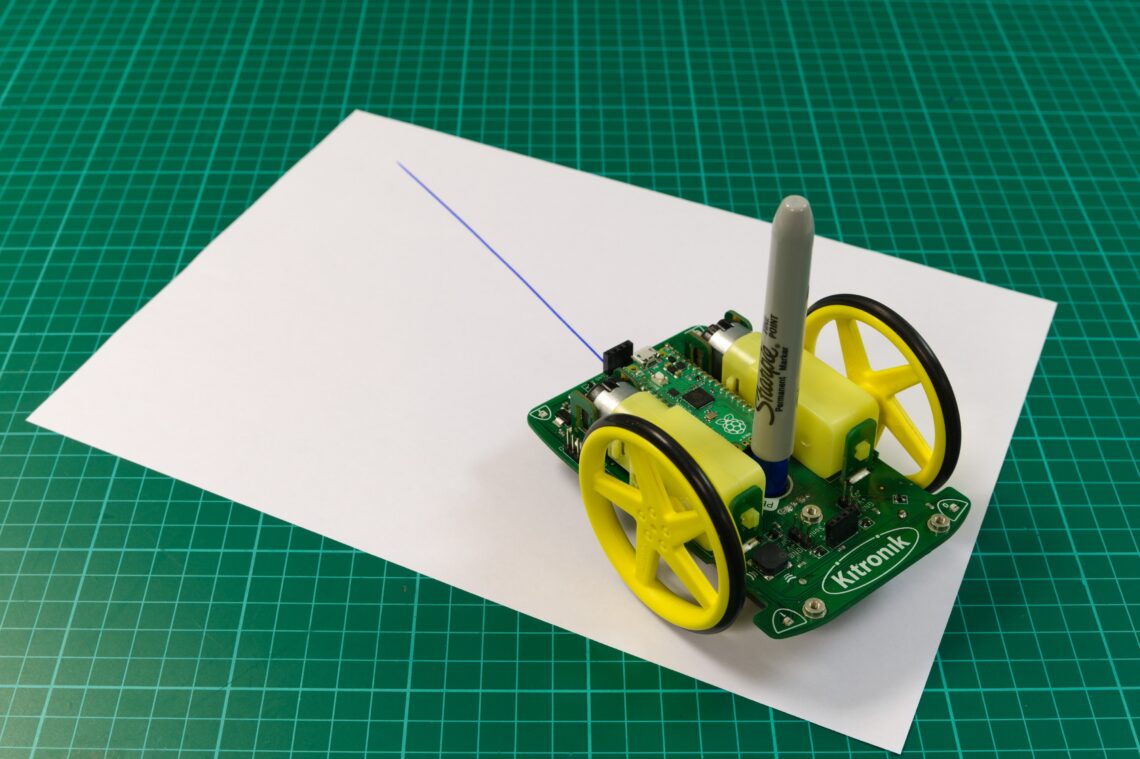
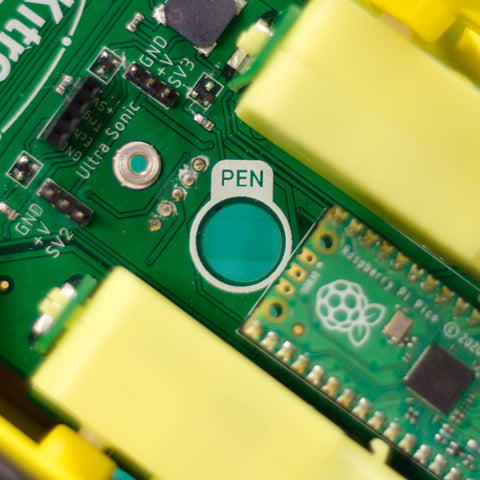
Stop()The ARP has a Pen hole in the centre of the motors. With a marker this can be used to draw on paper.
Try other shapes, can you write a letter and then your name?
Try creating functions for shapes, and then linking them together to create a piece of art.
Coding Resources for Pico-ARP:
| Online Tutorials – Pico ARP. |
|---|
| Using the Motors. |
| Using the Buzzer, Button and Lights. |
| Using the Line Following Sensors. |
| Using the Ultrasonic Sensor. |
| Using the Servo connections. |