If you are new to the Pico, and Python development, check out Raspberry Pi’s guide to get you started
Kitronik have also written a First Steps Tutorial to get you started using the Pico with the Thonny Editor.
Getting the Autonomous Robotics Code
Kitronik have written a module to use with the Autonomous Robotics Platform which is available, along with sample programs, in the Kitronik GitHub.
If the words “Clone the repo” mean nothing then check out our guide to git
If you are new to using modules with the Pico, there is a helpful guide providing practical examples and explanations on how to do so.
Clone or download the repository and then copy / save the PicoAutonomousRobotics.py file to your Pico.
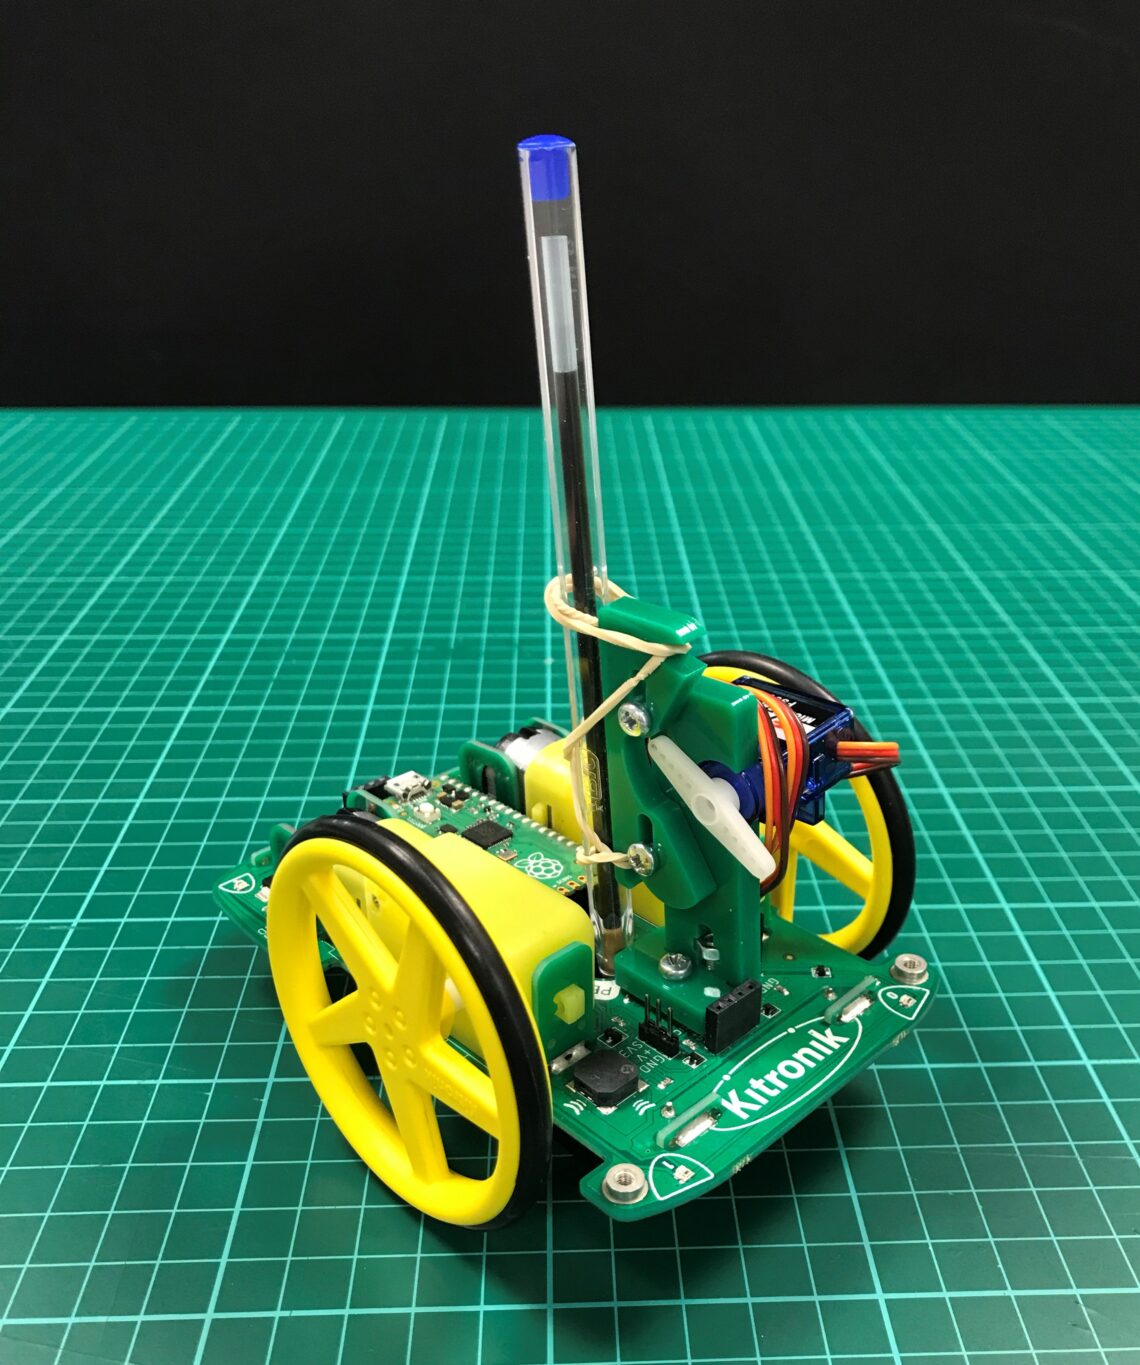
This tutorial assumes that you have an ARP Pen Lifter built and attached to your ARP, with the Servo plugged into the SV2 pins.

This tutorial builds on the Motor control tutorial.
To begin either open the tutorial code for the motor control from GitHub or create it in Thonny:
from PicoAutonomousRobotics import KitronikPicoRobotBuggy
from time import sleep
from machine import Timer
buggy = KitronikPicoRobotBuggy()
run = False
#constant for the speed of turning
DegreesPerSecond = (6/5)*360
buttonState = 0
def checkButton(p):
    global buttonState
    global run
    buttonState = buttonState <<1 | buggy.button.value() |0xE000
    buttonState &=0xFFFF
    if buttonState == 0xEFFF: #button has been pressed and passes the debouncing test
        if run == True:
            run = False
            Stop() #there might be a sleep in the main loop so stop the motors *now*
        else:
            run = True
debounceTimer = Timer(-1)
debounceTimer.init(period=2, mode=Timer.PERIODIC, callback=checkButton)

def Forwards():
        buggy.motorOn("l","f",100)
        buggy.motorOn("r","f",100)

def Reverse():
        buggy.motorOn("l","r",100)
        buggy.motorOn("r","r",100)
def Stop():
        buggy.motorOff("r")
        buggy.motorOff("l")
def Spin():
        buggy.motorOn("l","f",80)
        buggy.motorOn("r","r",80)
def TurnLeft(HowFar):
    buggy.motorOn("l","r",80)
    buggy.motorOn("r","f",80)
    sleep(HowFar/DegreesPerSecond)
    Stop()
def TurnRight(HowFar):
    buggy.motorOn("l","f",80)
    buggy.motorOn("r","r",80)
    sleep(HowFar/DegreesPerSecond)
    Stop()
while True:
    Stop()
Then add the following functions:
def PenUp():
    buggy.goToPosition(2,45)
def PenDown():
    buggy.goToPosition(2,125)
Your complete code should look like:
from PicoAutonomousRobotics import KitronikPicoRobotBuggy
from time import sleep
from machine import Timer
buggy = KitronikPicoRobotBuggy()
run = False
#constant for the speed of turning
DegreesPerSecond = (6/5)*360
buttonState = 0
def checkButton(p):
    global buttonState
    global run
    buttonState = buttonState <<1 | buggy.button.value() |0xE000
    buttonState &=0xFFFF
    if buttonState == 0xEFFF: #button has been pressed and passes the debouncing test
        if run == True:
            run = False
            Stop() #there might be a sleep in the main loop so stop the motors *now*
        else:
            run = True
debounceTimer = Timer(-1)
debounceTimer.init(period=2, mode=Timer.PERIODIC, callback=checkButton)

def Forwards():
        buggy.motorOn("l","f",100)
        buggy.motorOn("r","f",100)

def Reverse():
        buggy.motorOn("l","r",100)
        buggy.motorOn("r","r",100)
def Stop():
        buggy.motorOff("r")
        buggy.motorOff("l")
def Spin():
        buggy.motorOn("l","f",80)
        buggy.motorOn("r","r",80)
def TurnLeft(HowFar):
    buggy.motorOn("l","r",80)
    buggy.motorOn("r","f",80)
    sleep(HowFar/DegreesPerSecond)
    Stop()
def TurnRight(HowFar):
    buggy.motorOn("l","f",80)
    buggy.motorOn("r","r",80)
    sleep(HowFar/DegreesPerSecond)
    Stop()
def PenUp():
    buggy.goToPosition(2,45)
def PenDown():
    buggy.goToPosition(2,125)
while True:
    Stop()
Now all the required functionality is available for drawing shapes and lifting the pen to create gaps in the line.
It is now possible to draw a square where the ARP starts off the paper, lifts the pen to travel onto the paper, then lowers it to do the drawing, lifting the pen when it has finished.
To do this replace the while True loop with this code:
while True:
   if(run):
        sleep(5) # wait so we can get the hand clear after pressing start.

        PenUp()

        Forwards()

        PenDown()
        for x in range (0,4):
            Forwards()
            sleep(0.5)
            TurnLeft(90)

        PenUp()
        run = False
    else:
        Stop()
Try other shapes, can you write a letter and then your name?
Try creating functions for shapes, and then linking them together to create a piece of art.
Coding Resources for Pico-ARP:
| Online Tutorials – Pico ARP. |
|---|
| Using the Motors. |
| Using the Buzzer, Button and Lights. |
| Using the Line Following Sensors. |
| Using the Ultrasonic Sensor. |
| Using the Servo connections. |