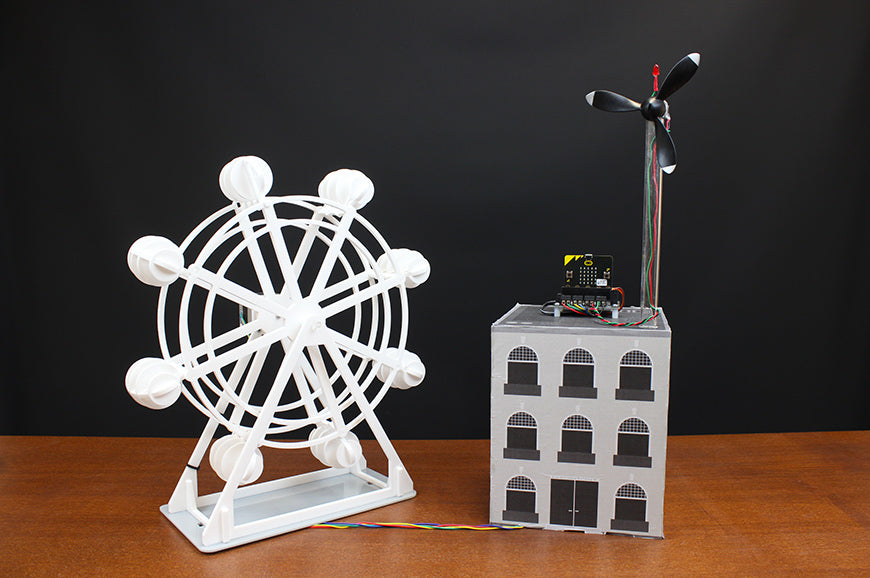
The last in our Kitronik :city builds from Bett 2019 is the microbit and Robotics board controlled London Eye and Wind Turbine. Take a look behind the scenes at how we put it together. If you want to have a go at this yourself, all of the files you need are included below.

Our new robotics board powered both the London eye with a stepper motor, and its own building on the opposite side of the river featuring a servo, motor, and LED in its wind turbine. It’s a seriously capable piece of kit for the BBC micro:bit.
You will need:
- White Perspex 5mm.
- White Perspex 3mm.
- Grey Perspex 3mm.
- MDF 3mm.
- All-In-One Robotics Board.
- BBC micro:bit.
- 180 servo.
- 16mm Clear acrylic tube.
- Mini DC motor.
- Propeller.
- Red flashing LED.
- Terminal Block.
- Our design files download.
microbit Kitronik :City London Eye & Turbine – BETT 2019 Part 5
London Eye

The keen-eyed among you will notice this is a modified version of the Ferris wheel model from the Kitronik Christmas Fair. You can download DXF laser files for all of the new version’s parts above.
You can also follow the same instructions as the Christmas fair Ferris wheel. Read on for the two major changes you’ll need to complete the model.

The main difference between this model and the Christmas fair Ferris wheel are the pods. These were designed to slot together into square holes on the wheel to give it the London eye’s distinctive shape. They even also feature 3mm holes to mount LEDs for a London themed light show.
Note: We used liquid poly cement for a clean and durable build for the BETT show 2019. But hot glue or superglue would also be suitable too. *
*

The other change which can also be added to the Ferris wheel is this handy baseplate. We made it from 3mm Grey Perspex but any sheet material of your choice will work. It features mounting holes for a table display, and a hole to keep the cables tied out of the way down the model’s frame.
The Building

The building (fondly named “Miscellaneous Building 3”) is made with the same 3mm MDF technique from our first guide. Inside the building, there is a DC jack socket for power like our other buildings, and a terminal block to connect the London eye stepper motor.

Also, as an extra touch we added just before the show was this wind turbine. Together with the London eye, it shows off all of the things that the robotics board can drive! It’s actually a motor driven from the robotics board for some extra eye-catching movement. The turbine swivels on a 180-degree servo hot glued to the inside of the building and also sports a flashing LED on top for low flying aircraft (you never know!). It sits on a section of 16mm acrylic tube rounded with a curved file for a close fit.
The Electronics

The robotics board for microbit can handle multiple different functions at the same time. Connect the stepper motor as shown, then you can connect the DC motor and the LED to the two remaining motor terminals on the board. Here we have linked the grounds of both terminals so only one cable has to run up the turbine.
Coding The microbit:
The microbit code for these models is surprisingly simple, thanks to our downloadable custom blocks. In Microsoft MakeCode, open the Advanced dropdown, then click Extensions and search “Kitronik”. You should see the All-In-One Robotics Board package.
The code starts by setting the turbine motor to run at 10% speed. It then repeats a loop that waits 10 seconds while keeping the stepper motor turning. Finally, after 10 seconds it picks a random number for the 180° servo to turn to face the “wind”. This then repeats itself indefinitely.
Kitronik :CITY Resources:
Our Kitronik :CITY stand attracted a lot of attention at BETT 2019. Many of our visitors also expressed a desire to make something similar once they returned to their schools. We decided to help out by producing the guides below. Each part of the :CITY has its own guide and each guide has all of the files, code and also instructions included. Additionally, if you or your students tackle any of the builds below then we would love to see the pictures. With your permission, we would also like to feature them in the Gallery (Gallery@kitronik.co.uk).
| Make A microbit Controlled Kitronik :CITY: | |
|---|---|
| Kitronik :CITY Part 1 – Laser Cut :MOVE Mini Garage. | Learn How! |
| Kitronik :CITY Part 2 – :MOVE Mini Football Stadium. | Learn How! |
| Kitronik :CITY Part 3 – Klimate, microbit & ZIP Halo Big Ben. | Learn How! |
| Kitronik :CITY Part 4 – Servo Driver Board Tower Bridge. | Learn How! |
| Kitronik :CITY Part 5 – Robotics Board London Eye & Turbine. | Learn How! |